Using Cyberduck
Use Cyberduck to connect with Lyve Cloud and transfer your data. For more information, review the Cyberduck Tutorial and Cyberduck Quick Reference Guide.
Download and Install Cyberduck.
Register the S3 (HTTPS) profile for preconfigured settings. For more information, see Generic S3 profiles.
To enable and register the S3 (HTTPS) profile:
Select Edit and then Preferences. For Mac users, select Cyberduck and then Preferences.
In the Profiles tab, choose S3 (HTTPS) from the connection profiles list.
Alternatively, to register the S3 (HTTPS) profile:
Open S3 (HTTPS) profile connection profile file. Copy the file contents into a notepad/any text editor.
Save the notepad file name with .cyberduckprofile extension and change the Save as type to All Files.
You need both the access key and secret key for each account you plan to connect with Cyberduck. For more information, see Creating service accounts.
Note
Consult your organization's policies and the EULA policies of the software before downloading 3rd party applications.
Bookmark: Bookmarks store the details of the connection to easily re-connect to the server.
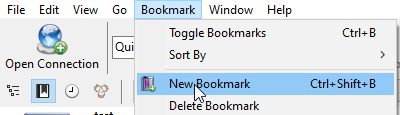
In Cyberduck, select Bookmark|New Bookmark. For Mac users, select + in the bottom left to add a New Bookmark.
Select the S3 (HTTPS) protocol from the list.
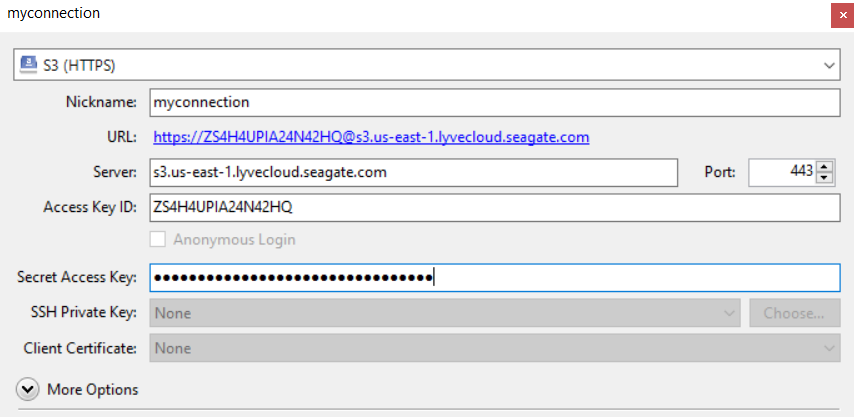
Enter the following mandatory details to add your connection to Lyve Cloud:
Field Name
Description
Nickname
Enter a name for the bookmark.
URL
Displays the URL once you enter the server and access key in the following format:http:// <Access Key ID><Server>
Server
Enter Lyve Cloud S3 endpoint. For more information see S3 API endpoints.
Lyve Cloud supports only region-specific S3 endpoints. To access buckets created in different regions in the S3 client, add an endpoint connection for each of the regions.
Tip
Copy the URL without https://
Port
Enter 443 as the port number to access the server.
Access Key ID
Enter your access key, a private key for authentication to connect a bucket created in Lyve Cloud.
The access key is displayed when you create a new service account in Lyve Cloud. A service account contains bucket credentials for Lyve Cloud to access a bucket.
For more information, see Creating service accounts.
Secret Access Key
Enter your secret key, a private key password for authentication to connect a bucket created in Lyve Cloud.
The secret key displays when you create a new service account in Lyve Cloud.
For more information, see Creating service accounts.
The bookmark is displayed once you close the window.
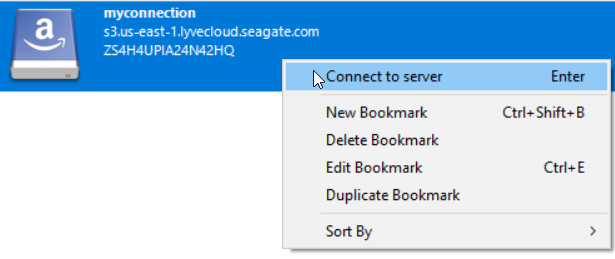
Right-click the bookmark and select Connect to Server.
Select Continue to establish the connection.
View the buckets available in the created bookmark once the connection is established.
On the Cyberduck client, the Disconnect button is displayed in the top right corner. A green dot appears to the right of active bookmarks, signifying an established connection. If no connection is established, the Disconnect icon is greyed out.
Right-click the bucket or select Actions to perform various operations or actions. For more information, see Managing Data.
Video: How to connect Cyberduck to Lyve Cloud
Managing Data
Perform various actions once a connection is established between Cyberduck and Lyve Cloud. For more information, see Cyberduck Help.
Uploading data to a bucket
Note
The object name can contain any of these special characters like @, #, *, $, %, &, !, ?, , , ;, ’, ”, |, +, =, <, >, ^, (, ), {, }, [, ] and alphanumeric characters like 0-9, a-z, A-Z . However, using any of these characters can cause issues due to limiting factors of S3 client SDK
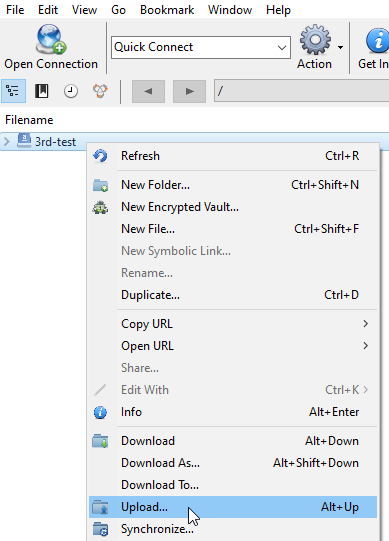
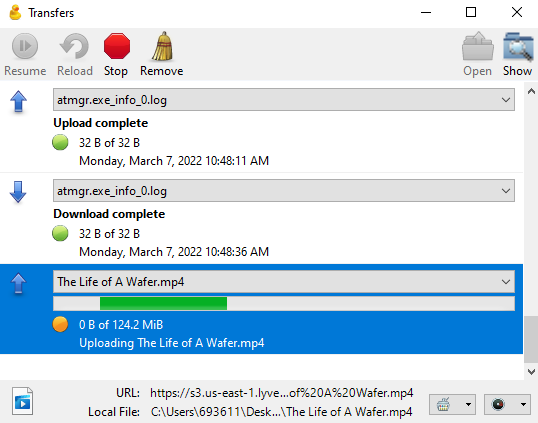
Select and right-click the bucket and select Upload and choose the file to upload.
After the file transfer progress status is complete, you can view the file.
Accept the certification installation and select Continue.
Note
Certificate installation is prompted only when the certificate is installed for the first time.
Downloading data to local storage
Expand the bucket where files are available.
Right-click the file to download and select one of the following options:
Download: Download a file to the predefined path.
The Transfers dialog displays the connection status. Select Continue in the Download dialog. You can view the remote file location and the local file location, but you cannot change the download path. Once the download is complete, the Transfers dialog displays the status.
Download As: Download a file in the required format.
Select Save as Type from the list, and select Save.
Download To: Download the file to a specific location.
Select Download To, then select the download folder in the Browse to Folder dialog, or create a new folder. Select Save.
Deleting data from the bucket
Expand the bucket from which to delete data.
Right-click the data file, and select Delete.
Select Delete in the Confirmation prompt.
Creating a new folder
In Cyberduck, select Select and open a bucket.
Right-click inside the bucket and select New Folder.
Enter the folder name in the Create New Folder screen.
Deleting a folder
Navigate into the bucket from which to delete the folder.
Right click the folder and select Delete.
Select Delete in the confirmation prompt.
Disconnecting Cyberduck from Lyve Cloud
Open Cyberduck to view all the available bookmarks or connections.
Select Disconnect in the top-right corner on the Cyberduck client.
Note
A green dot indicates an active bookmark and an established connection. However, if the connection is not established, the Disconnect icon is greyed out.