Lyve Cloud with Veeam Backup and Replication
Veeam Backup and Replication consists of three components:
Backup Server (GUI, installed on Windows 64-bit OS)
Backup Proxy (installed on Windows or Linux machine)
Backup Repository (Any disk-based storage) with copy/archive to object storage
A Lyve Cloud Storage Account
Permission with All Operations
A Veeam Backup and Replication Account
Note
The following instructions use Veeam Backup and Replication v11.
Configuration Overview
The configuration for Lyve Cloud with Veeam Backup & Replication is divided into three simple tasks.
Create a Lyve Cloud Service Account.
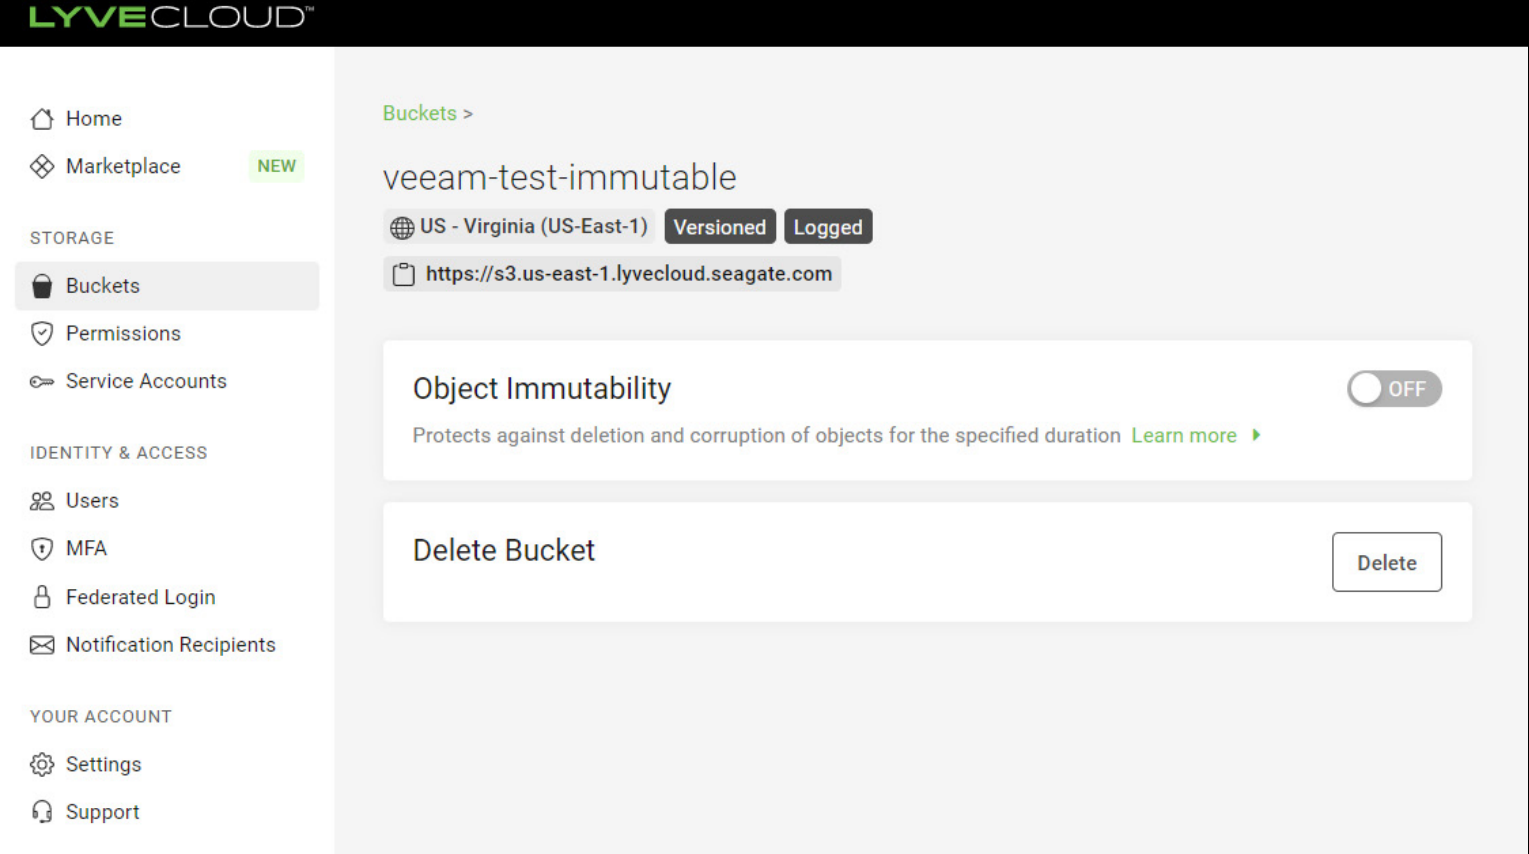
Create a bucket with Object Immutability enabled.
Important
For correct setup with Veeam, you must configure your storage bucket with object immutability turned on.
Turn off Object Immutability
Important
To enable S3 versioning, our customers can utilize the immutability feature. By creating a bucket and enabling immutability, versioning is automatically enabled as well. Once versioning is active, Veeam customers should turn off immutability in the Lyve Cloud console, removing default retention period for newly created objects.
Create bucket permission. For more information, see Creating bucket access permissions.
Create a service account. For more information, see Creating service accounts.
Create a Veeam environment. For more information, see How to Install Backup and Replication.
Add a cloud tier to Veeam Backup & Replication. For more information, see How to move data to Veeam Cloud Tier.
Add a capacity tier to Veeam Backup & Replication to store and archive backups in the cloud. For more information, see Veeam Scale-out Repository.
Deploying Lyve Cloud with Veeam
Add a cloud tier on the Veeam Backup server.
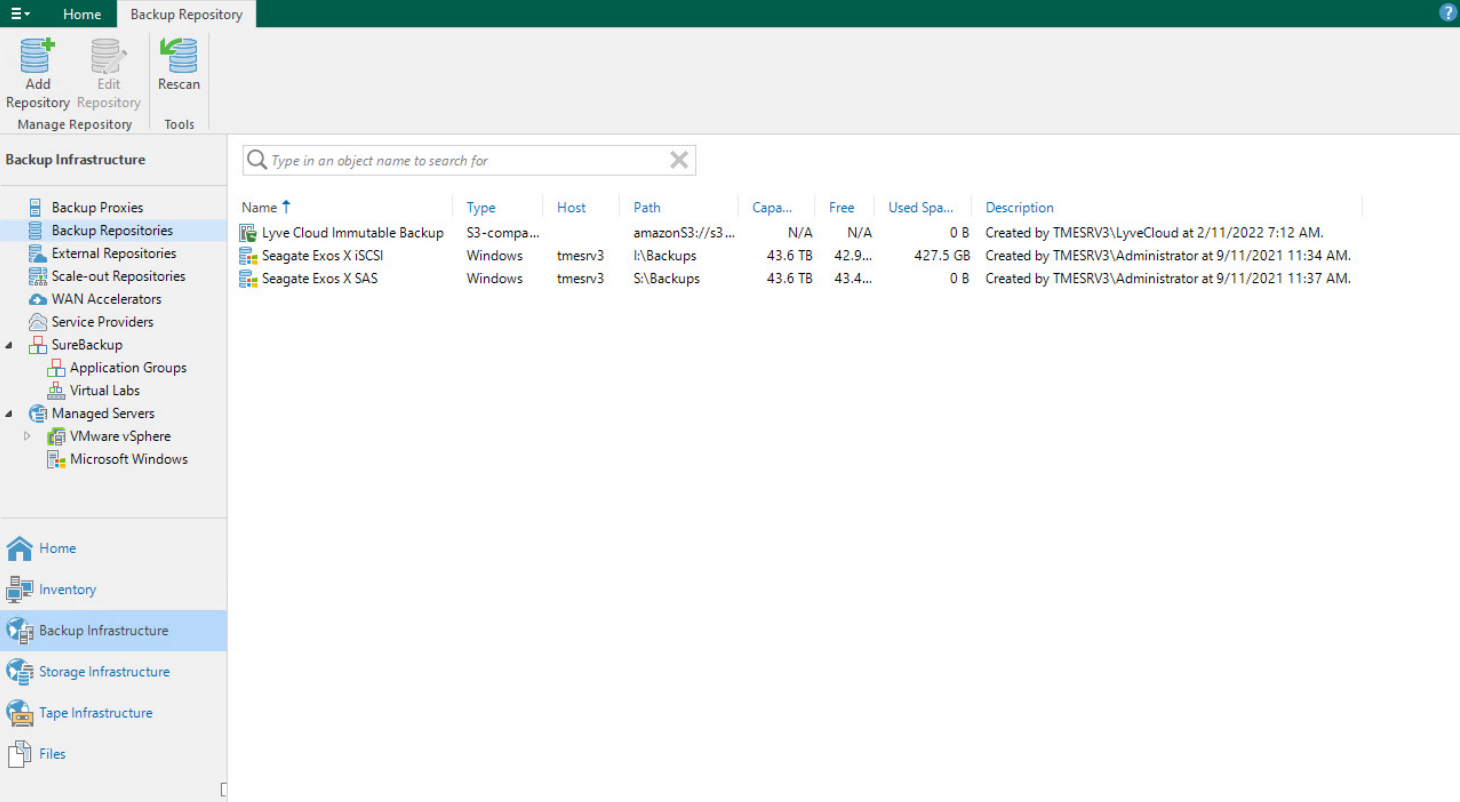
Launch New Object Repository Wizard. Open the Backup Infrastructure tab, and select Backup Repositories.
In the menu, select Add Repository.
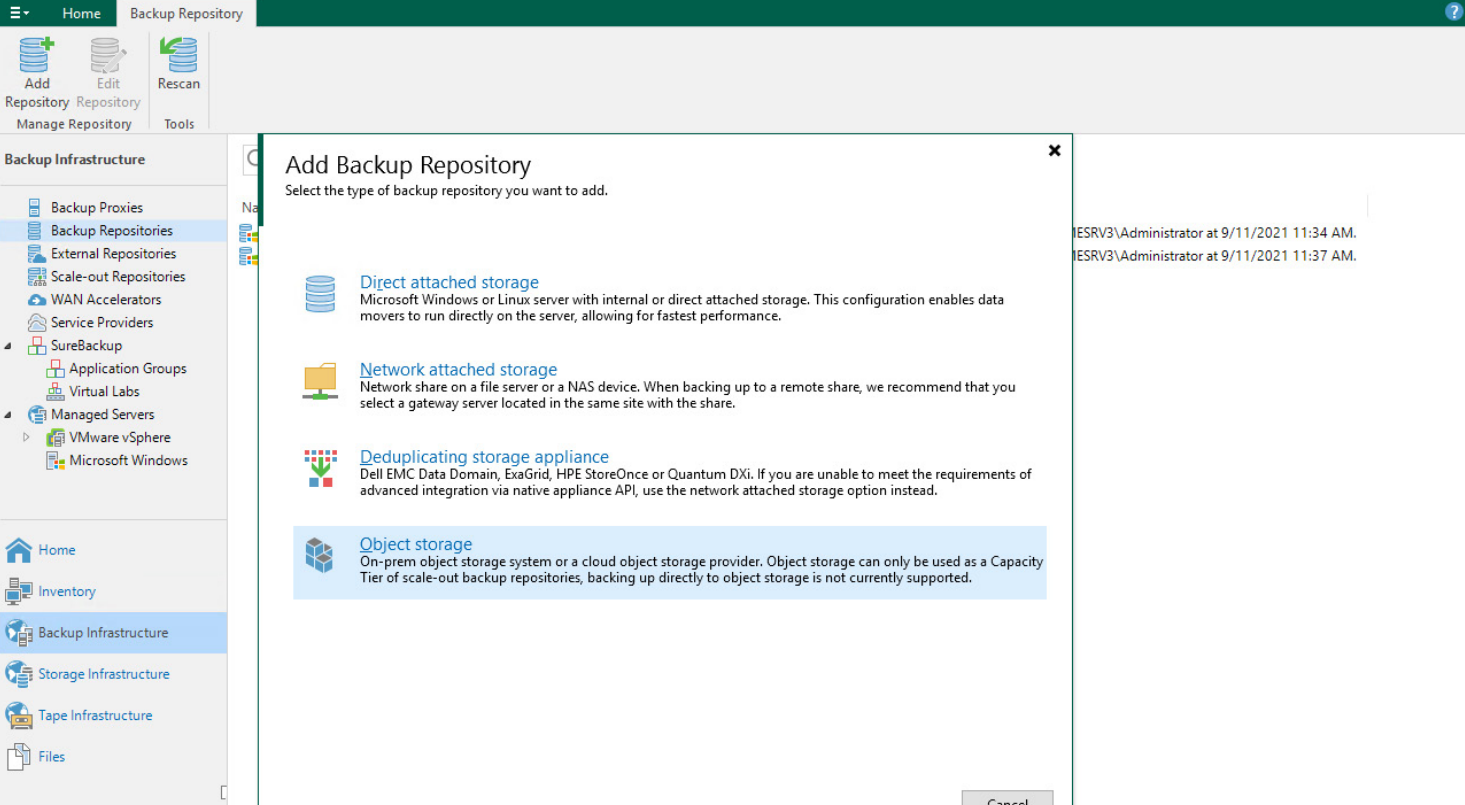
In the Add Backup Repository dialog, choose Object Storage and select S3 Compatible to add the backup repository.
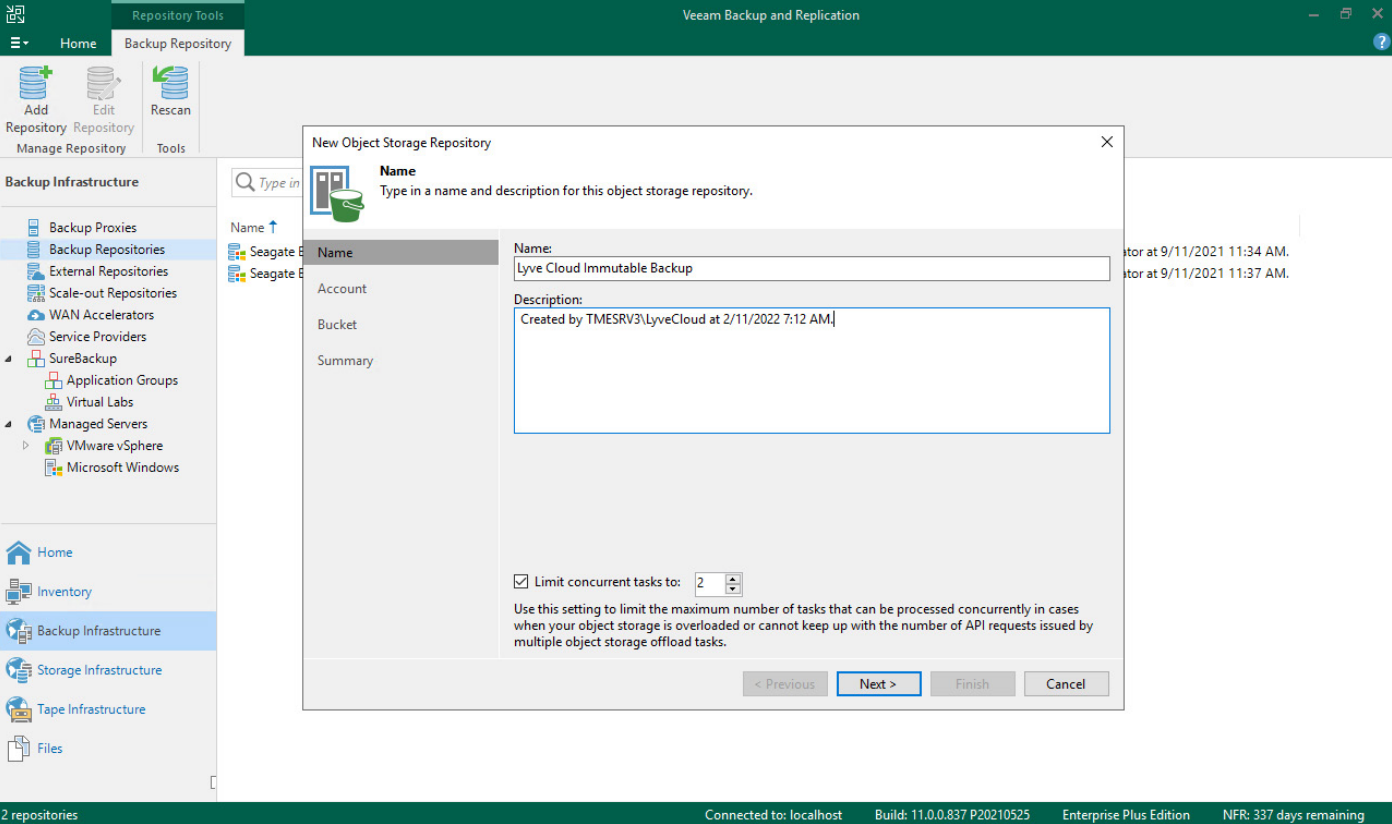
In the New Object Storage Repository dialogue, specify a Name and Description and select Next.
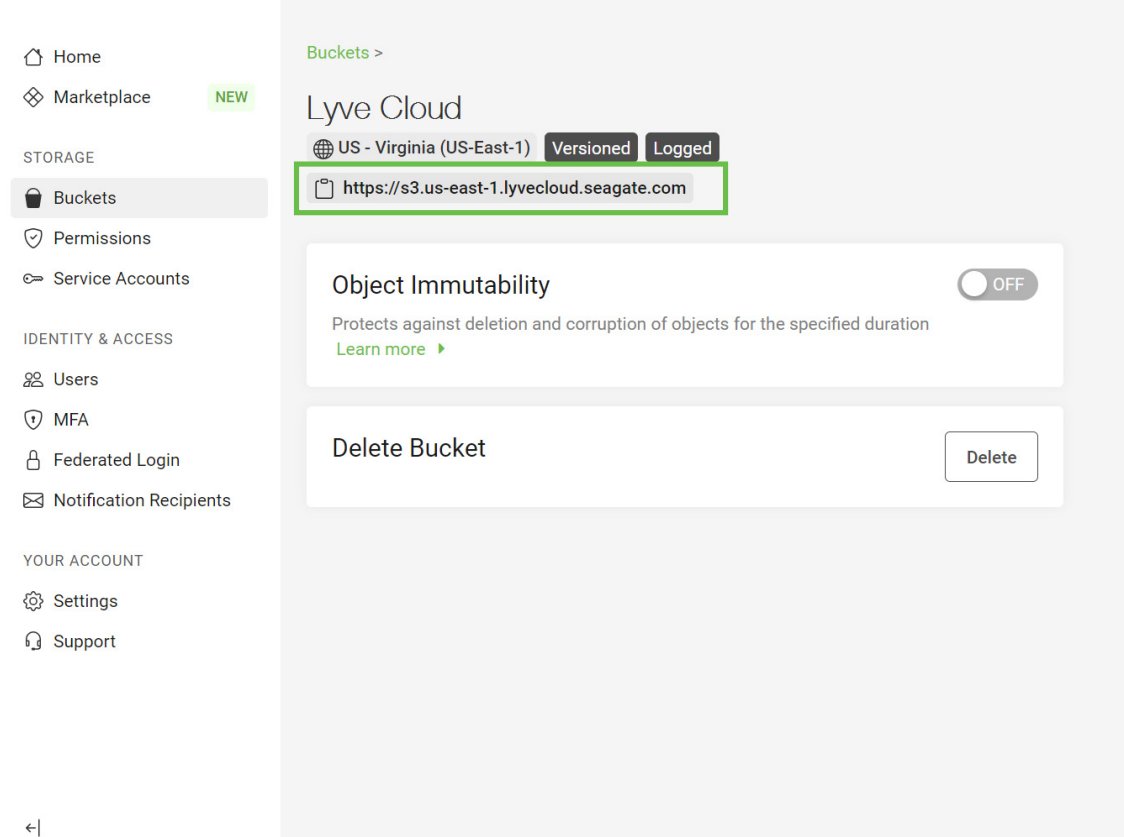
In the Accounts section, select the S3 URL of your Lyve Cloud Bucket from the Buckets section of the Lyve Cloud console, and paste it to the Service Point field in Object Repository Wizard.
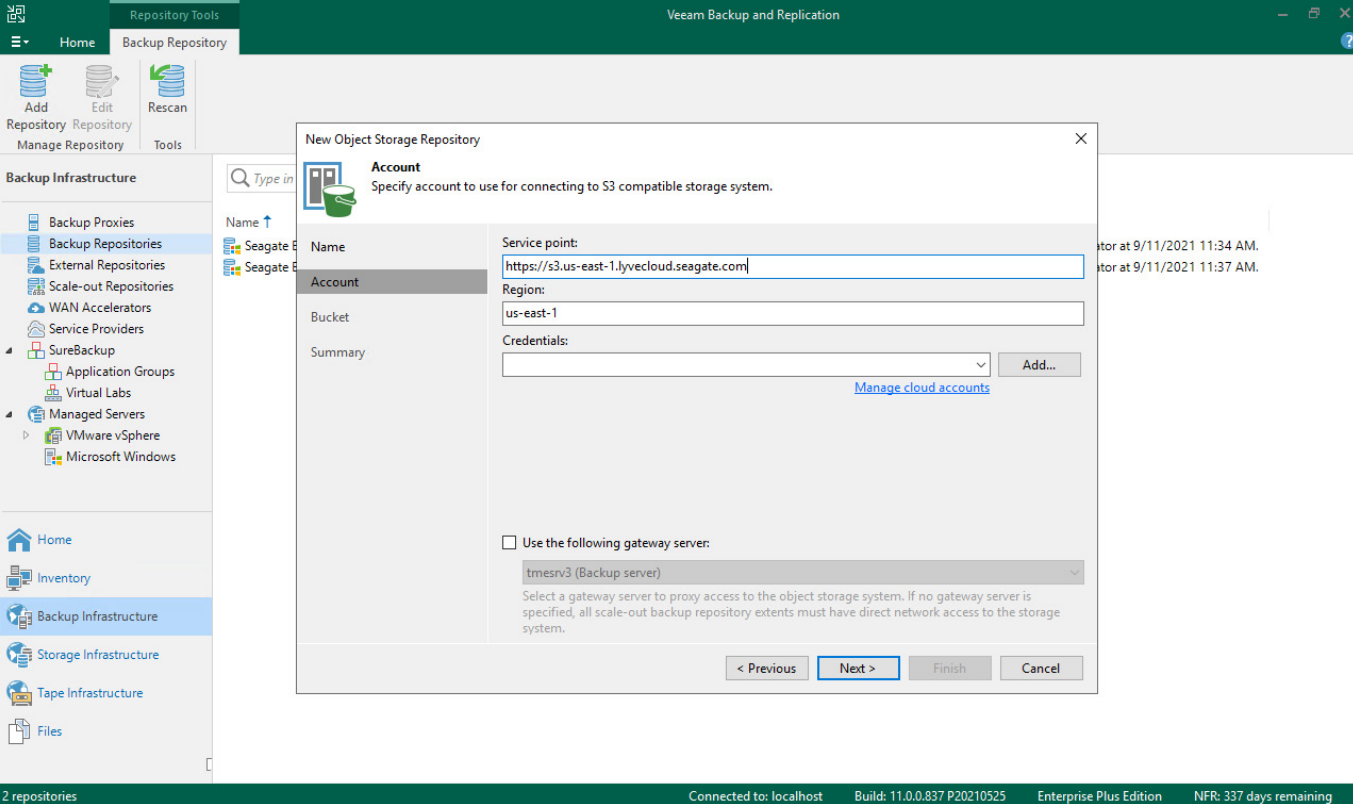
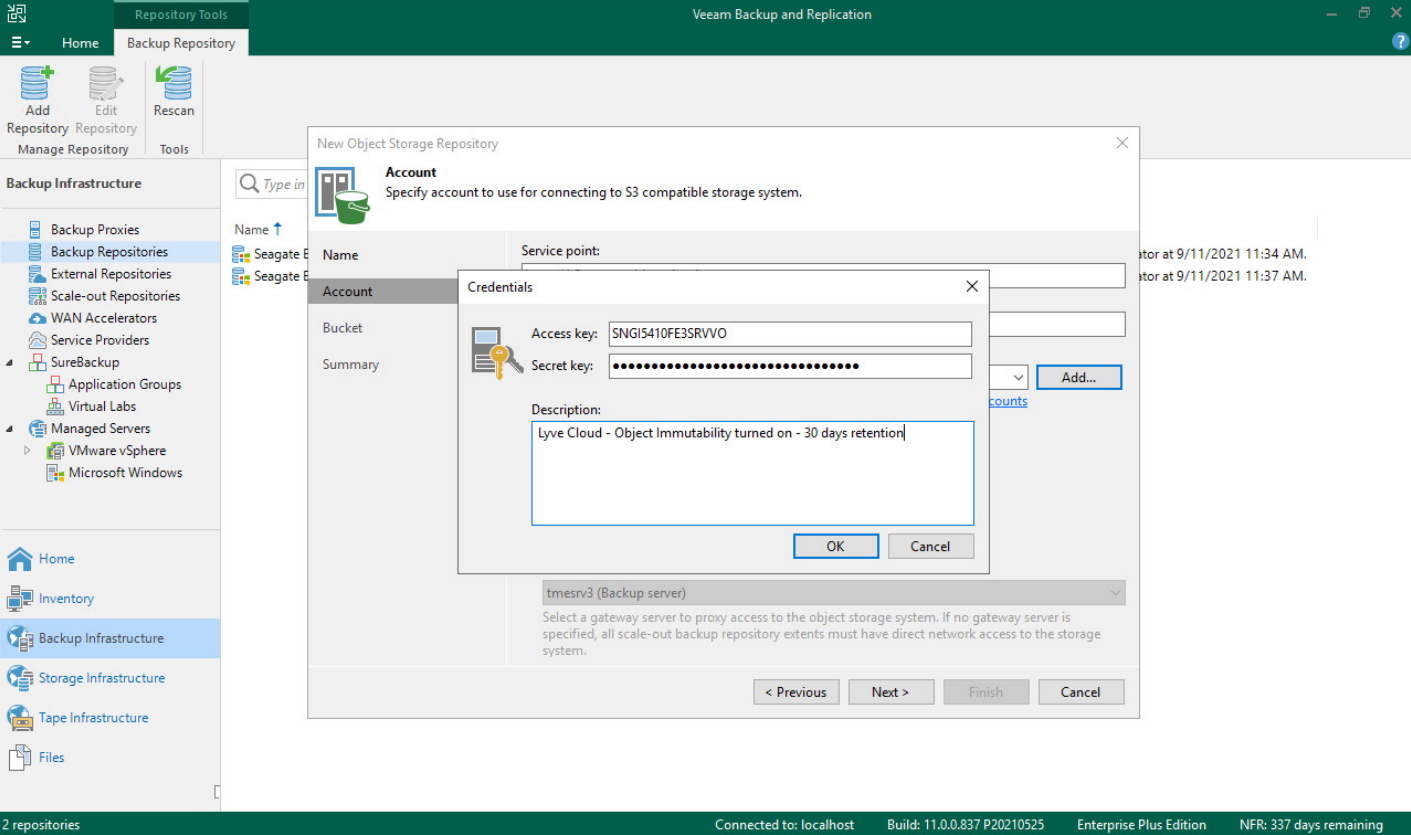
In the New Object Storage Repository, specify the following in the Account section and select Next.
Service Point: Enter the S3 Bucket URL. For more information, see Creating buckets. Select the S3 URL of your Lyve Cloud Bucket from the Buckets section of the Lyve Cloud console and paste it.
Region: Type in the region specified in the S3 URL.
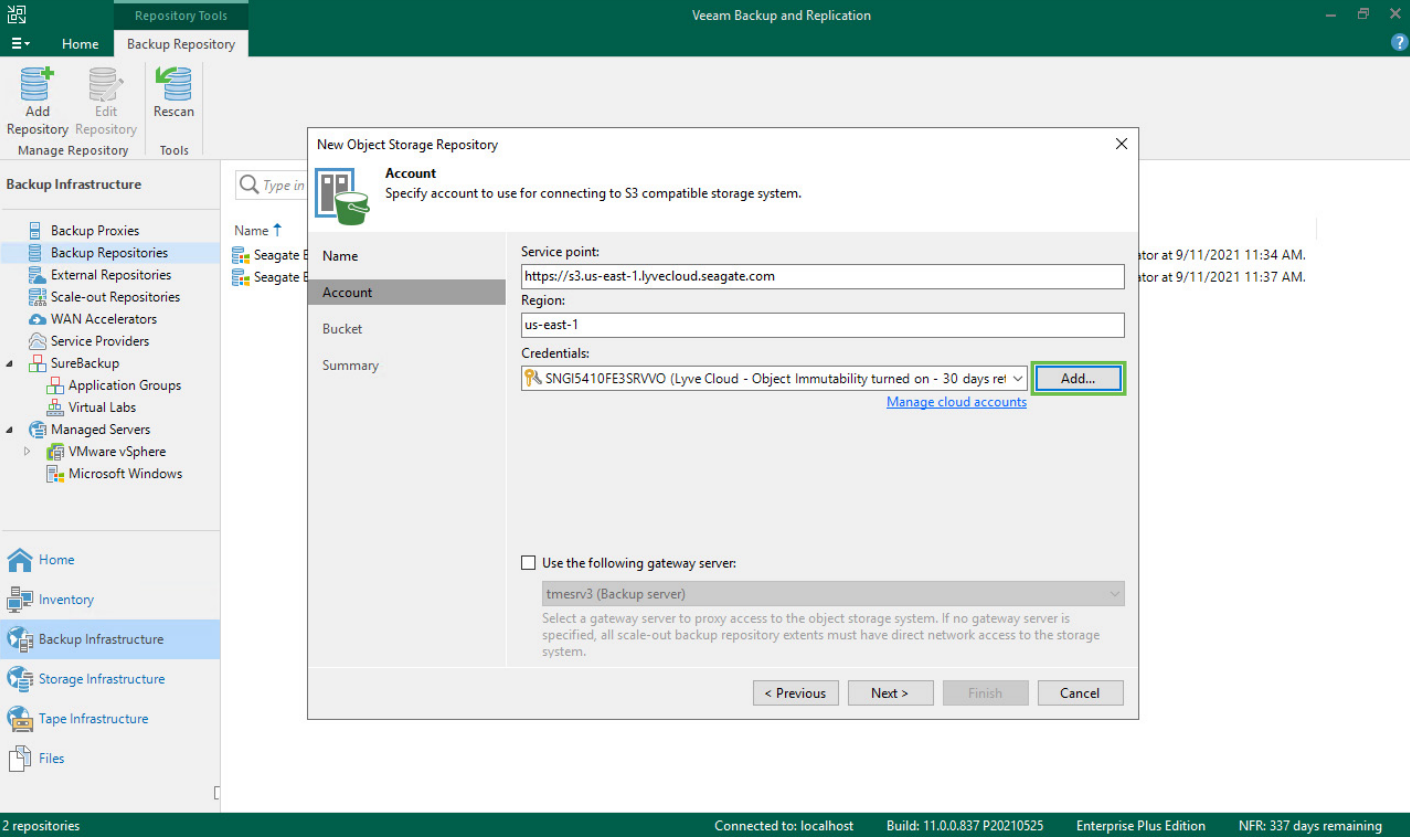
Credentials: Select Add.. and provide the access and secret keys. For more information, see Creating service accounts.
Gateway Server: Select Use the following gateway server and choose the appropriate server from the list.
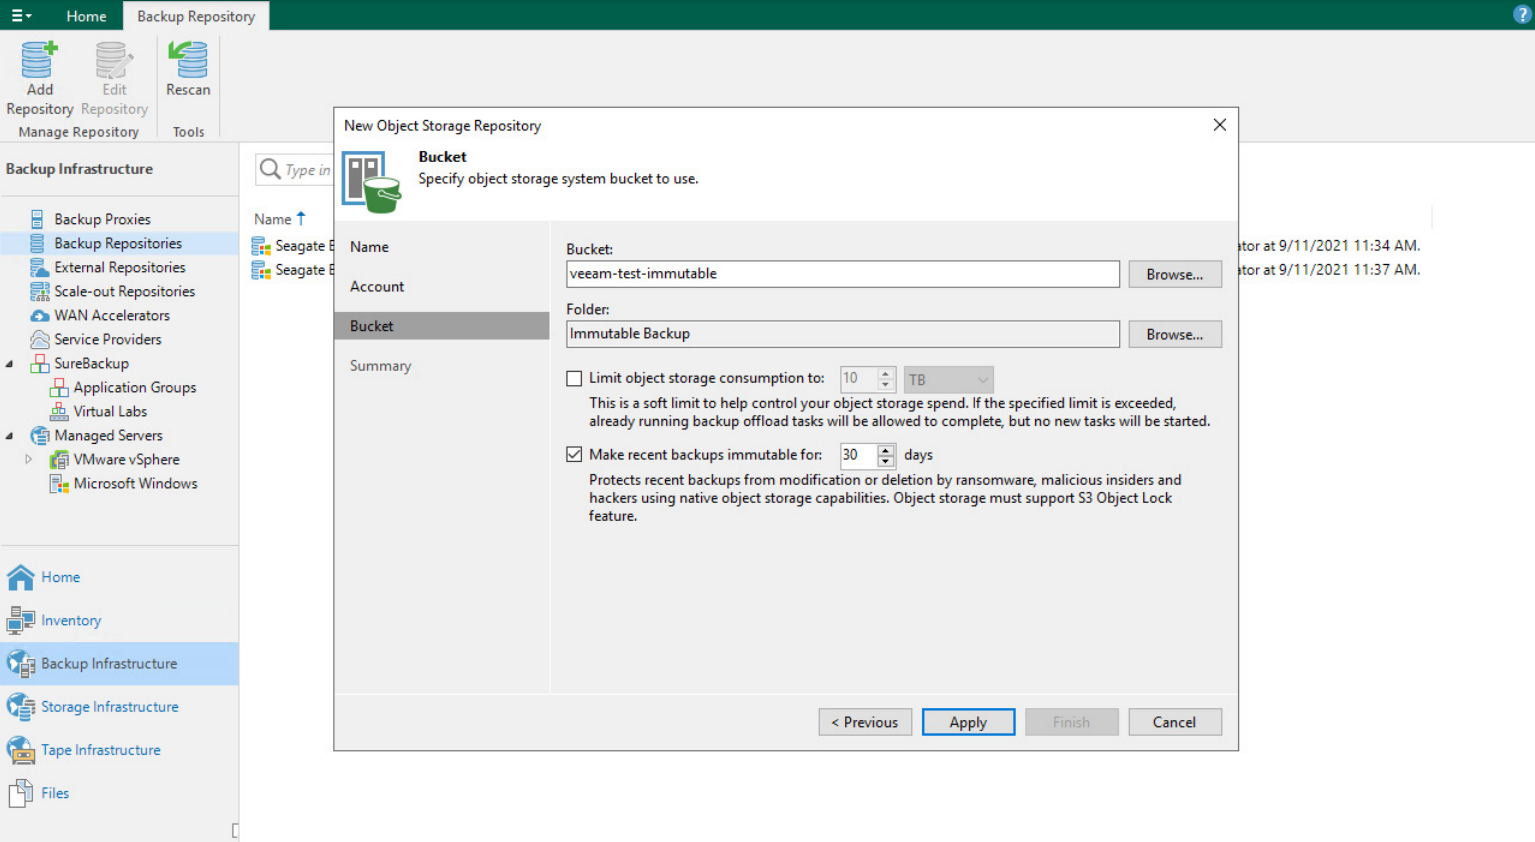
Select the Bucket menu from the New Object Storage Repository wizard and specify the following:
Bucket: Browse the bucket from the desired location.
Folder: Browse the folder from the desired location.
Note
To prohibit the deletion of data blocks from Lyve Cloud object storage, select the Make recent backups immutable for check box and specify the immutability period. This option can only be used with a Lyve Cloud S3 bucket with versioning enabled. For more information, see Immutability.
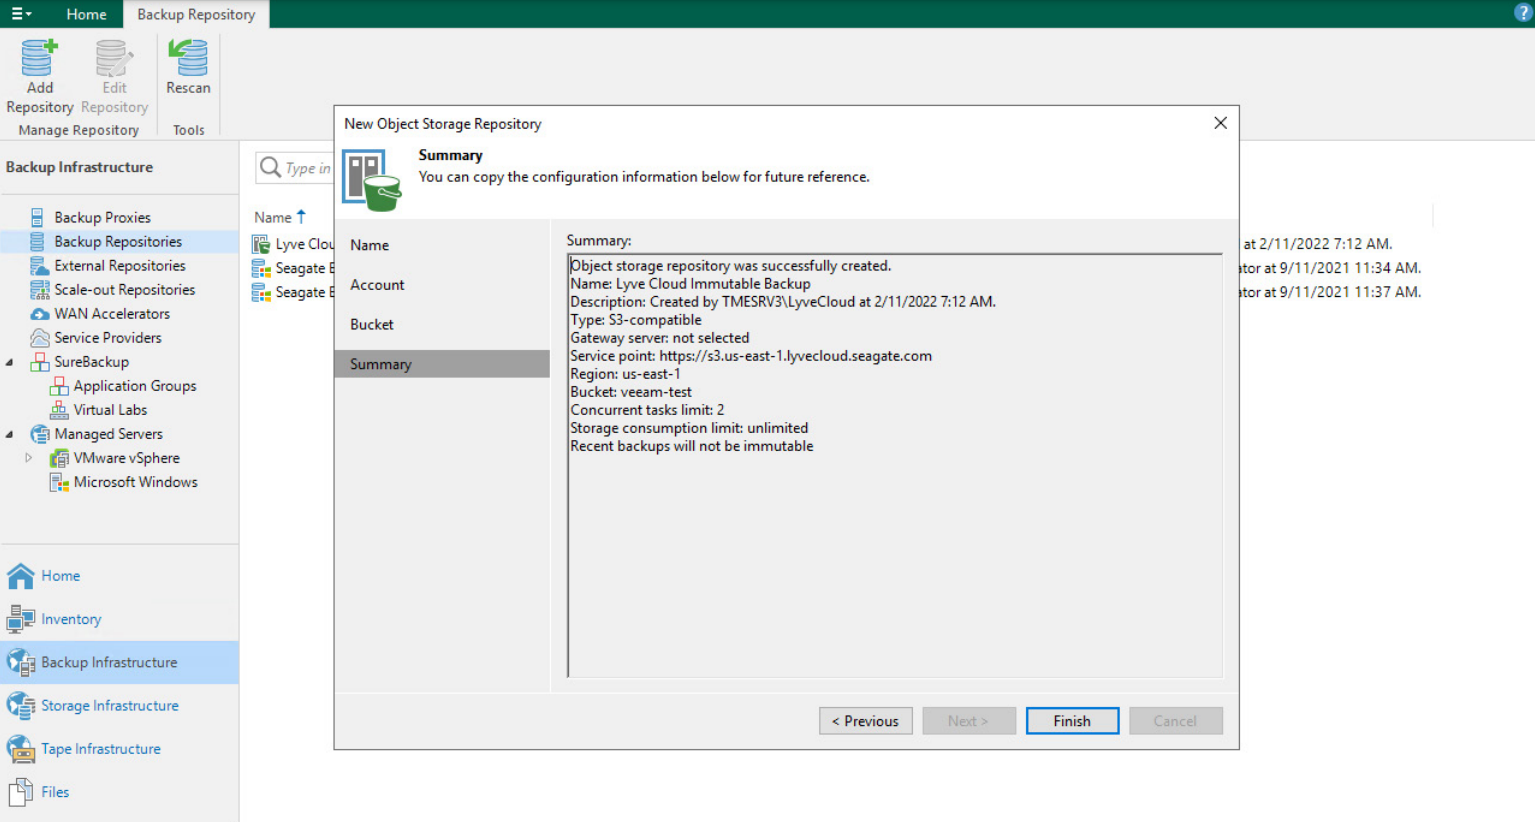
Verify the details in the Summary menu, and select Finish to complete the object storage repository configuration.
Video: How to Create an Object Storage Repository?
Adding capacity tier on Veeam Backup server.
Add a new scale-out Backup Repository.
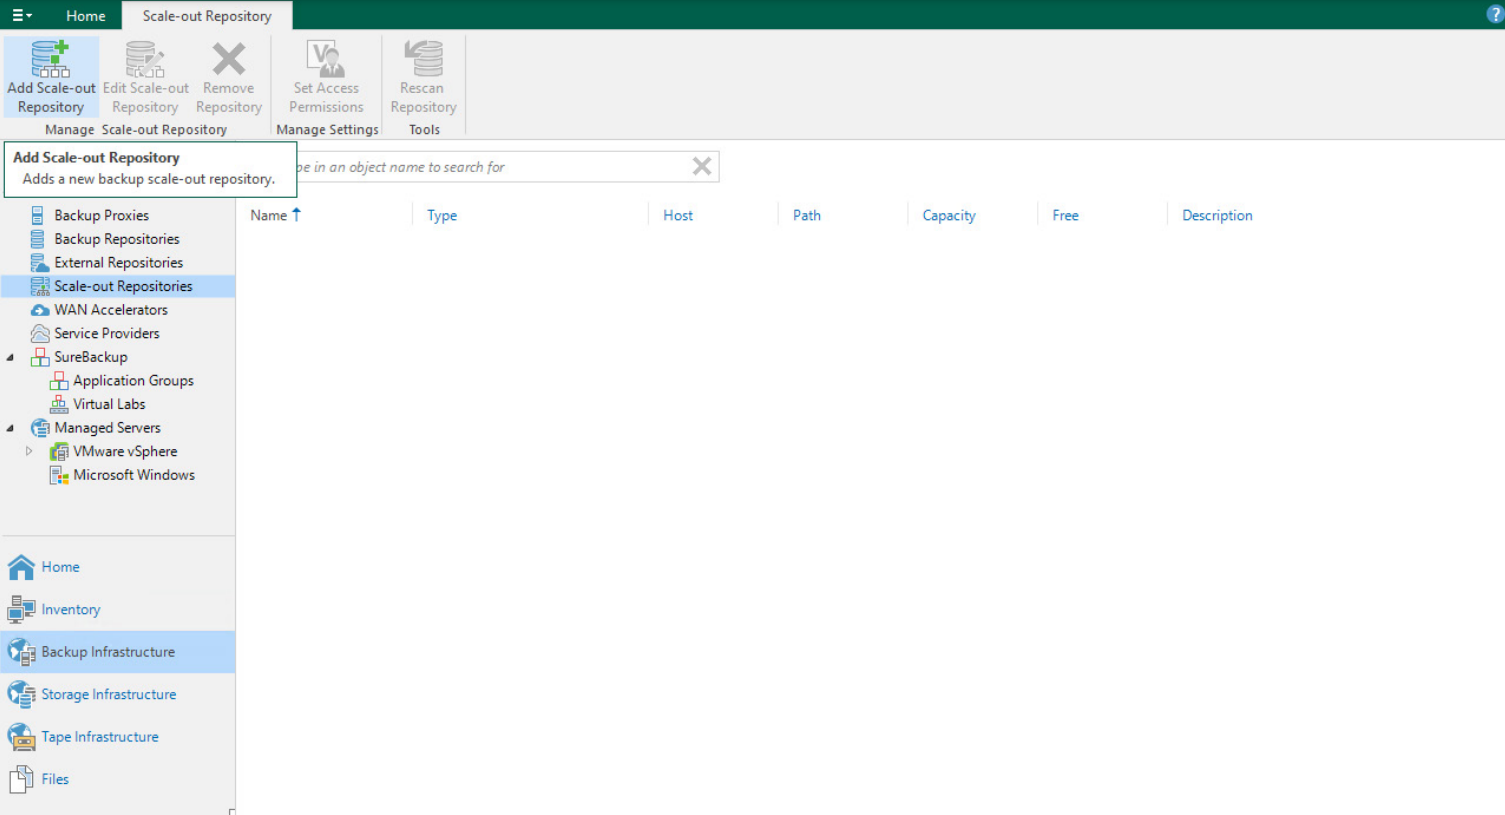
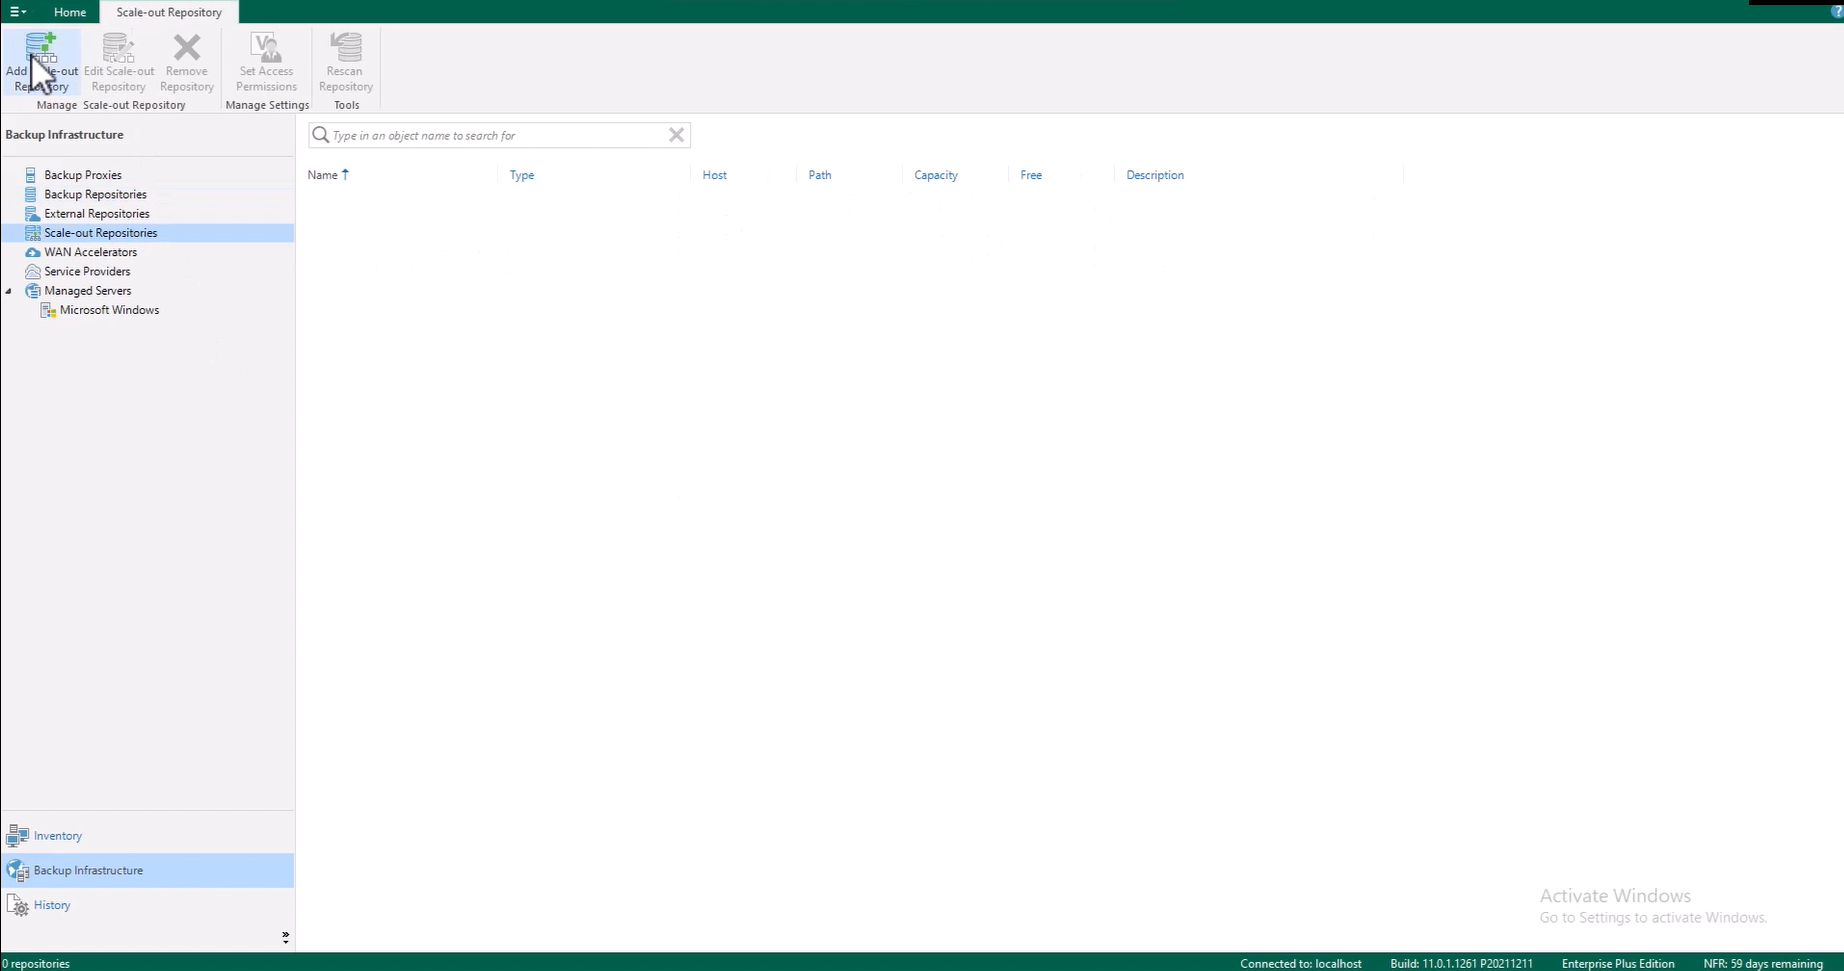
In the Backup Infrastructure menu, select Add Scale-out Repository, and then select Scale-out Repositories.
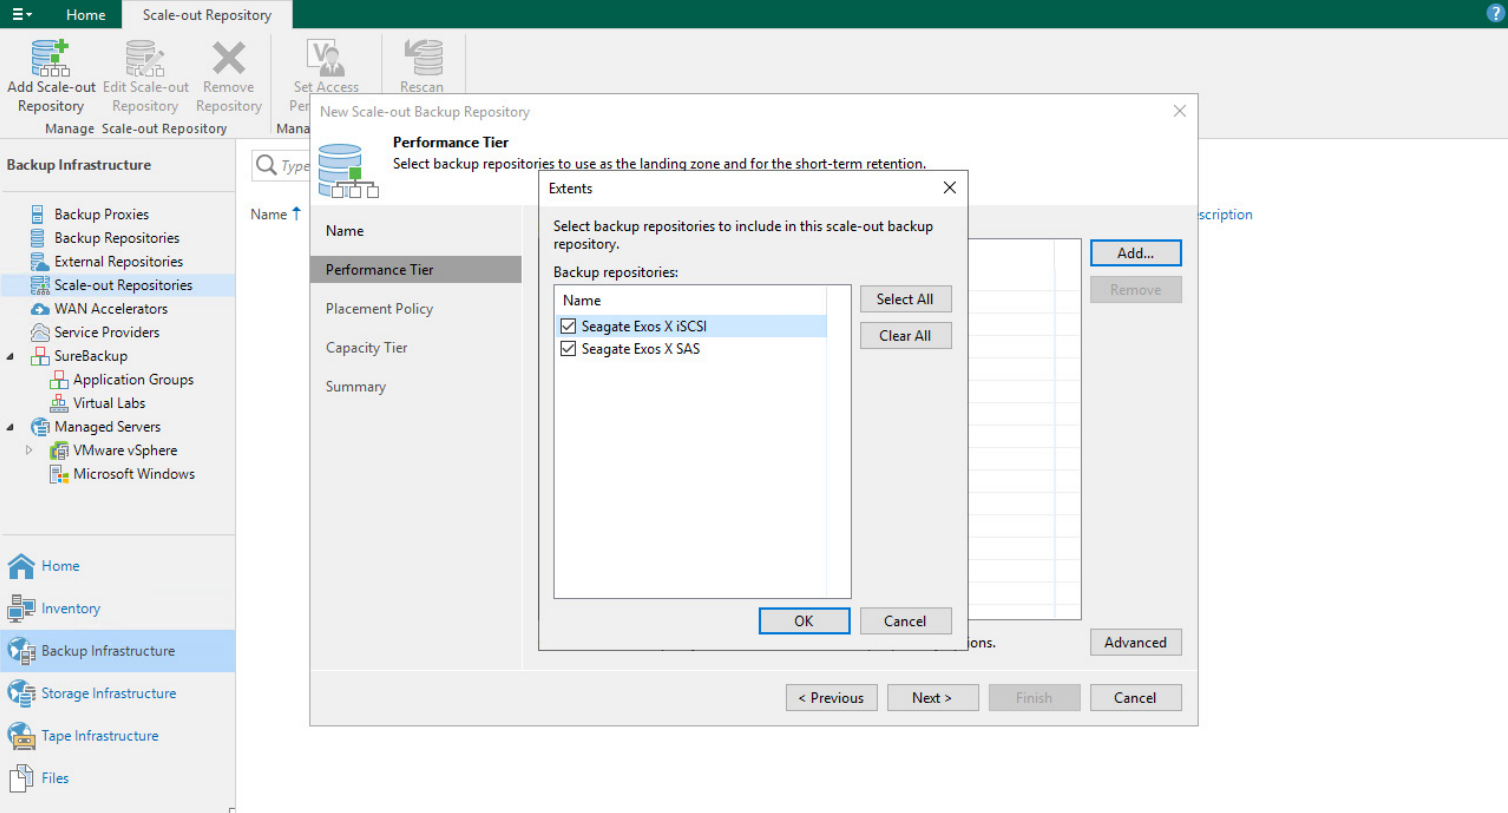
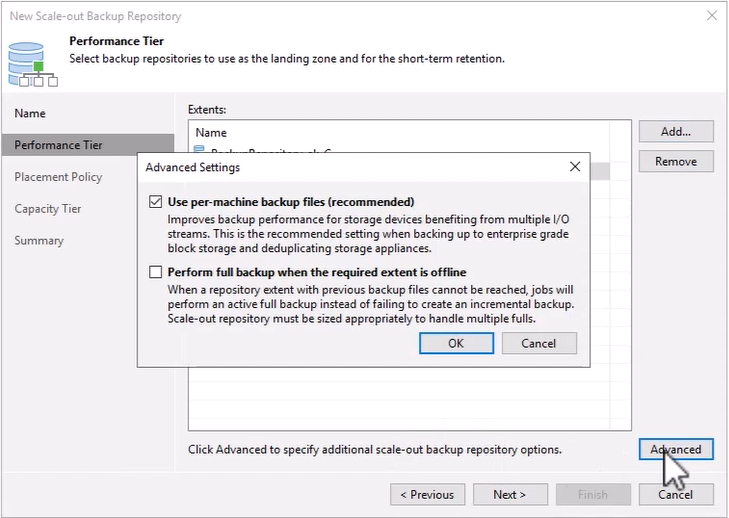
In the New Scale-out Backup Repository wizard, select Performance Tier in the menu.
Select Backup repositories to include in this scale-out backup repository.
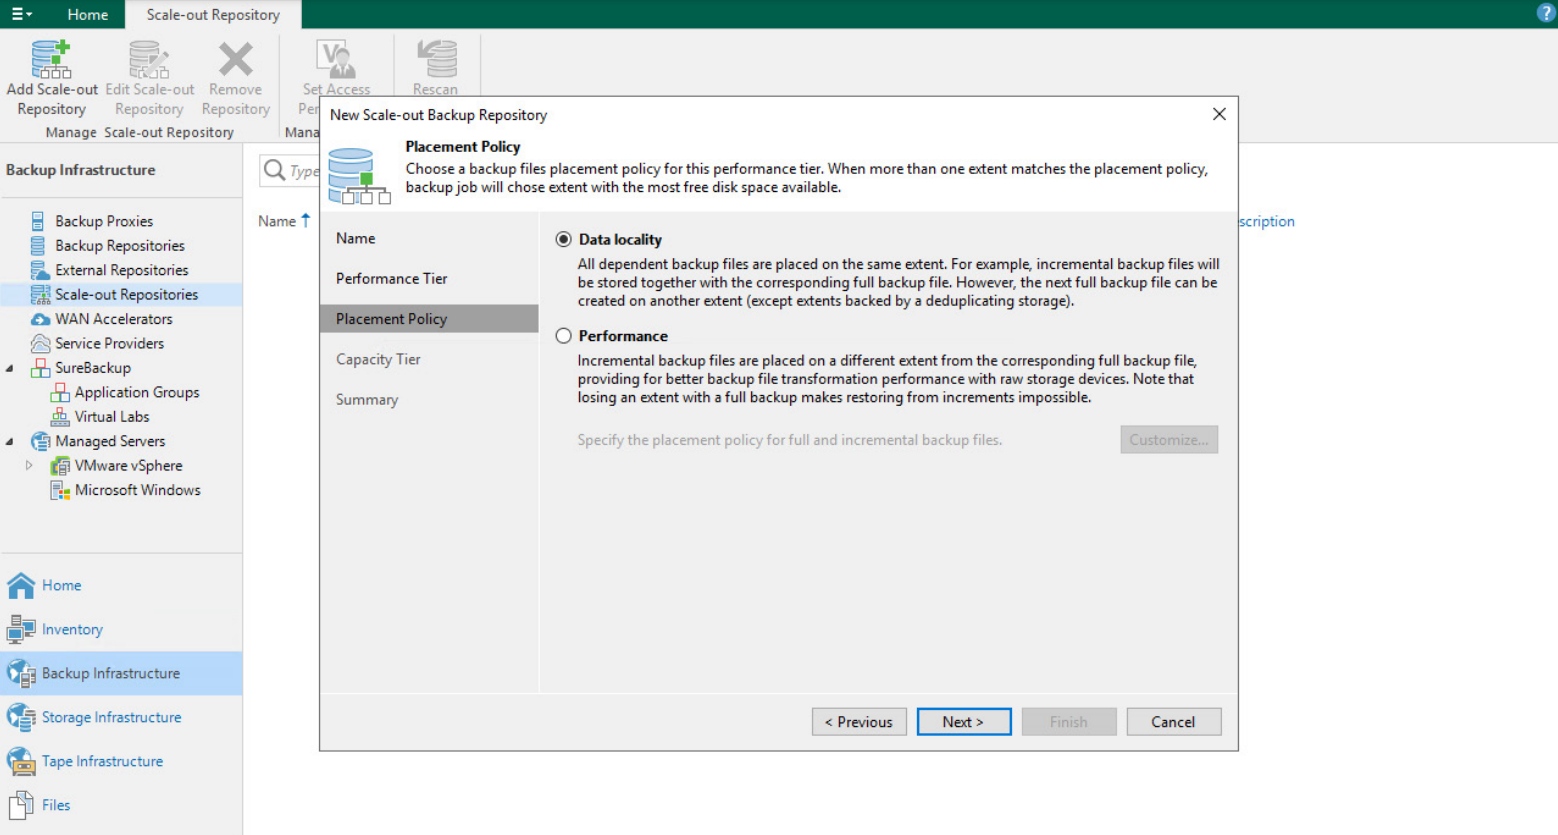
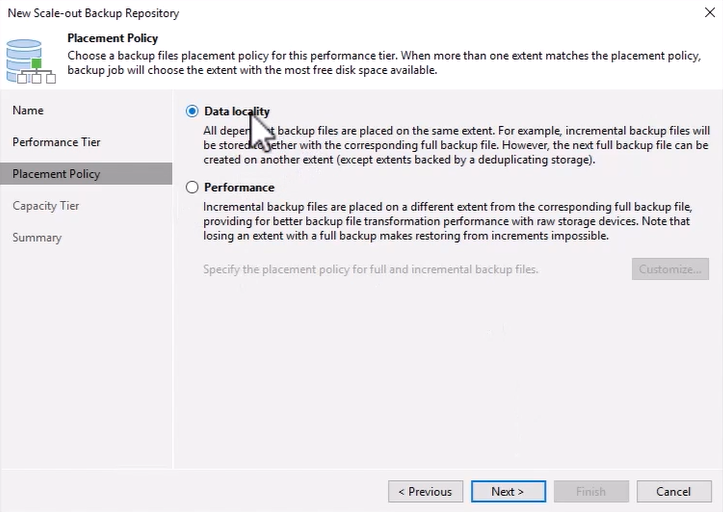
In the Placement Policy menu, choose the Placement Policy as Data Locality or Performance.
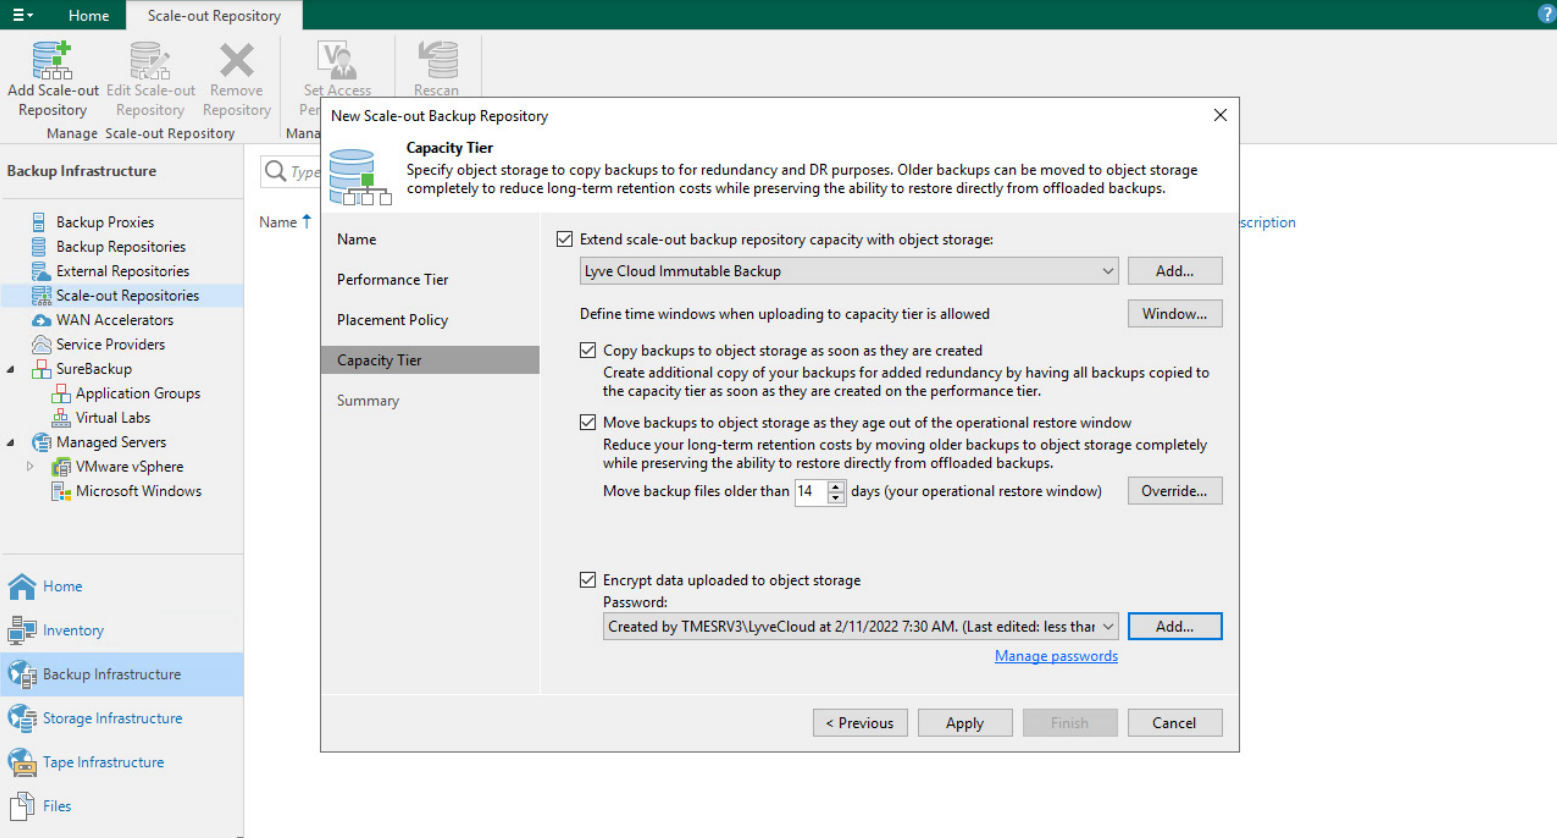
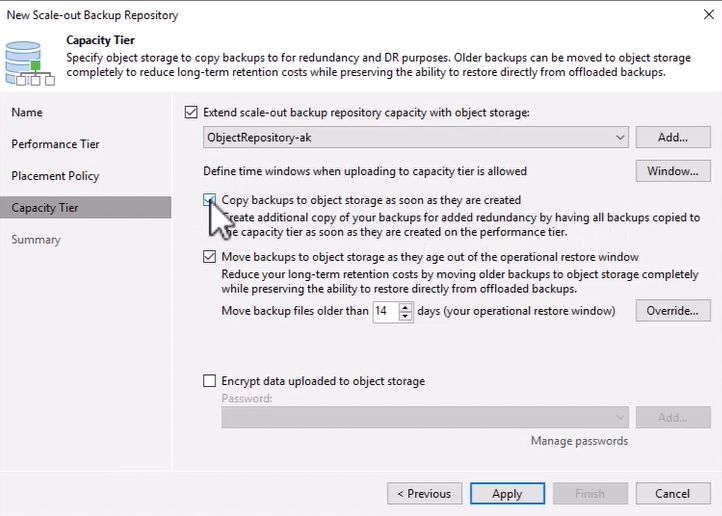
In the Capacity Tier menu, choose the capacity tier.
Select Add to specify Lyve Cloud Object Storage to copy backups.
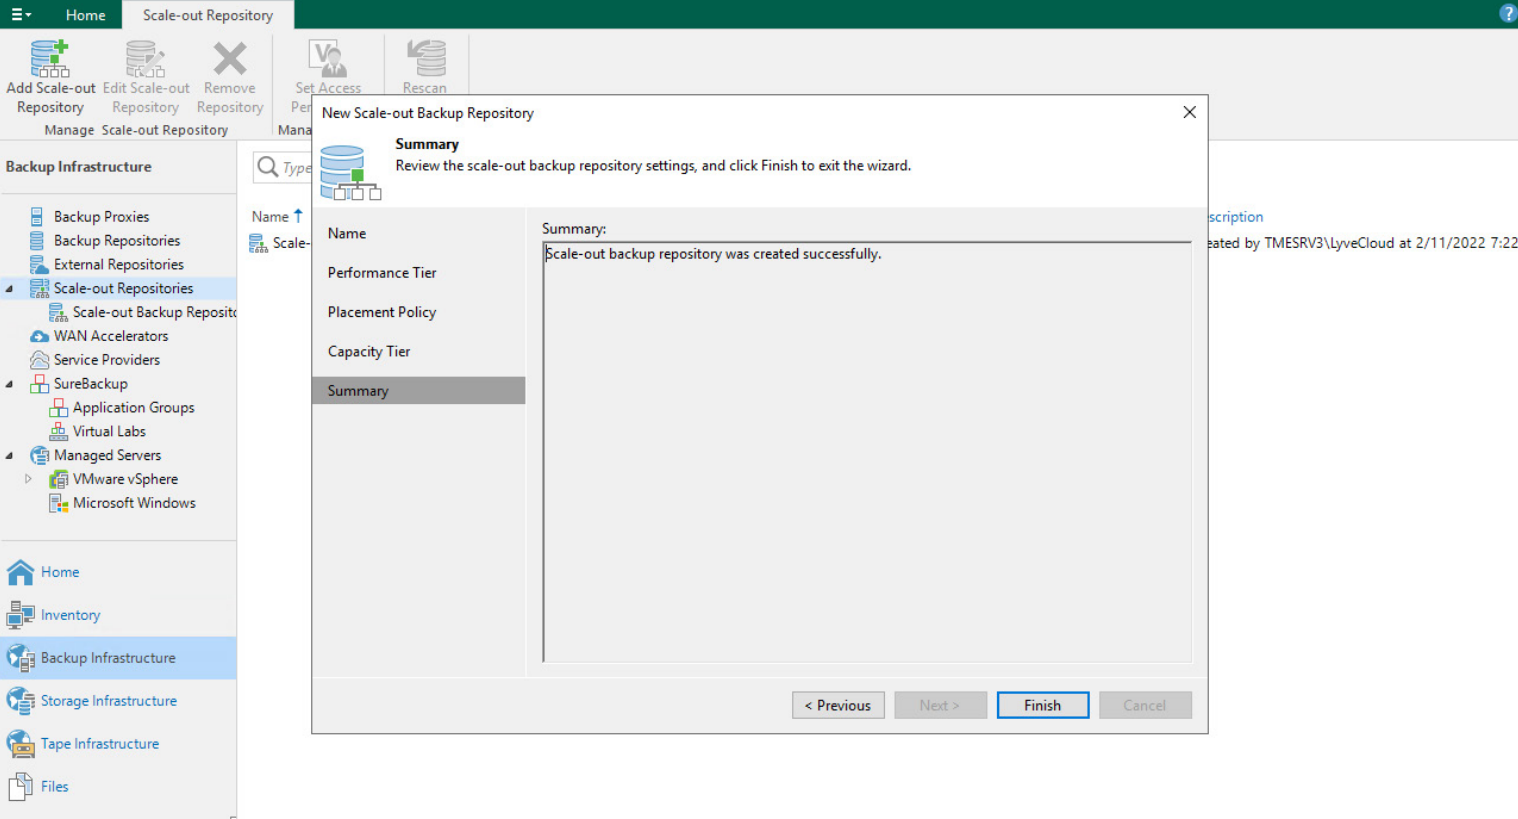
Select Summary to review, and select Finish.
Note
If you configured your storage bucket with object immutability enabled, you will need to turn it off by editing the bucket once you’ve completed this final step. Make sure versioning is active for continued ransomware protection.
Creating a scale-out backup repository
To create a scale-out backup repository (SOBR), you must first create backup repository. For more information on creating a backup repository, see Deploying Lyve Cloud with Veeam.
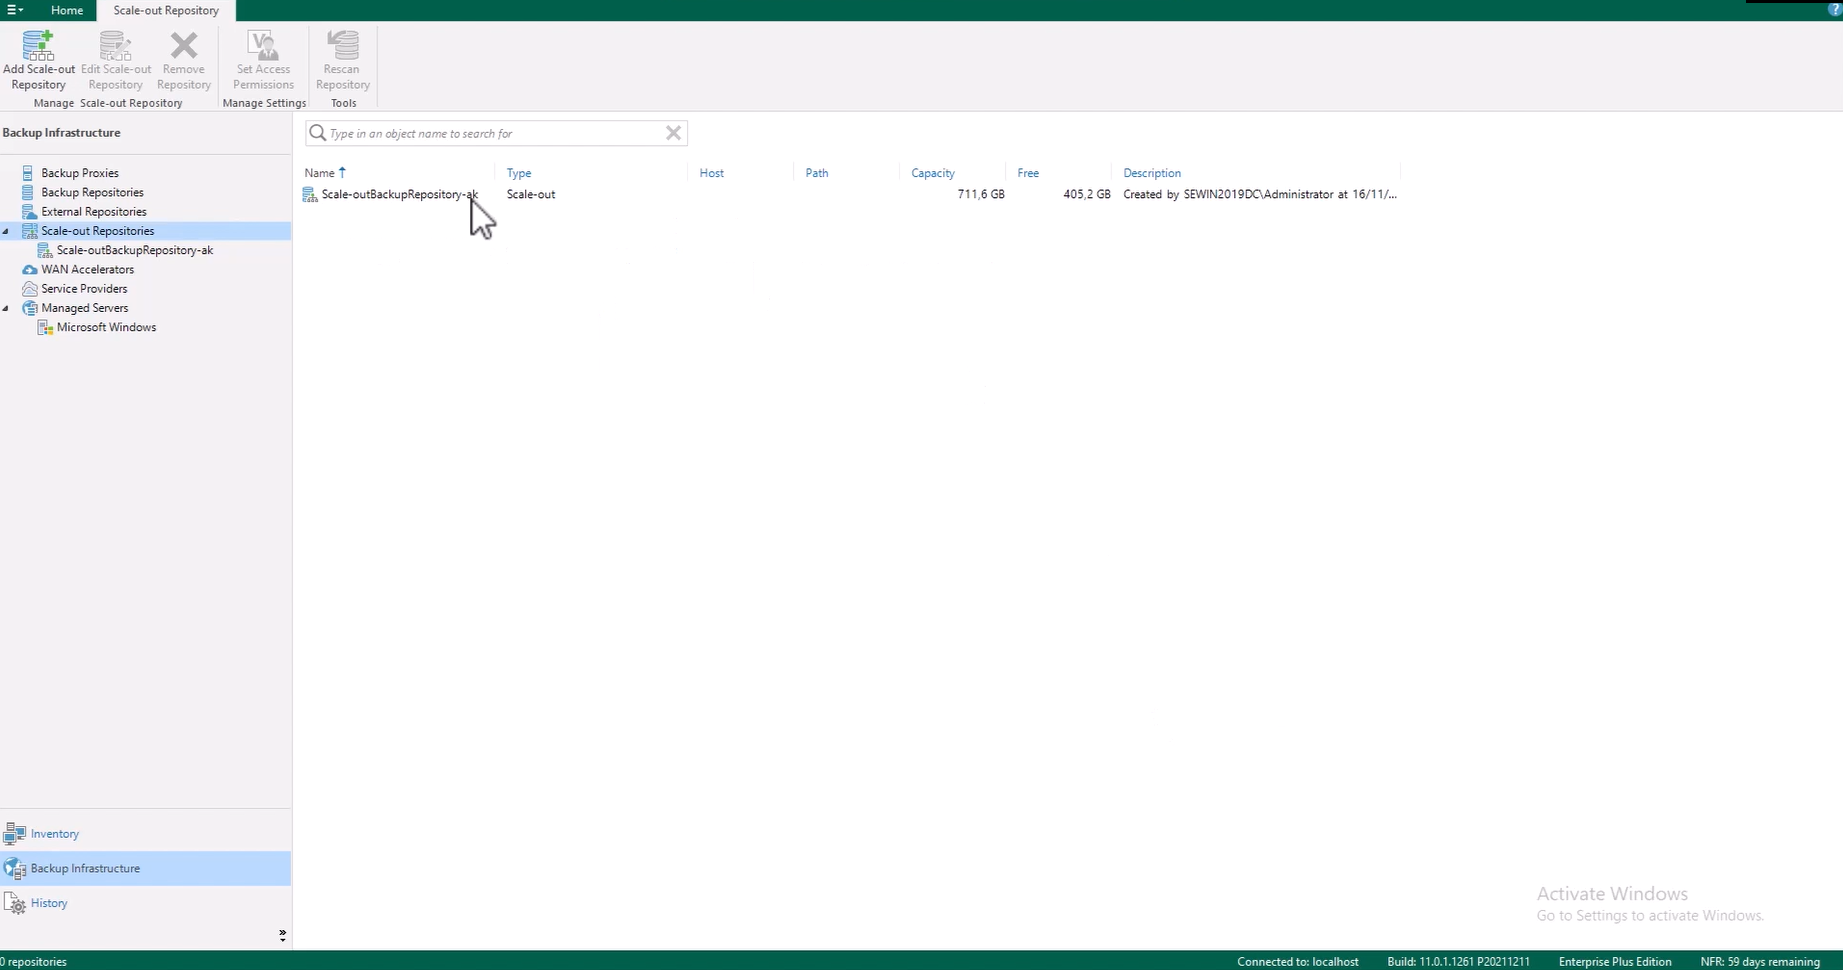
Select Scale-out Repositories in the left menu and select Add Scale-out Repository.
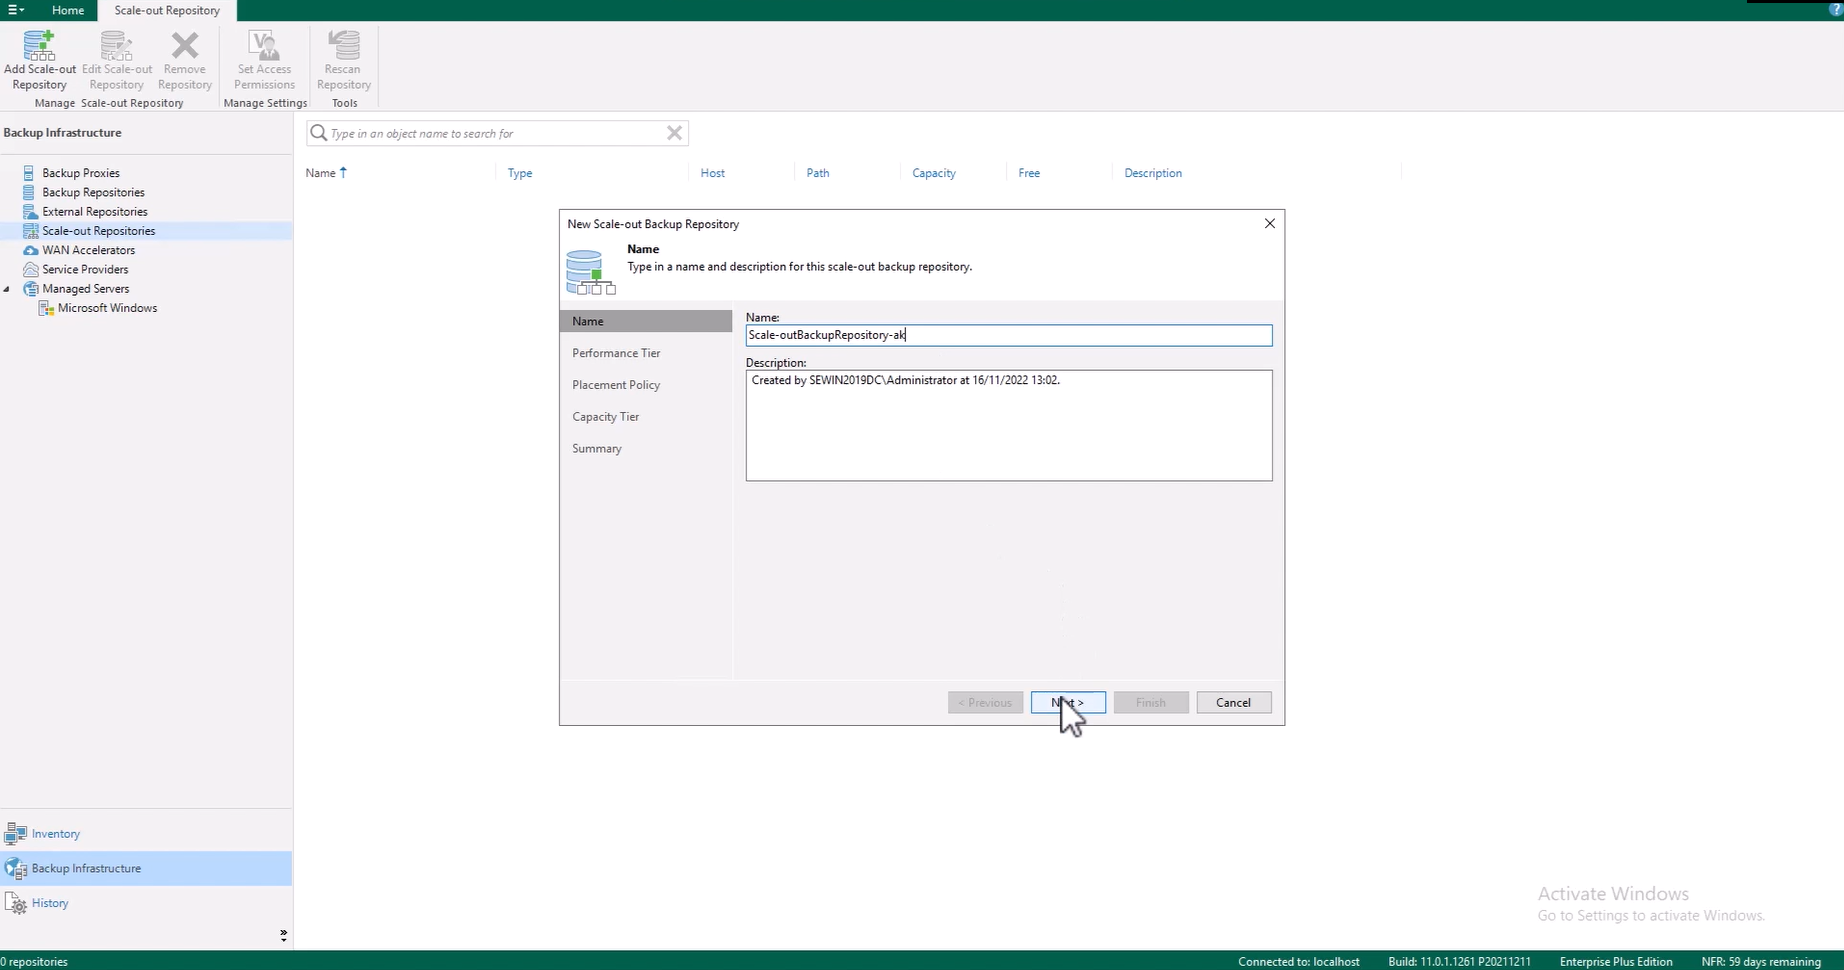
Enter a Name and select Next.
From the performance tier section, select Add to choose one or more backup repositories to include in the scale-out repository, and select OK.

Select Advanced to choose the advanced settings specific to your use case. Select OK and proceed to the next section.
Choose the placement policy for this performance tier.
From the Capacity Tier section, check Extend scale-out backup repository capacity with object storage and choose an object repository. Then check the options to define time windows when uploading to the capacity tier is allowed. Select Apply.
Review the summary and select Finish.
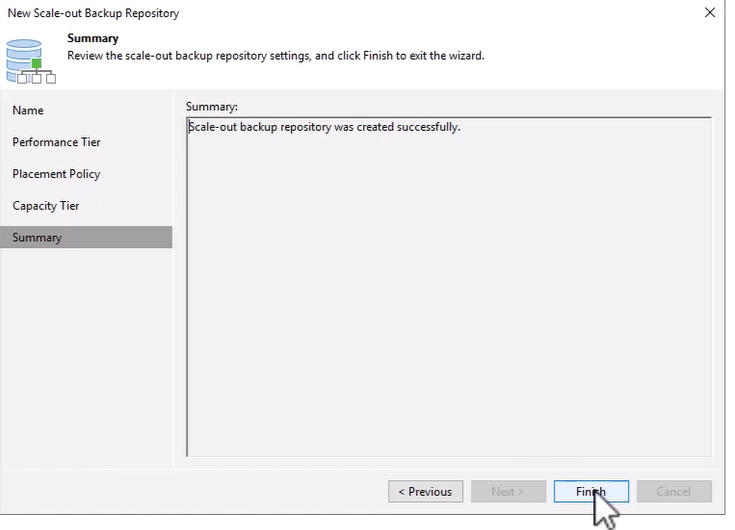
The scale out backup repository is successfully created.
Video 2: Creating a Scale-Out Repository?
Creating a backup job
In this section, you will learn how to create a backup job.
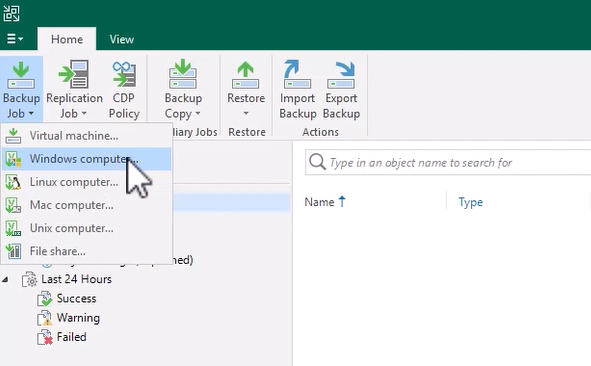
Open the Jobs section from the left menu, select Backup Job, and choose the system for the backup job.
In this example, we have selected Windows computer.
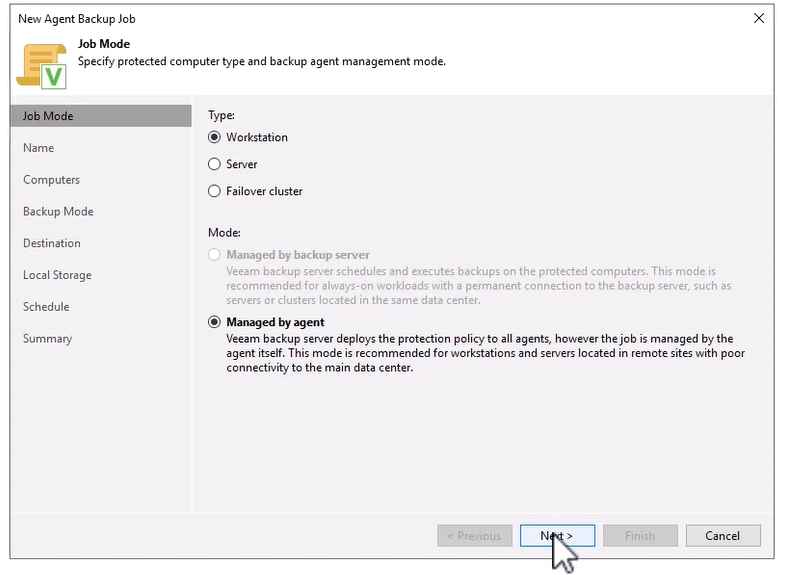
Choose the Type of computer to backup and the Mode of management.
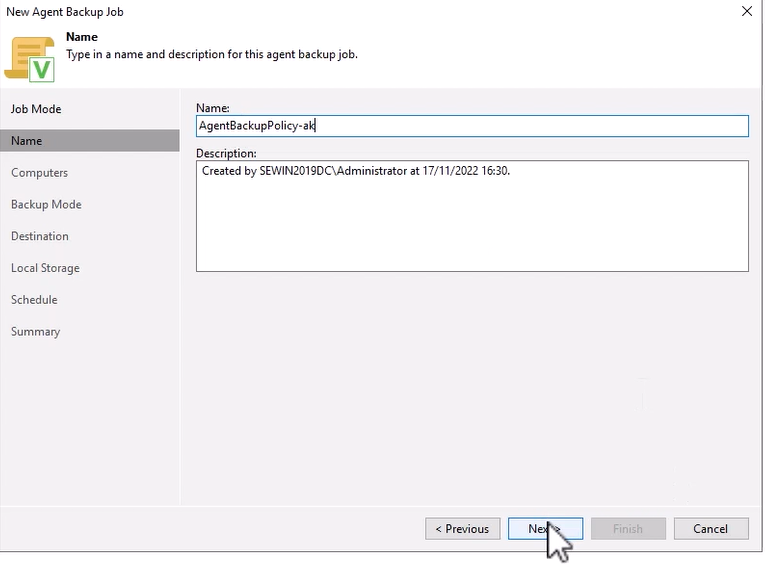
Create a name and select Next.
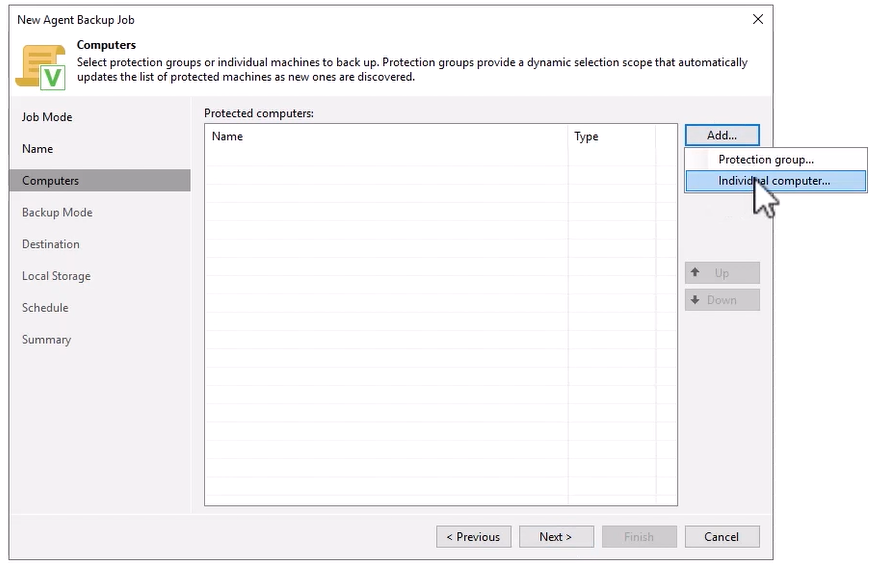
Select Add to add a Protection group or Individual computer.
In this example, we have selected Individual computer.
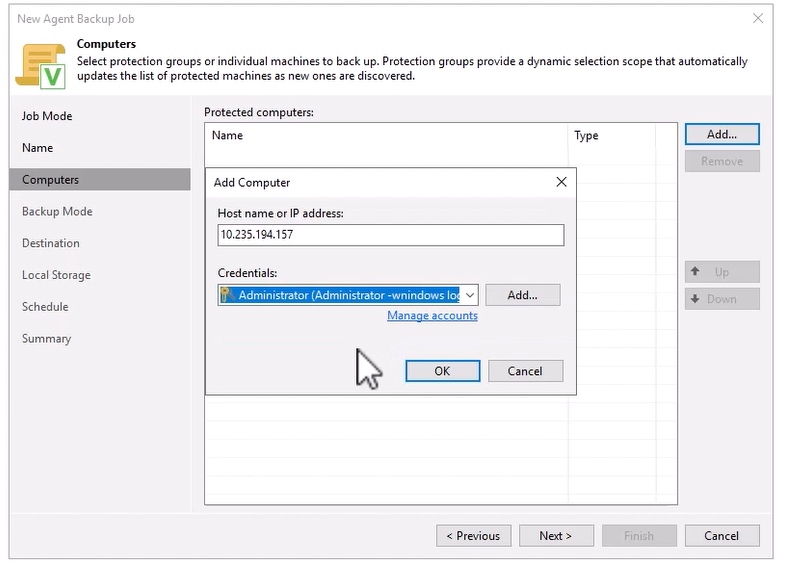
Enter the Host name or IP address of the computer, select Add to add administrator credentials, and select OK.
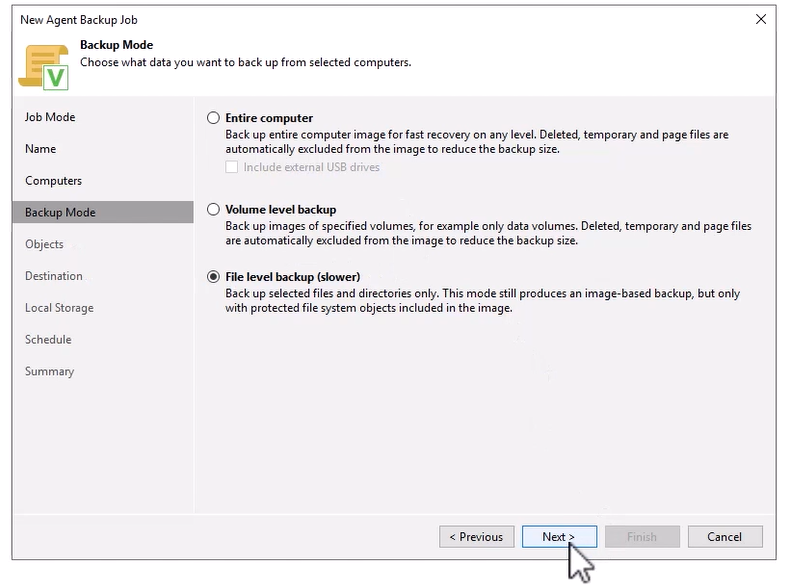
From the Backup Mode section, choose what data you want to back up.
In this example, we have selected File level backup.
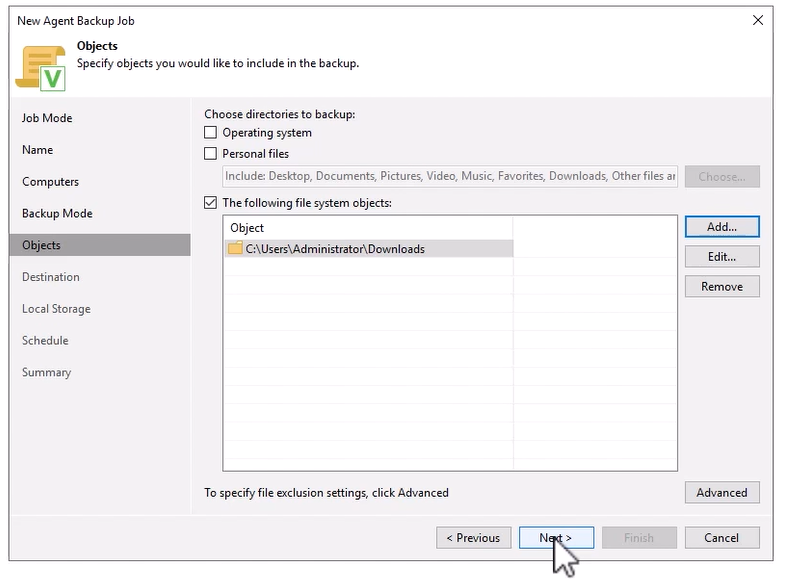
Choose the directories to back up. Select Add, enter the directory path or volume name, select OK, then select Next.
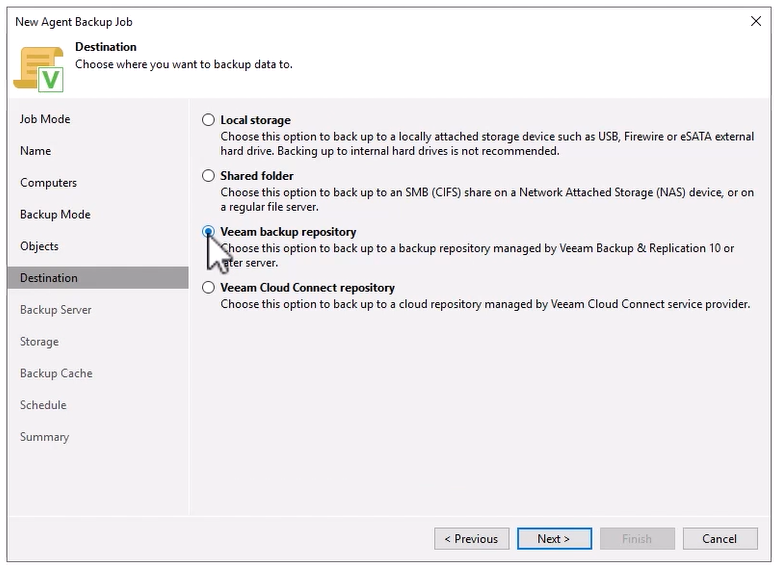
From the Destination section, choose where to backup your data to.
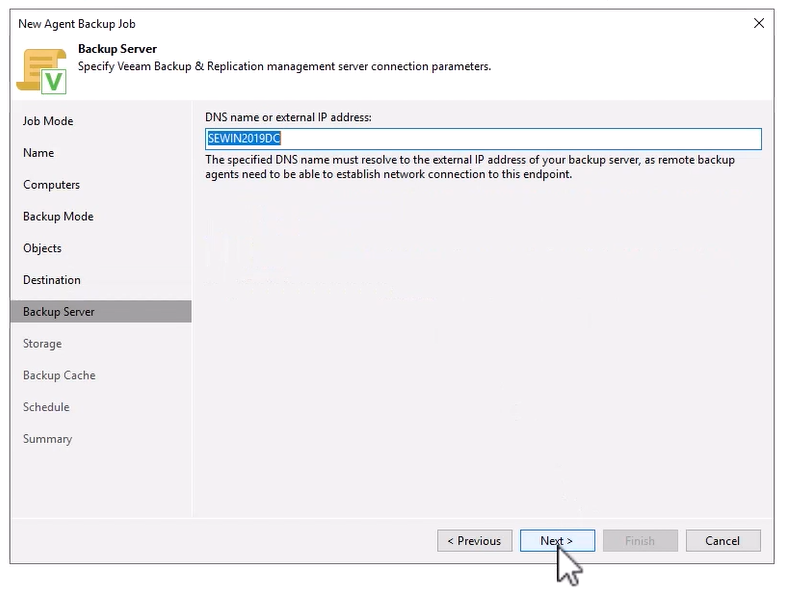
Specify the DNS name or external IP address. In this example, we kept the default DNS name.
Choose the backup repository to store the backup files and the duration to keep backups for.
In this example, we've chosen the scale-out repository.
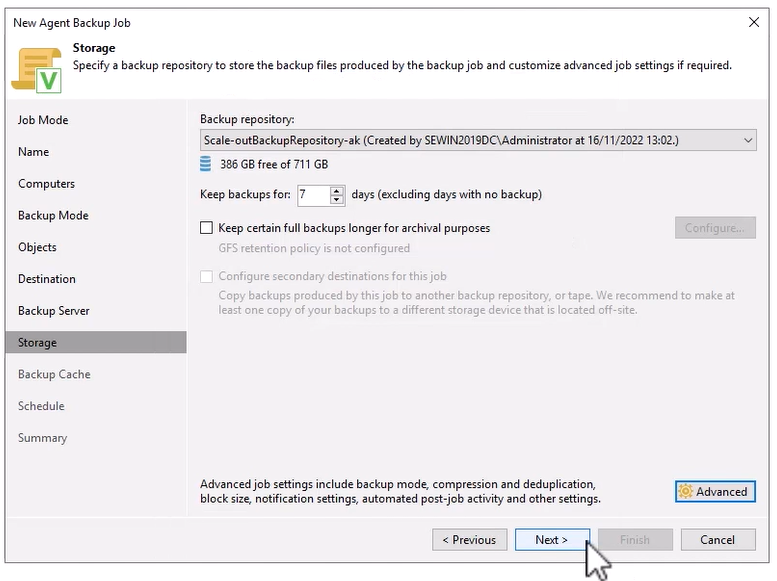
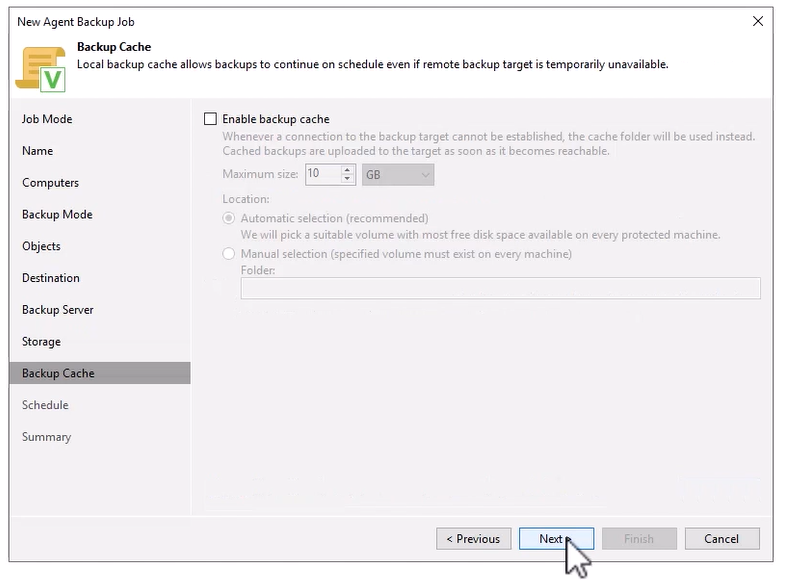
Optionally, you may enable a backup cache to enable backups locally if your remote location is unavailable.
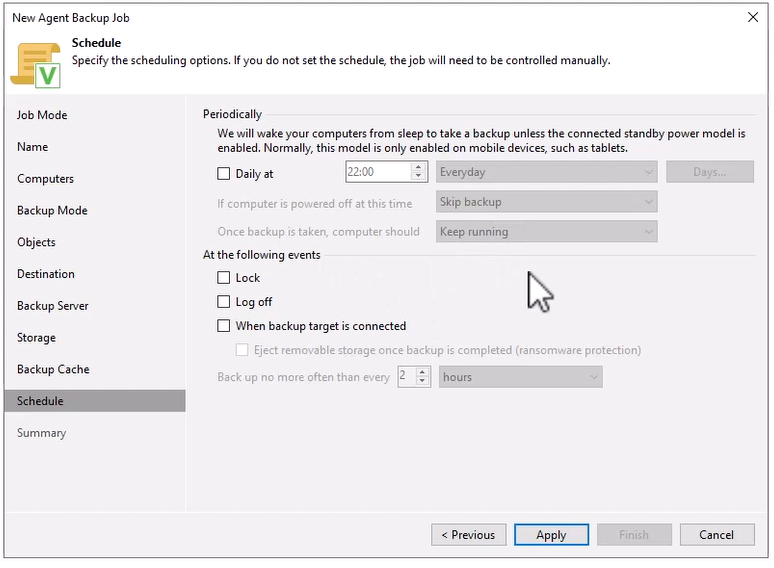
Set the scheduling options and select Apply. If you do not set a schedule, the job will need to be created manually.
Review the Summary and select Finish to complete.
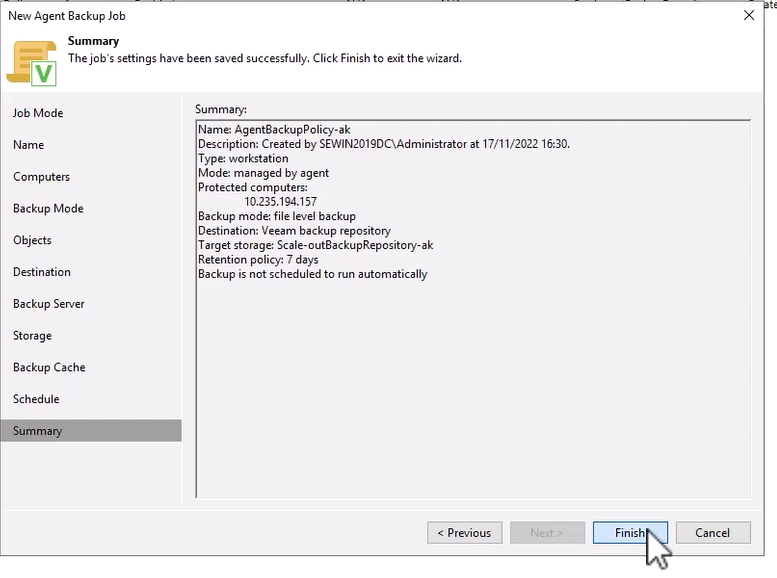
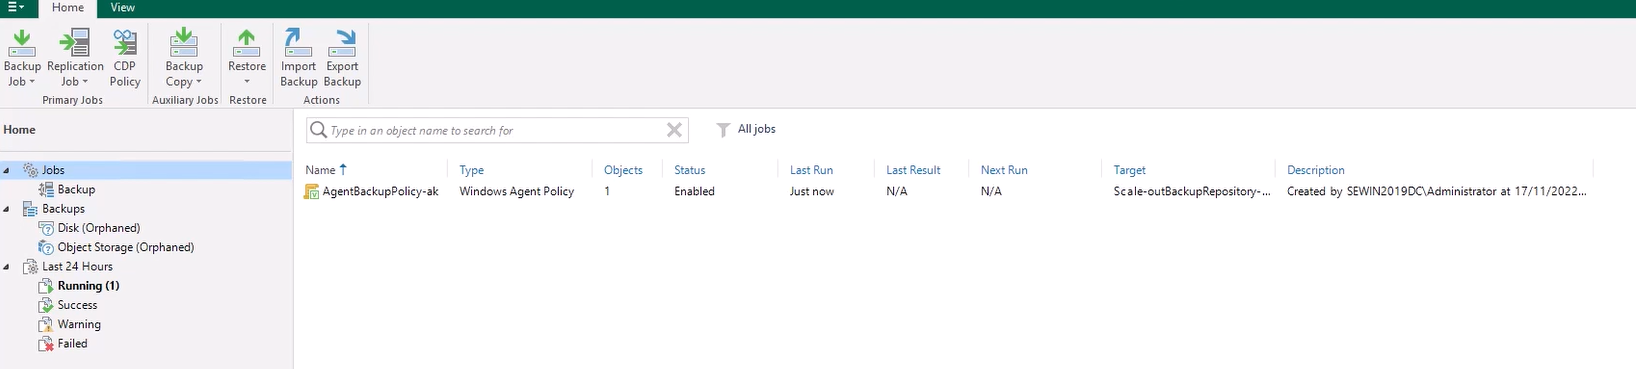
The job can be seen under the Jobs section.