Lyve Cloud with CloudBoost
In this section, you will learn how to configure CloudBoost and Dell Networker to enable backups to Lyve Cloud.
Login to the CloudBoost Management Console as an administrator. You can access the CloudBoost appliance using CLI or GUI.
On-Prem CloudBoost Management console: HTTPS://<CLOUDBOOST IP ADDRESS>:7443
CLI: ssh admin@<CLOUDBOOST IP ADDRESS>
Configuring CloudBoost client network
Connect to the CloudBoost CLI.
Authenticate with the default password, which is password.
Set the password for the new administrator.
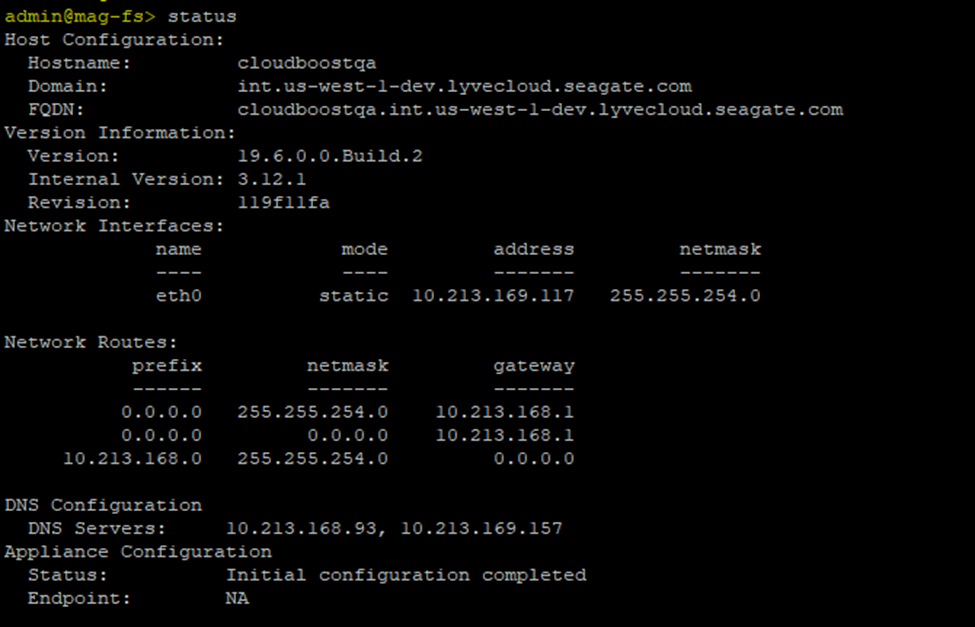
Type the status command to see the current network configuration of the appliance.
If the IP address is dynamically assigned, then skip to step 8. To statically set the IP address and netmask, type the command:
net config interface static IP address netmask addressNote
You must type the following command for each network listed in the status command output if you have multiple networks.
net config eth0 XX.X.XX.XXX netmask 0.0.0.0Type the command to add the gateway manually.
route add IP address netmask netmask address gw gateway
address
For example, route add 0.0.0.0 netmask 0.0.0.0 gw xx.x.xx.x
Note
You must add multiple routes to the gateways if you have multiple networks.
Type the command to set DNS manually.
dns set primary <primary IP address>dns set secondary <secondary IP address>dns set tertiary <tertiary IP address>Example 1. For example, to set DNS manually.DNS set primary 10.5.96.91 DNS set secondary 10.5.96.92 DNS set tertiary 10.5.96.93
Type the following command to set the fully qualified domain name
fqdn servername.yourcompanydomainConsider the following:
Custom FQDN_name names are not supported.
The FQDN_name must be lowercase and not include the underscore character (_).
Example 2. Sample command to set the fully qualified domain name.FQDN: cloudboostqa.int.us-west-1-dev.lyvecloud.seagate.com
Note
You must set the FQDN to access the On-Prem CloudBoost Management Console.
Type the following command to verify the networking setup and check the appliance's status.
statusAfter verifying the system's basic networking settings, configure CloudBoost using the On-Prem CloudBoost Management Console.
Cloud profiles
Before you configure a CloudBoost appliance in the On-Prem CloudBoost Management Console, create a cloud profile for the storage.
Note
For creating a cloud profile, please use a Service Account with All Operations (full access) that enables cloud boost to create bucket tenants. Obtain the necessary credentials for the cloud provider.
Use a web browser and sign in to the On-Prem CloudBoost Management Console as an administrator.
Type the On-Prem CloudBoost Management Console address in the following format:
https: //<FQDN of the cloud appliance>:7443
Note
The username to access the console is admin , and use the password you updated during the deployment of CloudBoost.
On the left menu, select Cloud Profile.
Select Edit to revise the default cloud profile and enter the following:
Display Name: View the default display name. This is a non-editable field.
Cloud Storage Provider: View the default Cloud Storage Provider.
Endpoint: Enter your Lyve Cloud bucket URL.
Access Key ID: Enter your Lyve Cloud bucket access key ID.
Secret Access Key: Enter your Lyve Cloud bucket secret access key.
Select Save to complete.
Enabling remote client mount
When you enable remote client mounts, you create the password you must use for the task. Optionally, you can share the admin username and new password with anyone who needs to mount with the client remotely.
Open a CLI window for the appliance.
Type the following command, where the value for the password is the password you created. Remote-mount-password enable password
Log in using the administrator's credentials.
Type the following command, where the value for the password is the password you created.
remote-mount-password enable password
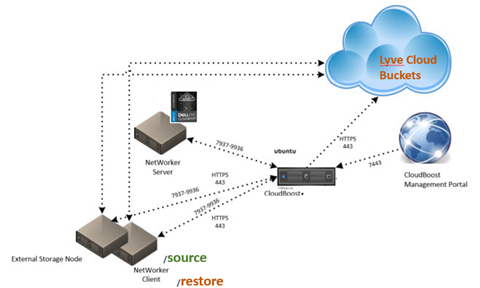
This section shows configuration and operations with the following typical architecture: Networker uses Cloud Boost and Lyve Cloud as a destination.
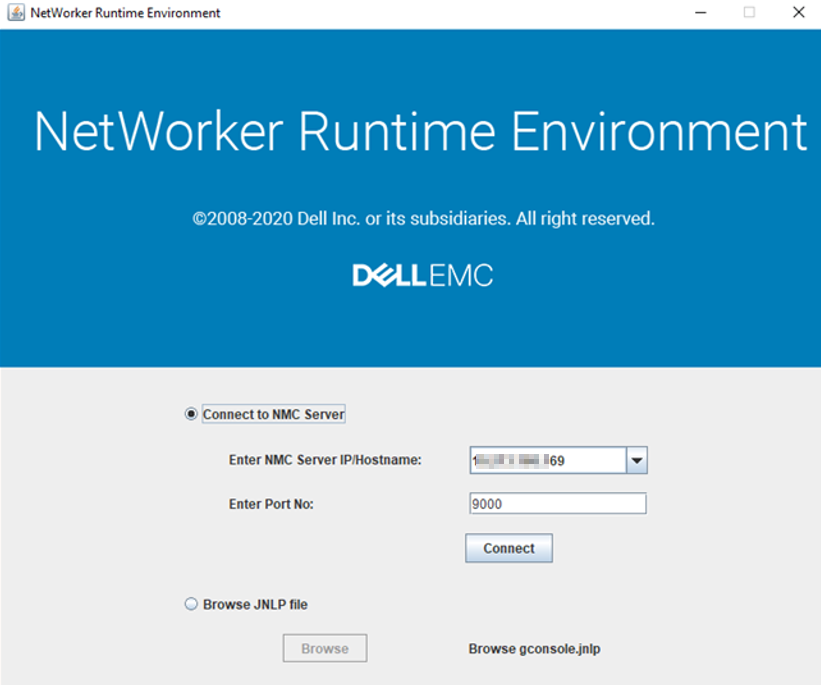
Launch the NetWorker Runtime Environment to begin the login process.
Enter the following and select Connect to continue:
NMC: Server IP Hostname: Networker server IP address.
Port number: The port number is 9000.
Note
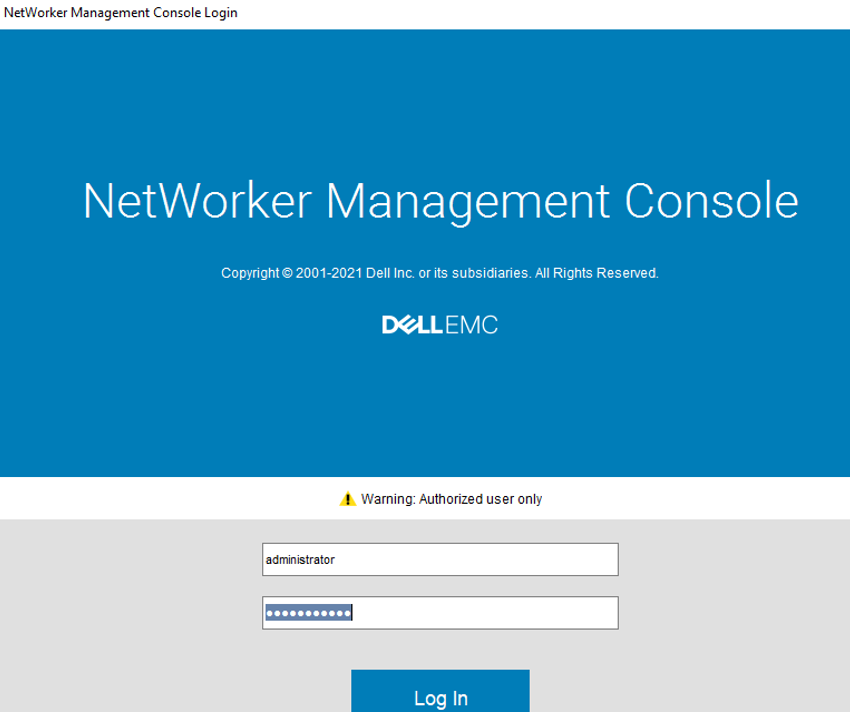
Proceed through the Security Warning and run the application.
Enter the credentials to log in.
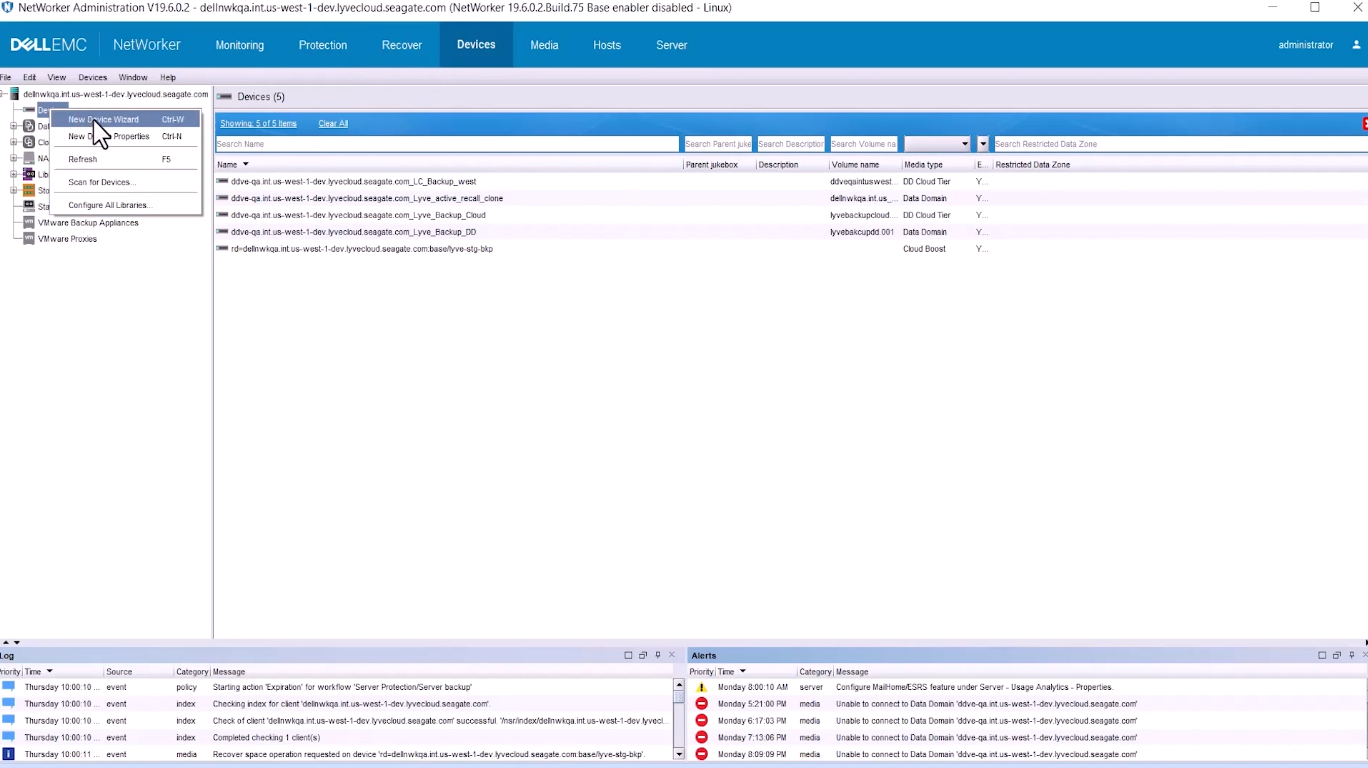
From the Devices tab, right click on Devices, and select New Device Wizard.
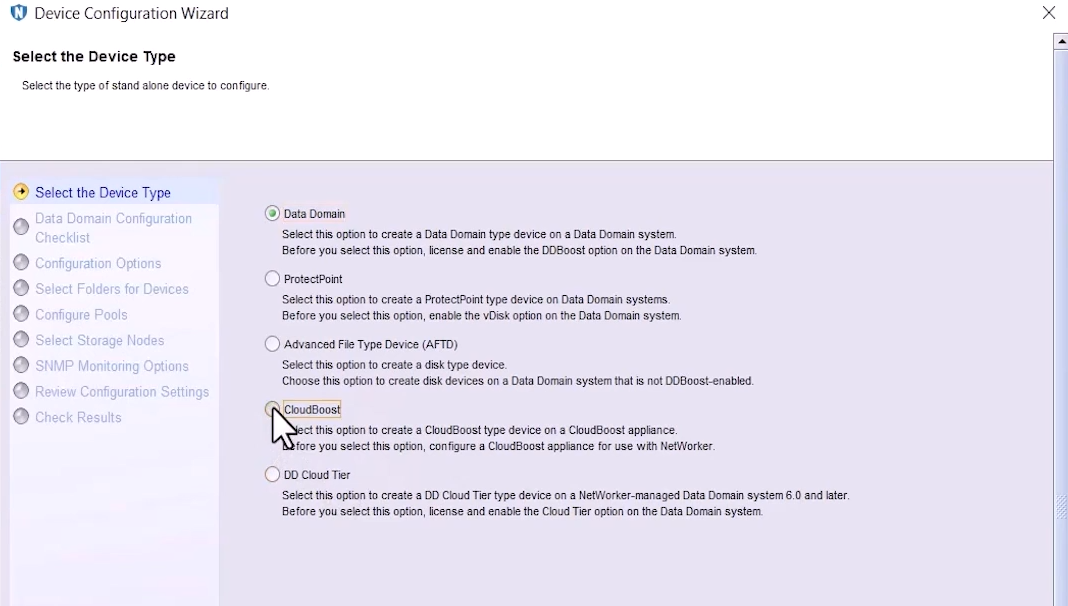
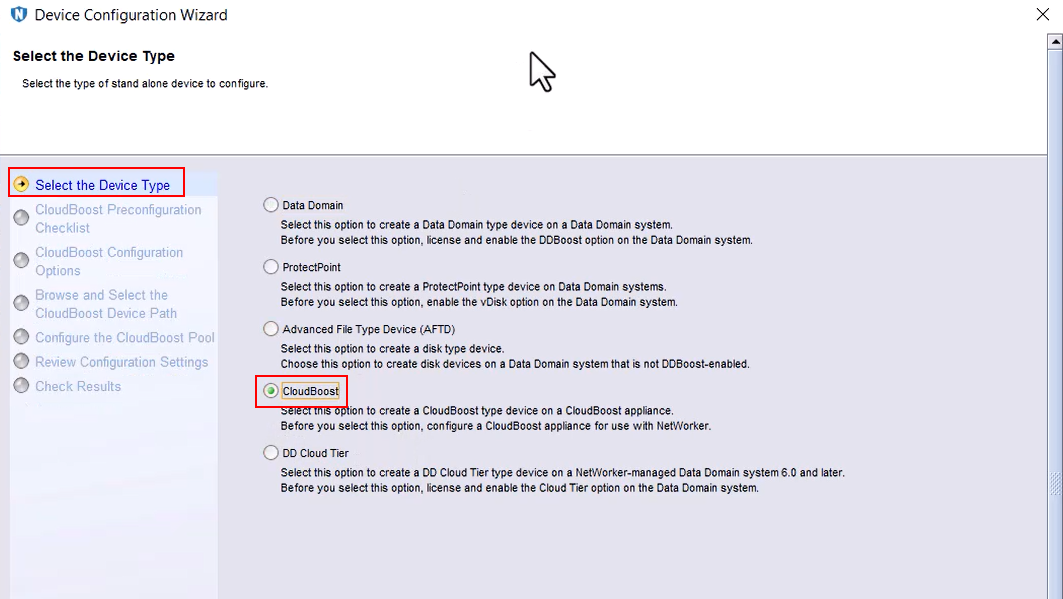
Select CloudBoost as the device type.
View the preconfiguration checklist and select Next.
Enter the following configuration options and select Next to proceed:
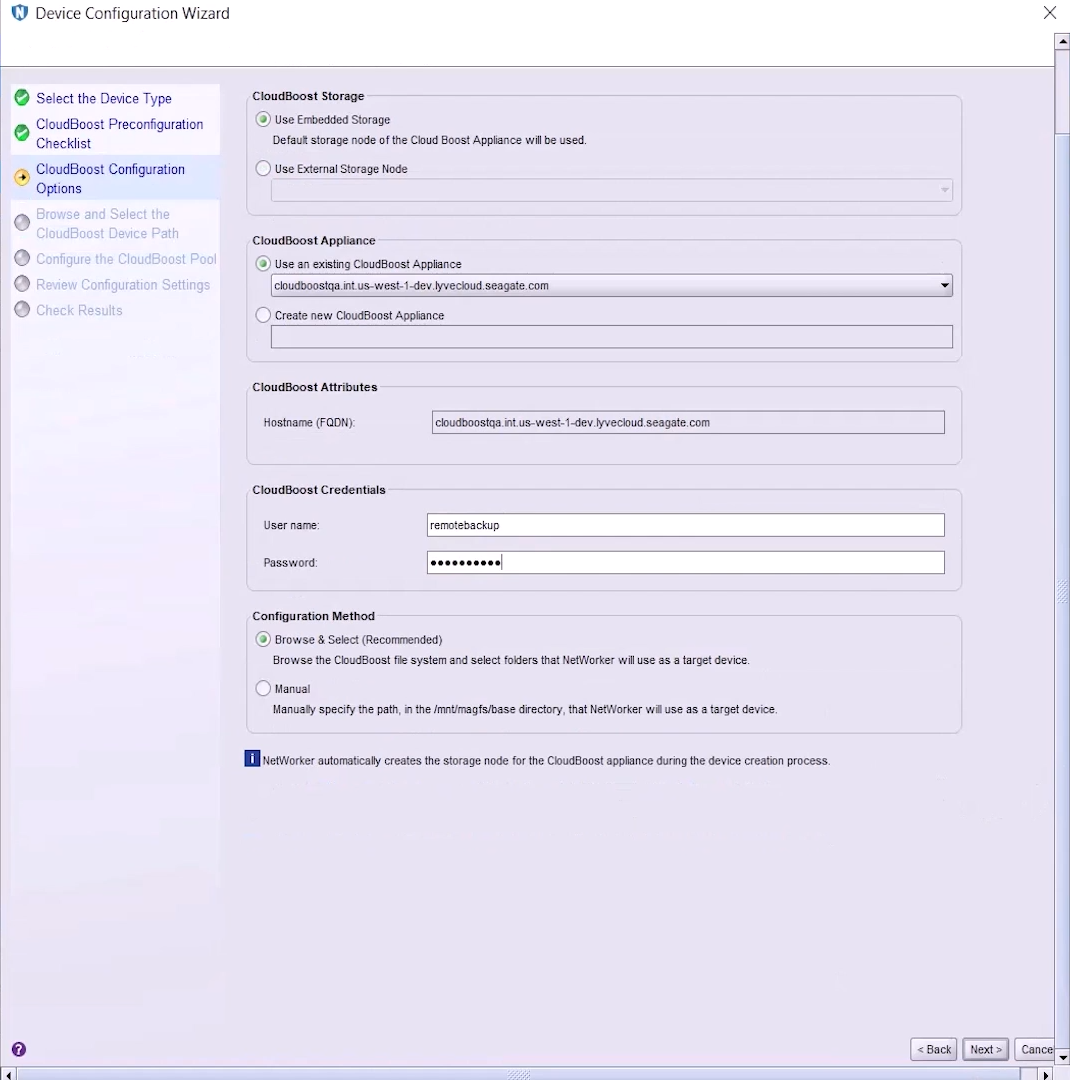
CloudBoost Storage: Choose Use Embedded Storage.
CloudBoost Appliance: Select Use an existing CloudBoost Appliance.
CloudBoost Credentials: Enter your CloudBoost username and password.
Configuration Method: Choose Browse & Select as the recommended method.
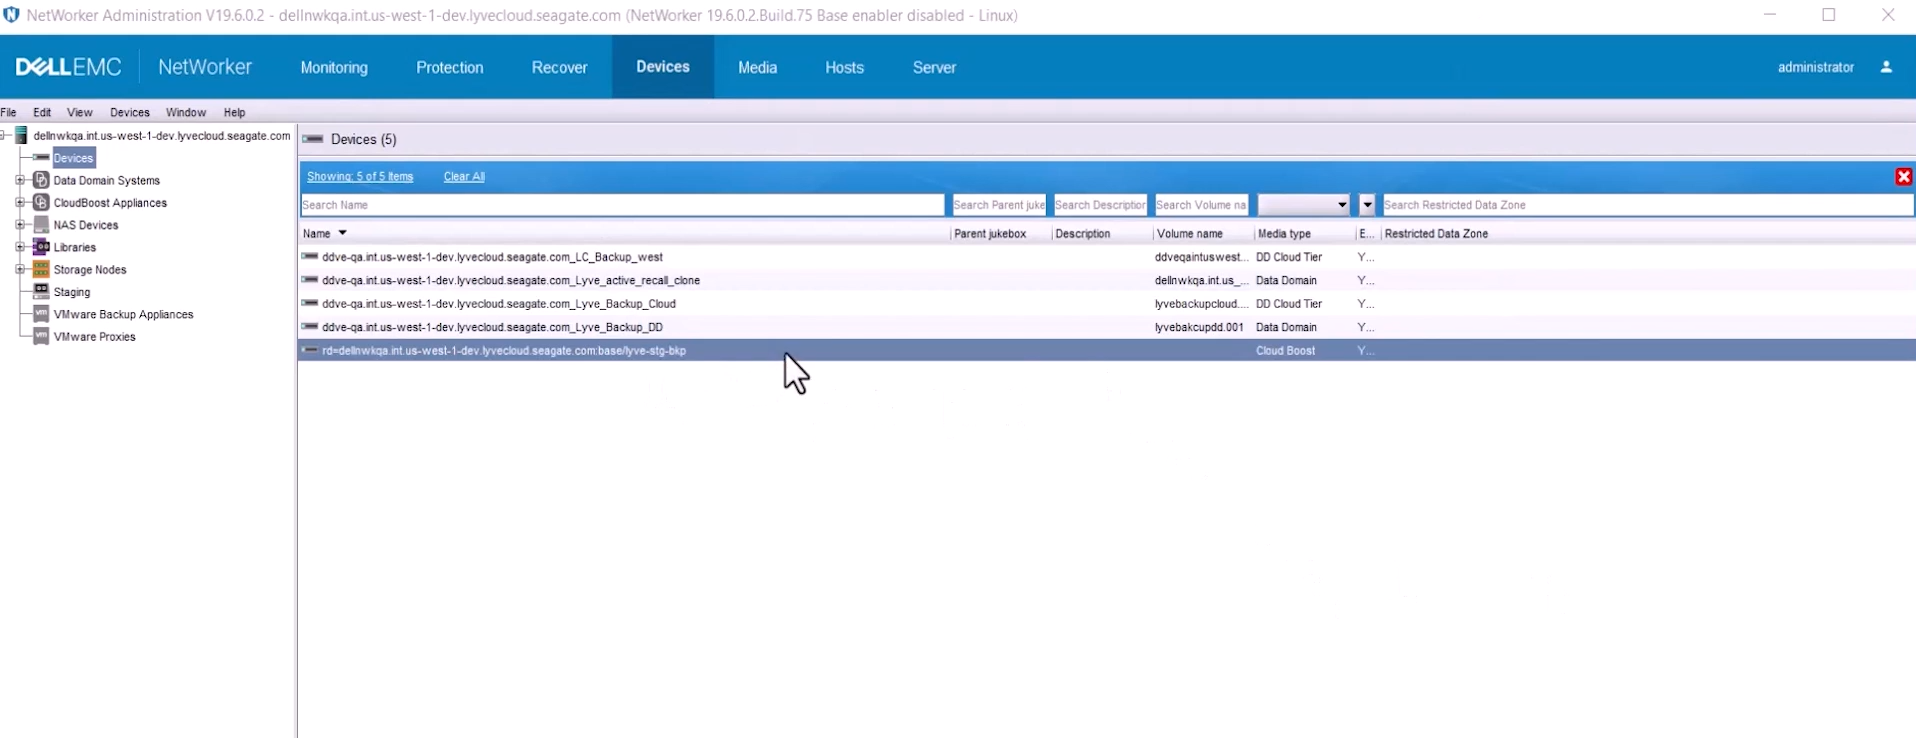
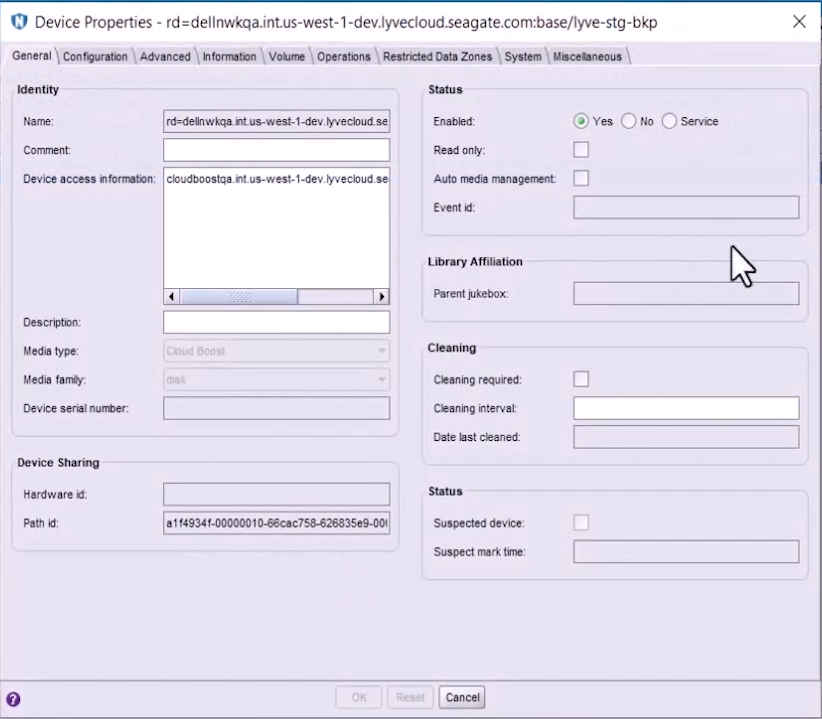
You should now see your device from the Devices page.
Select the new device to view the Device Properties.
In the Devices tab, expand your device from the left menu.
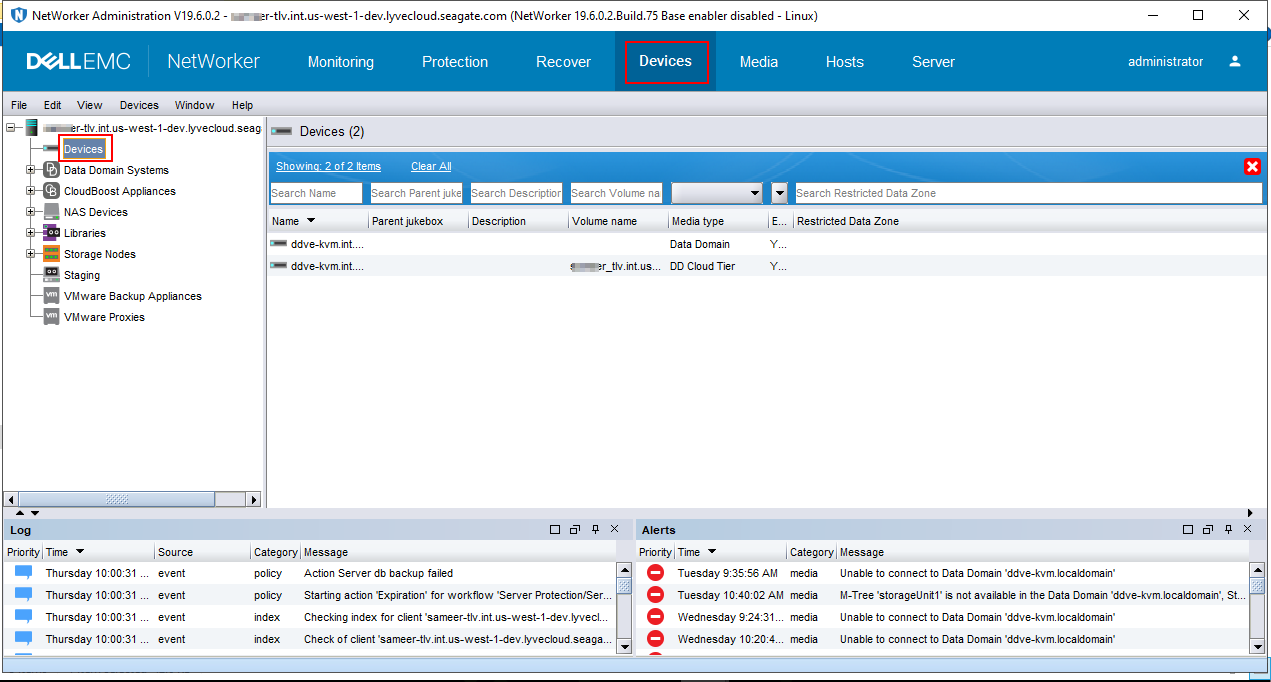
Right select on Devices and select New Device Wizard.
In the Device configuration wizard, Select the Device Type , choose CloudBoost and click Next.
View the CloudBoost Pre-configuration Checklist and select Next.
In the CloudBoost Configuration Options section, complete the following:
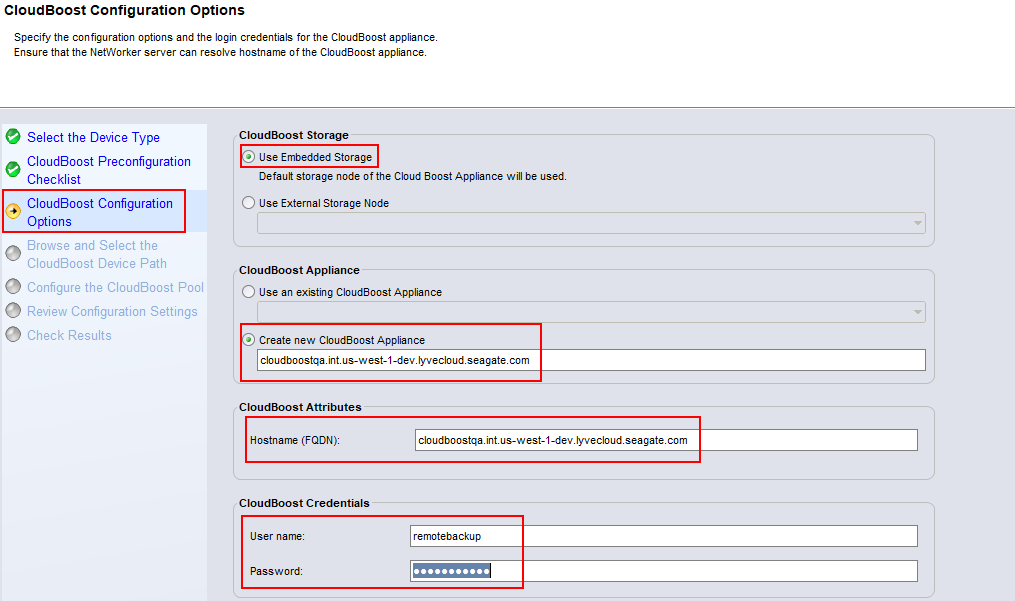
In the CloudBoost Appliance section, select Use an existing CloudBoost Appliance.
In the CloudBoost Attributes and enter Hostname (FQDN) as cloudboostqa.int.us-west-1-dev.lyvecloud.seagate.com.
In the CloudBoost Credentialssection, enter the username and password and select Next.
Username: remotebackup.
Password: Set the password by logging into the CloudBoost Appliance and using the remote-mount-password enable passwordcommand.
In the Browse and Select the CloudBoost Device Path section, select New Folder and then select next.
Configure CloudBoost Pool
Review Configuration Settings
Check Results and select Finish.
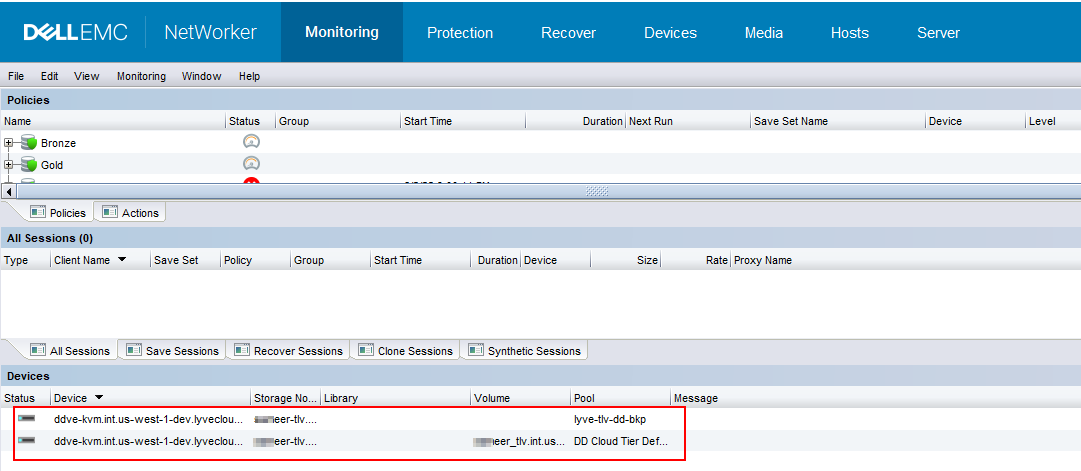
Once you add the CloudBoost Device, you can view it under Devices -->CloudBoost appliance.
Once you add the device to Networker, configure and run the backup.
Login to Networker and Launch Networker Administrator and select the Protection tab.
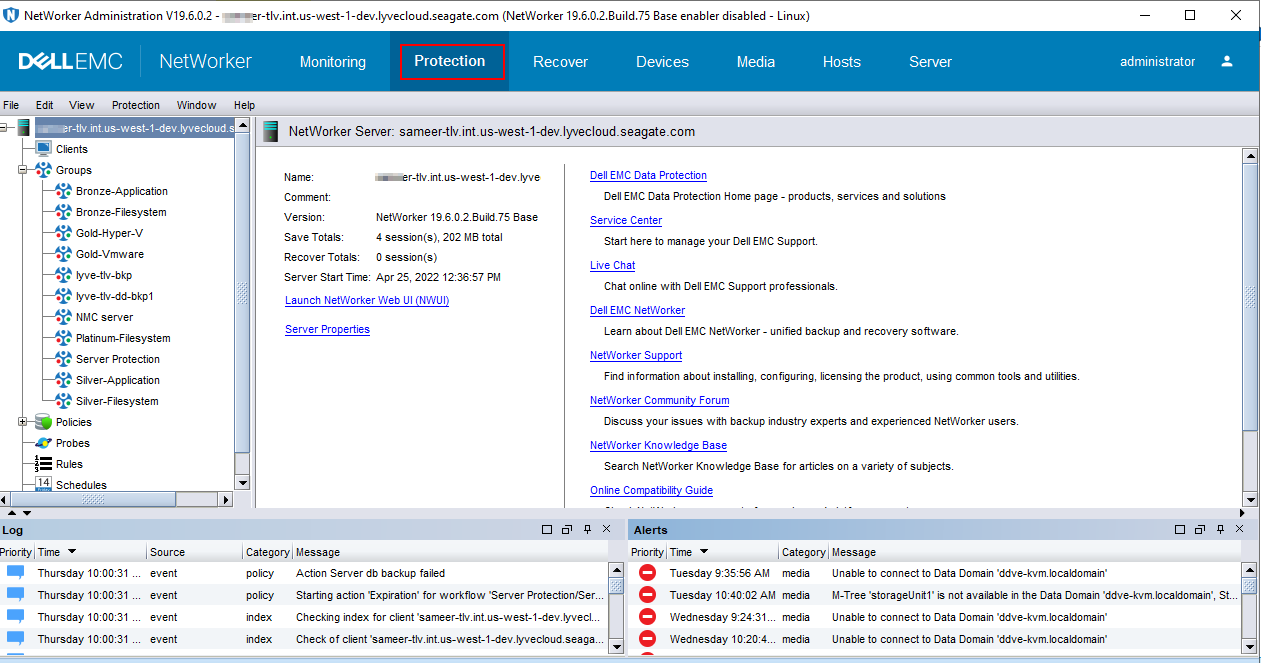
In the left navigation pane, select Groups and right select to create a new group.
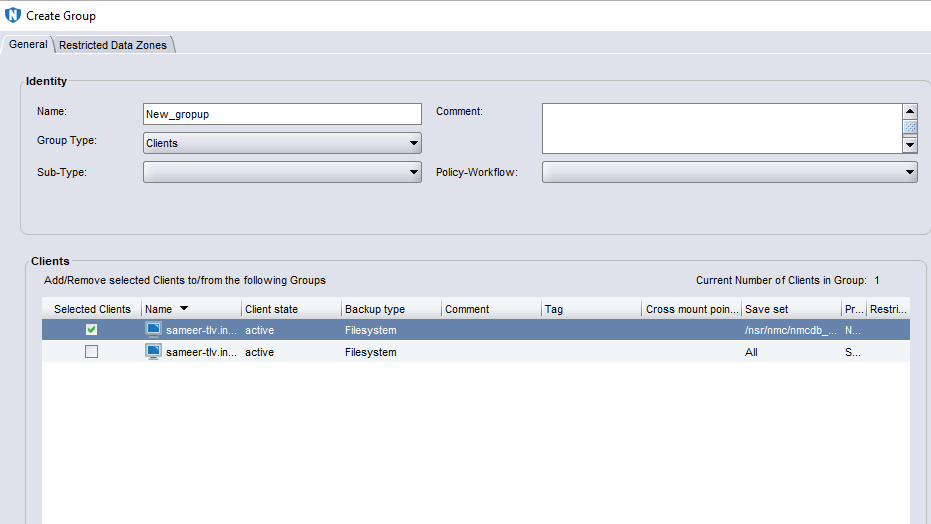
Complete the following to create Group:
Name: Name of the group.
Clients: Select the client from the list.
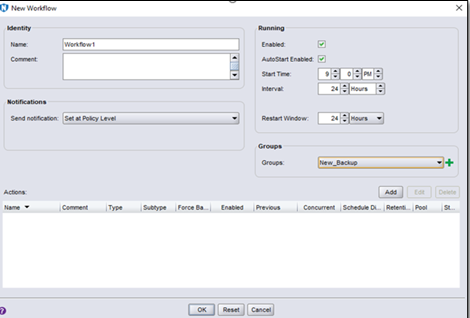
In the left navigation pane, select Policies and right-click to create a new policy.
Enter the name of the new policy.

Right-click on the new policy, select New and enter the name in the Groups section.
Select created the group to Create New Action.
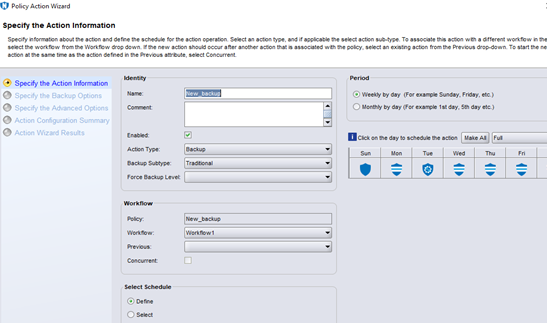
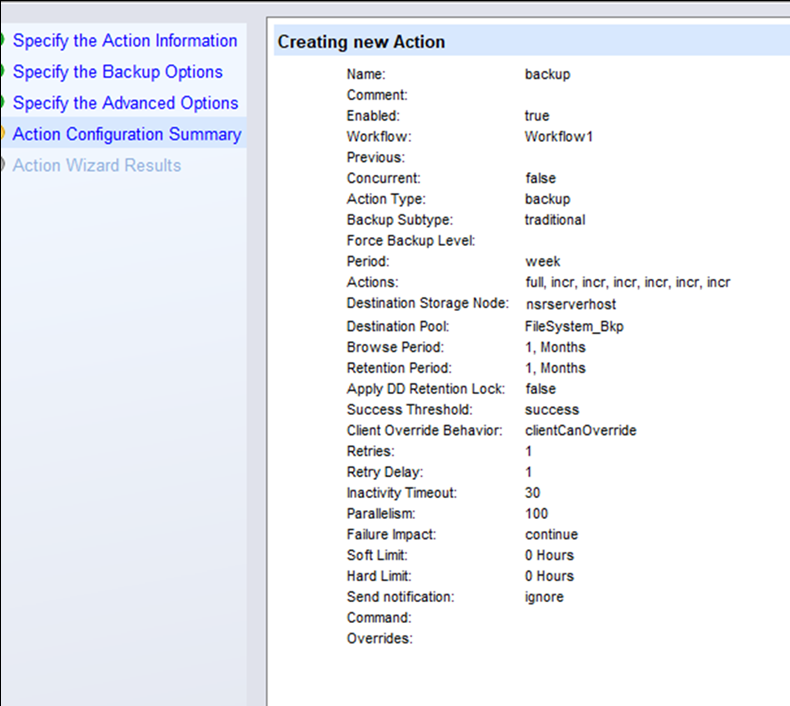
In Policy Action Wizard, Select Specify Action Information and enter the following:
Name: Specifies the name of the identity.
Period: Specifies the duration, For example, Weekly by day.
Select Specify the Backup Optionsin the Data Movement section, specify the Destination Pool, and select Next.

In the Backup Action summary, select Configure.
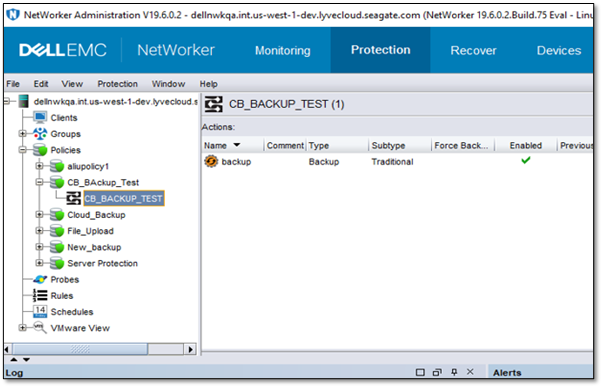
In the Protection tab, select Policies.
Right select on backup and choose Start to start the backup.
Click the Monitoring tab to monitor the backup.
In the Recover tab, right-click Recover from the menu options.
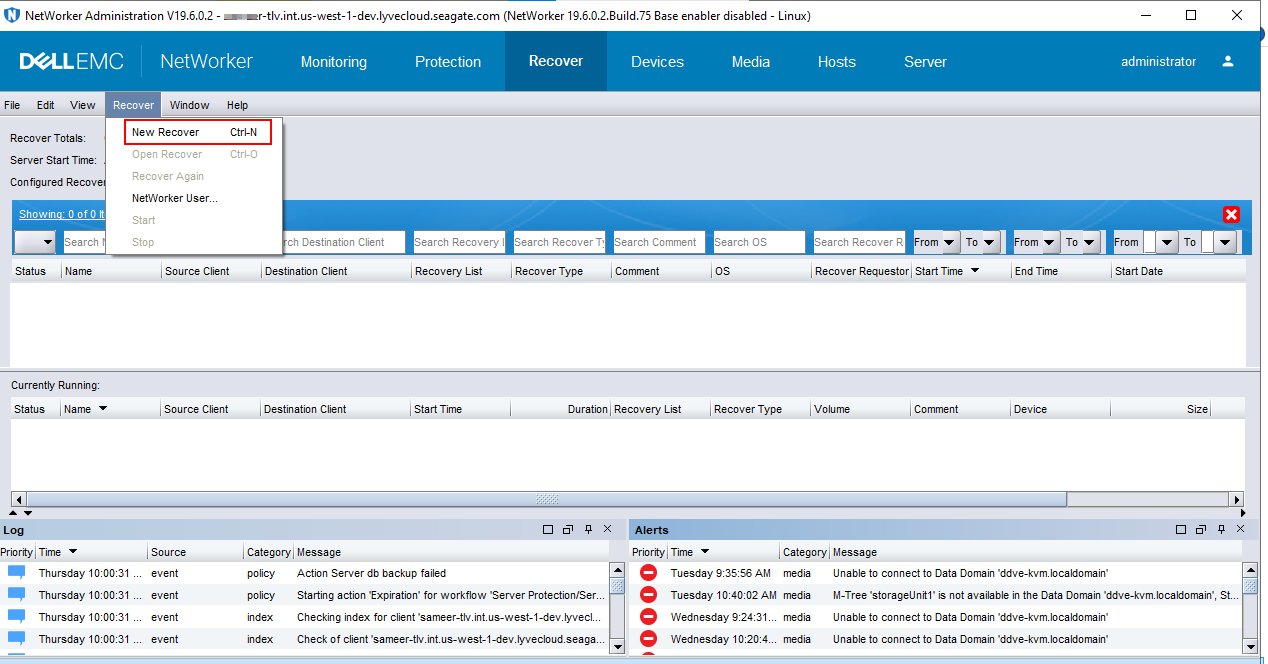
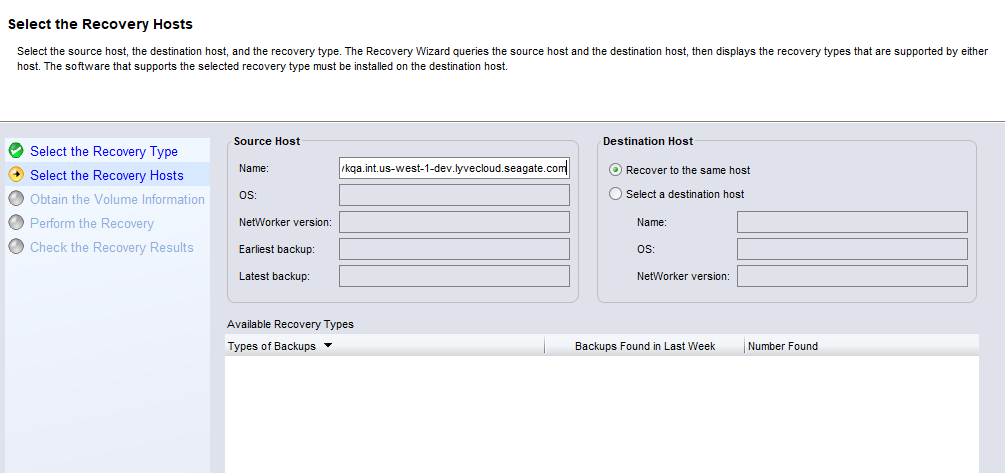
Select New Recover, and in the Recover Configuration wizard, complete the following:
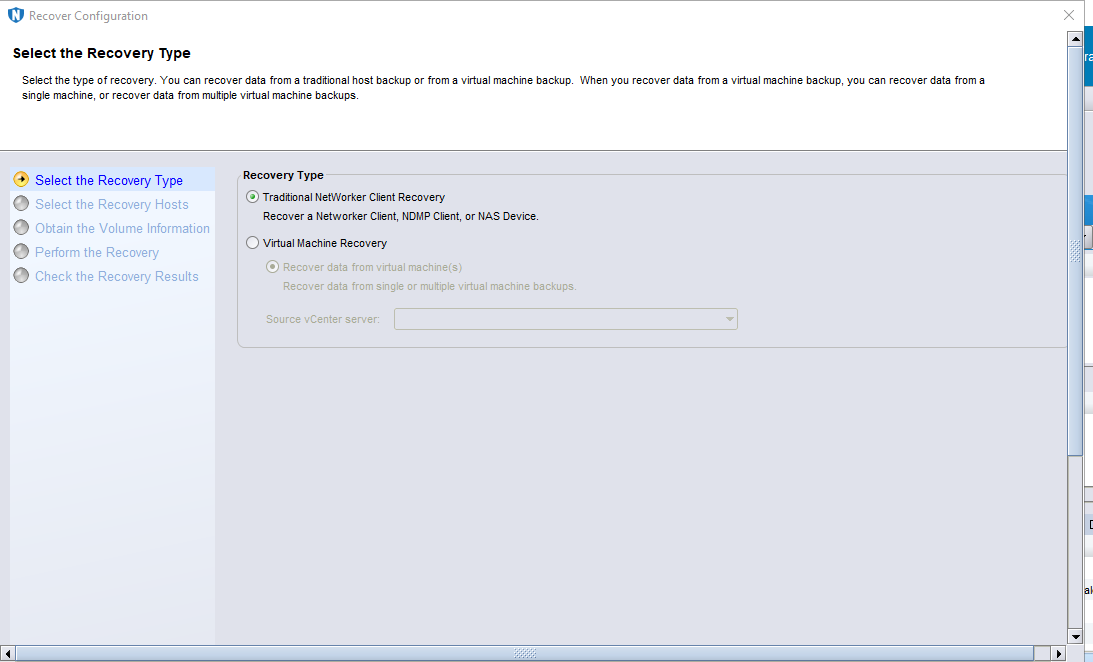
Enter the Name (FQDN) of the source host. All other information is retrieved.
Choose files to restore.
For example, /home/user/source
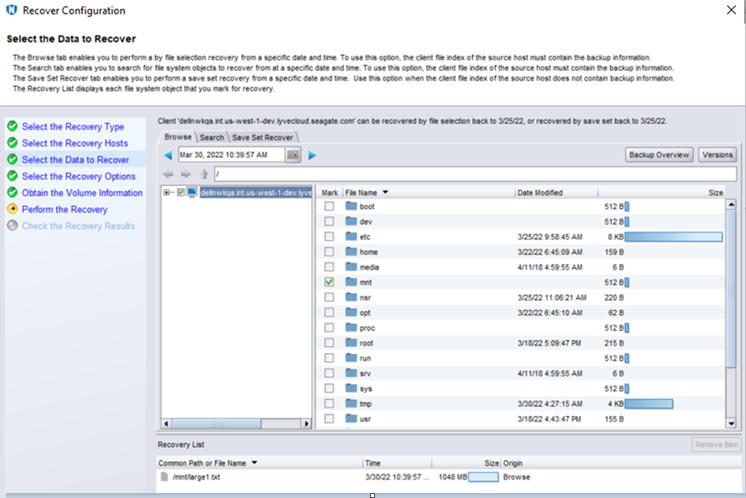
Choose a restore destination.
For example, /home/user/restore
Review the details and select Run Recovery.
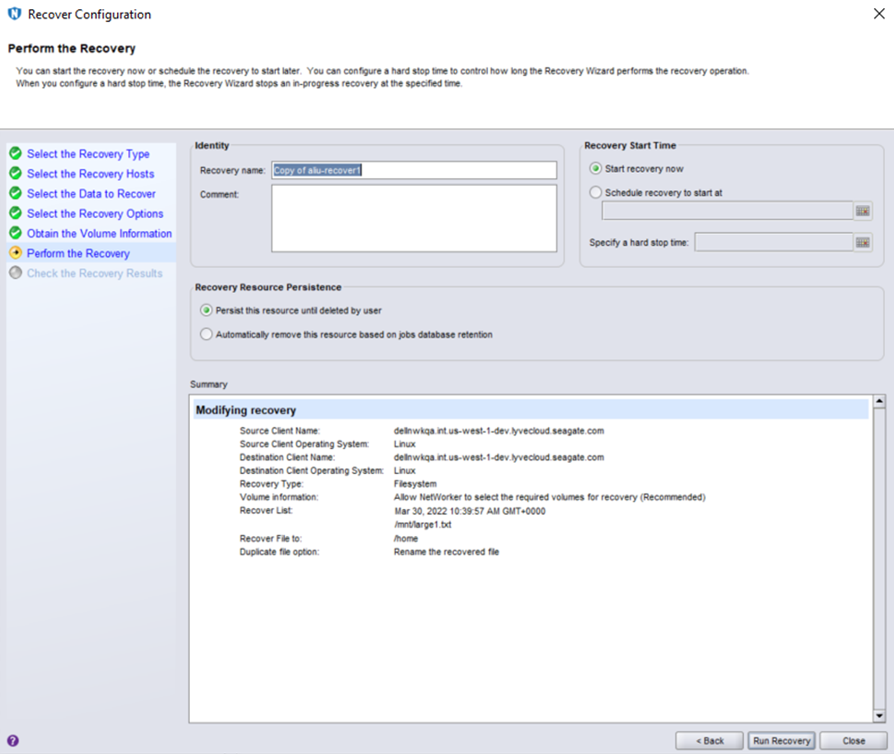
You can monitor the progress in the Monitor tab. Once the recovery job completes successfully, verify the restore file(s) in the destination location.