Appendix
Enable SSL for Data Mover Server
Secure Sockets Layer (SSL) ensures data is encrypted in transit through an Internet connection from On-premises Data Source to Lyve Cloud. The standard technology for keeping an internet connection secure and safeguarding any sensitive data that is being sent between two systems. You must create an individual SSL certificate for each OS server.
You can use your Web server's SSL security features for authentication. A Server certificate allows users to authenticate the Data Mover portal before any information is passed to the portal. To enable SSL server certificate verification and to provide a level of security, you should obtain a certificate from a third-party CA. Certificates that are issued to your organization by a third-party CA are tied to the Web server (Data Mover portal) to which you bind SSL.
Login to the Data Mover server.
Username: lyveinstall
Password: !yv3@dm1n
Copy the enterprise server’s certificate file and keys to the folder
/home/portaladm/certs. The folder contains the following certificates:server certificate file (*.cer)
CA certificate (*.cer)
key file (*.key)
Use this command to navigate the Lyve Browser to install the script to the default path /home/lyve/InstallScript.
cd /home/lyve/InstallScript
Use the command to execute the shell file.
sudo ./ssl_gateway.sh
Select the Server’s Certificate File.
Select the Certificate Key file
Select CA Certificate File
Enter the Data Mover server’s hostname or IP Address
Enter the Portal Server hostname or IP Address
You must create an individual SSL certificate for each OS server.
Login to the Data Mover portal server.
Username: lyveinstall
Password: !yv3@dm1n
Copy the enterprise server’s certificate file and keys to the folder /home/portaladm/certs. The folder contains the following certificates:
Server certificate file (*.cer)
CA certificate (*.cer)
Key file (*.key)
Use this command to navigate the Data Mover browser to install the script to the default path ~/OtterPortalPublish/InstallScript.
cd ~/OtterPortalPublish/InstallScript
Use the command to execute the shell file.
sudo ./ssl_gateway.sh
Select the Server’s Certificate File.
Select the Certificate Key file
Select CA Certificate File
Enter the Portal Server hostname or Ip Address
The script will auto-generate, import and configure the SSL certificate.
Log in to Data Mover Portal using HTTPS.
https://PORTALHOSTNAME/
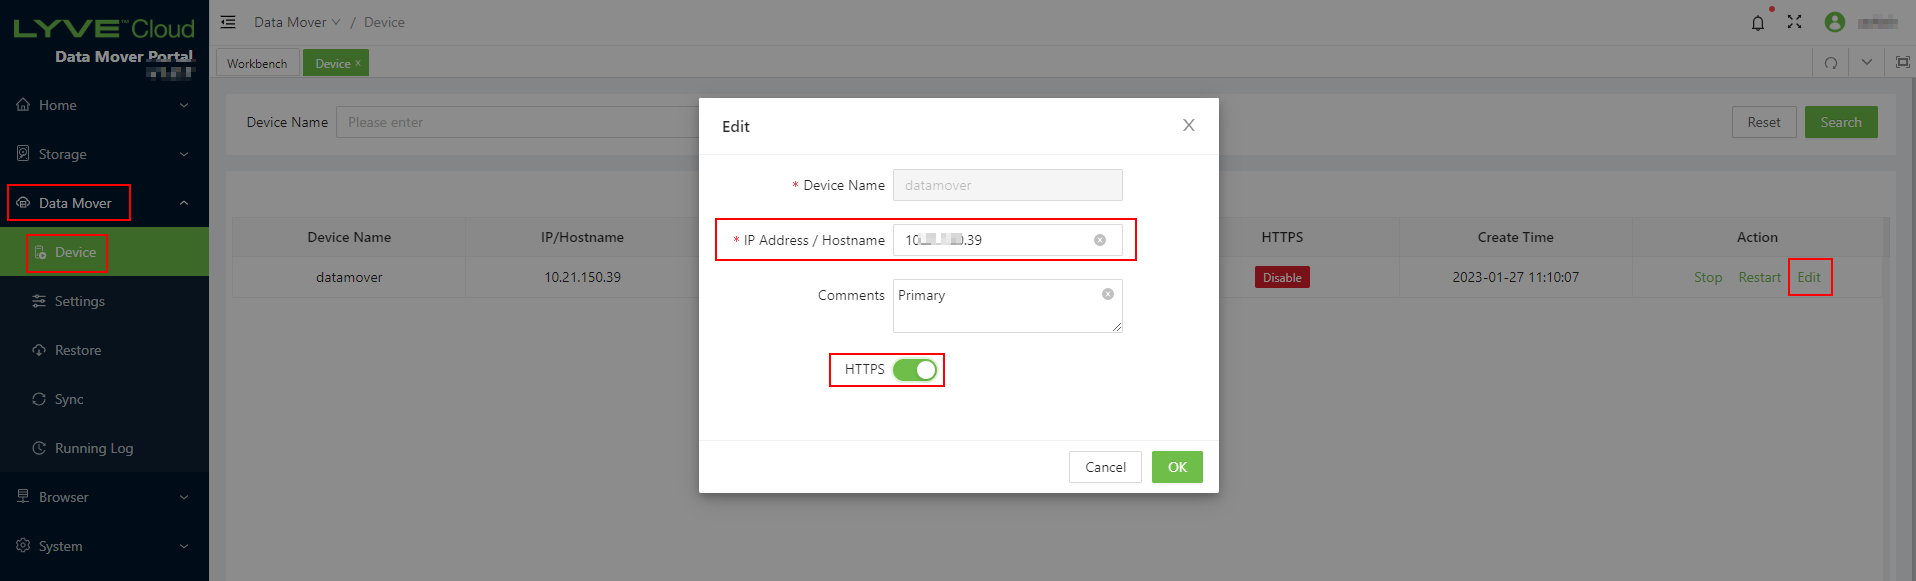
Select Data Mover from the menu, and then select Device.
Select Edit in the Actions column for the device to edit.
Edit the Portal Hostname and enable the Https and select OK.
Log in to Data Mover Portal using HTTPS.
https://PORTALHOSTNAME:8088/
Download the file from the HTTPS browser.
If you can download the files successfully, it means that the HTTPS browser is working fine.
