Setting up Data Mover
After the configuration, you must restart the server for the changes to take effect.
Tip
When the files are changed, the entire file is re-sent. The Data Mover does not support differential updates and file versioning; you can still enable it on Lyve Cloud.
The service does not delete or move any files from on-premises. However, files are copied to Lyve Cloud.
Files are stored as-is without capacity reduction features such as compression or deduplication.
Access Data Mover Portal on the web using the http://PORTALHOSTNAME or IPaddress/login.
Enter the default username and password to log in.
Username: admin
Password: 1q2w3E*
Note
If the portal hostname is not available, replace it with the IP Address.
If SSL is enabled, use HTTPS instead of HTTP.
Select Homeand then select Setup from the menu.
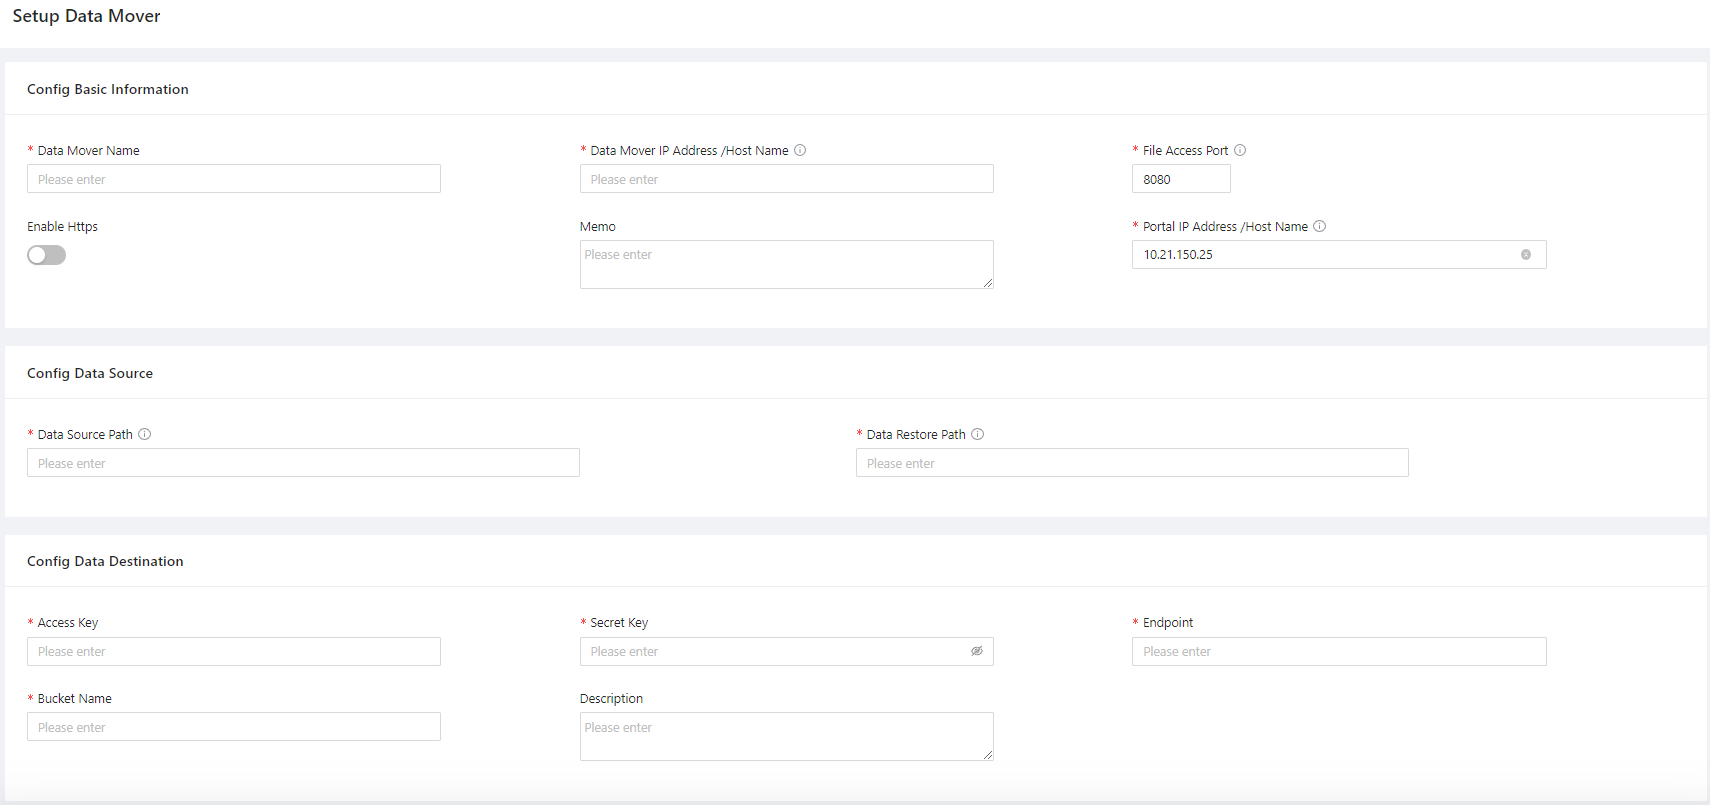
In the Configuration Information, enter the following details, and select Submit.
Note
Some information for the Portal IP address or hostname is automatically populated. Also, ensure the hostname is in the FQDN convention.
Section
Field Name
Description
Config Data Mover Basic Information
Data Mover Name
Specify the data mover name.
Data Mover Worker Host Name/IP Address
Specifies the Data Mover worker IP Address/Hostname.
File Access Port
Specify the port number of the data mover. Port number is 8080
Portal IP Address/Host Name
Specifies Data Mover portal IP Address/Hostname.
Enable HTTPS
Use the toggle to enable or disable HTTPS. You can enable HTTPS when you install SSL certificate for Data Mover.
Comments
Enter any additional details during the set up.
Data Path Configuration
Data Source Path
On-prem NAS path for data upload to Cloud.
Data Restore Path
On-prem NAS restore path for data restores from Cloud.
Note
The restore path cannot be the same as Data Source Path.
Lyve Cloud configuration
Access Key
Enter your access key. The access key displays when creating a new service account in Lyve Cloud. A service account contains the bucket credentials for the Lyve Cloud bucket.
For more information, see Creating service accounts.
Secret Key
Enter your secret key. The secret key is displayed when creating a new service account in Lyve Cloud.
For more information, see Creating service accounts.
Endpoint
Enter Lyve Cloud S3 endpoint. For more information, see the S3 API endpoints.
Currently, Lyve Cloud supports only region-specific S3 endpoints. To access buckets created in different regions in the S3 client, add an endpoint connection for each region.
Bucket Name
Specify the Lyve Cloud bucket name to move the data from on-prem.
Description
Specify the description of the data configuration.
In Data Mover Setting, change the Upload (Max) Threads and Restore ACL if required.
Upload (Max)Threads: Define the number based on your allocated site network bandwidth. Reference: 50 Threads ~ 250 Mbps.
Restore ACL (Access Control List):If required, enable to upload/restore ACL to/from Lyve if required, by default, it is disabled.
Note
Requires more CPU/memory resources when enabling ACL.
Field Name
Description
Data Source Path
Specifies the On-prem NAS path for data upload to Cloud.
Restore Path
Specifies On-prem NAS restore path for data restore from Cloud.
Note
The restore path cannot be the same as Data Source Path.
Watch Service
Specifies the max watch service threads.
No change is required for the default settings as ten threads.
Upload(Max)
Specifies the maximum threads for data upload to the cloud.
50 threads ~ 250 Mbps and WAN Internet bandwidth dependency.
Max queue produce
Specifies Max queue produced per fetch from metadata.
It will not be in the queue from 1,00,000 onwards.
Upload Part Size
Specifies the min part size in MB to divide into small files.
Thread pool
Specifies the max number of multipart upload threads in the pool
Threshold
Specifies the min file size in MB to trigger the multipart upload
Restore Thread(max)
Specifies the max restore threads for data restoration from cloud to on-premise restore path.
50 threads ~ 250 Mbps and WAN Internet bandwidth dependency
Sync Thread(max)
Specifies max Sync threads for data sync
To change the settings, see Updating Data Mover settings.
Log in to the Data Mover Portal using default credentials:
Username: admin
Password: 1q2w3E*
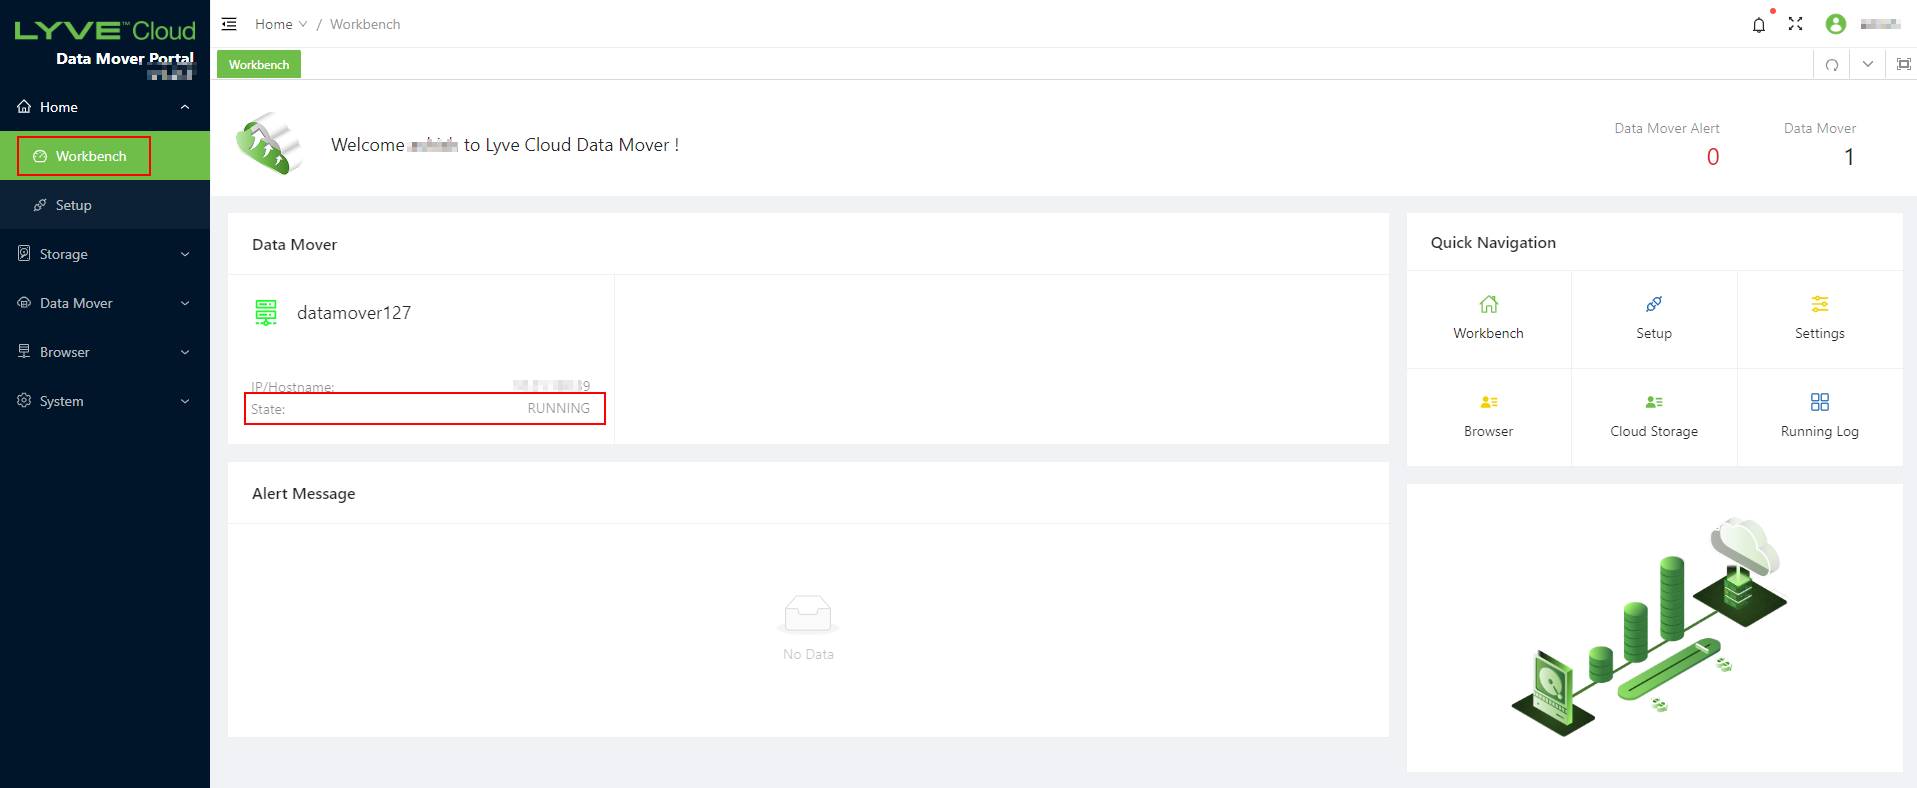
From the menu, select Workbench and verify that and the Data Mover State is Running.
Verify Auto and Manual data backup, and select Sync.
Auto data backup starts running automatically within 5 mins after each cycle and syncing new data to Lyve Cloud. For more information, see Updating Data Mover settings.
Note
Data transfer starts based on the Data Mover's first start date/time.
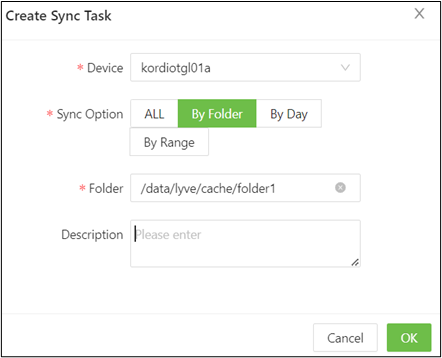
Create a sync task for manual data backup by Folder. You must create a sync task for one minute.
Once you complete the manual sync, the files are scanned and synced. You can pause, resume, and cancel the task if required.

Choose the Data Mover to upload a specific valid data source mount point folder (containing files) to Lyve Cloud.
For more information, see Using Data Mover Sync.
After the manual task is completed, select Running Log and choose Category = Manual Sync to view the result details
To view the Data Mover dashboard, select the Data Mover listed in Workbench.
File in Queue: Number of files pending upload to Lyve Cloud.
File Transfer Size: Total file size uploaded to Lyve Cloud.
Throughput Transfer Rate: Total file size uploaded/duration per sec.

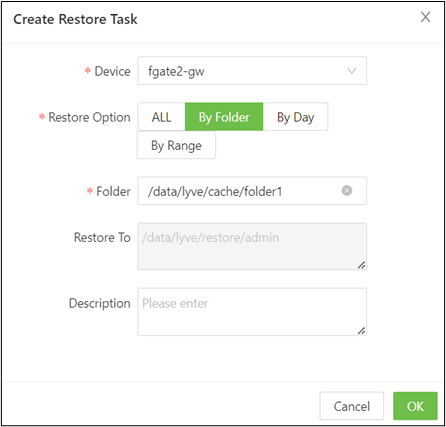
Select Restore in the left menu to verify data restore by folder from Lyve to the data restore mount point path.
Verify data restore by folder from Lyve to data restore mount point path
Select Restore and Create a Restore task by Folder (Enter the same folder name in Step 3 – Sync by Folder).
For more information, see Restoring Data.
Restore the running task, and data should be restored from Lyve Cloud to the data restore mount point path. You can pause/resume and cancel the restore task if required.
Note
Ensure that the data is downloaded to the data restore path /admin/timestamp folder, and the folder must have read/write permission. Ensure there is enough storage space for data restoration. You can manually delete the unwanted data from the restore path, if required.
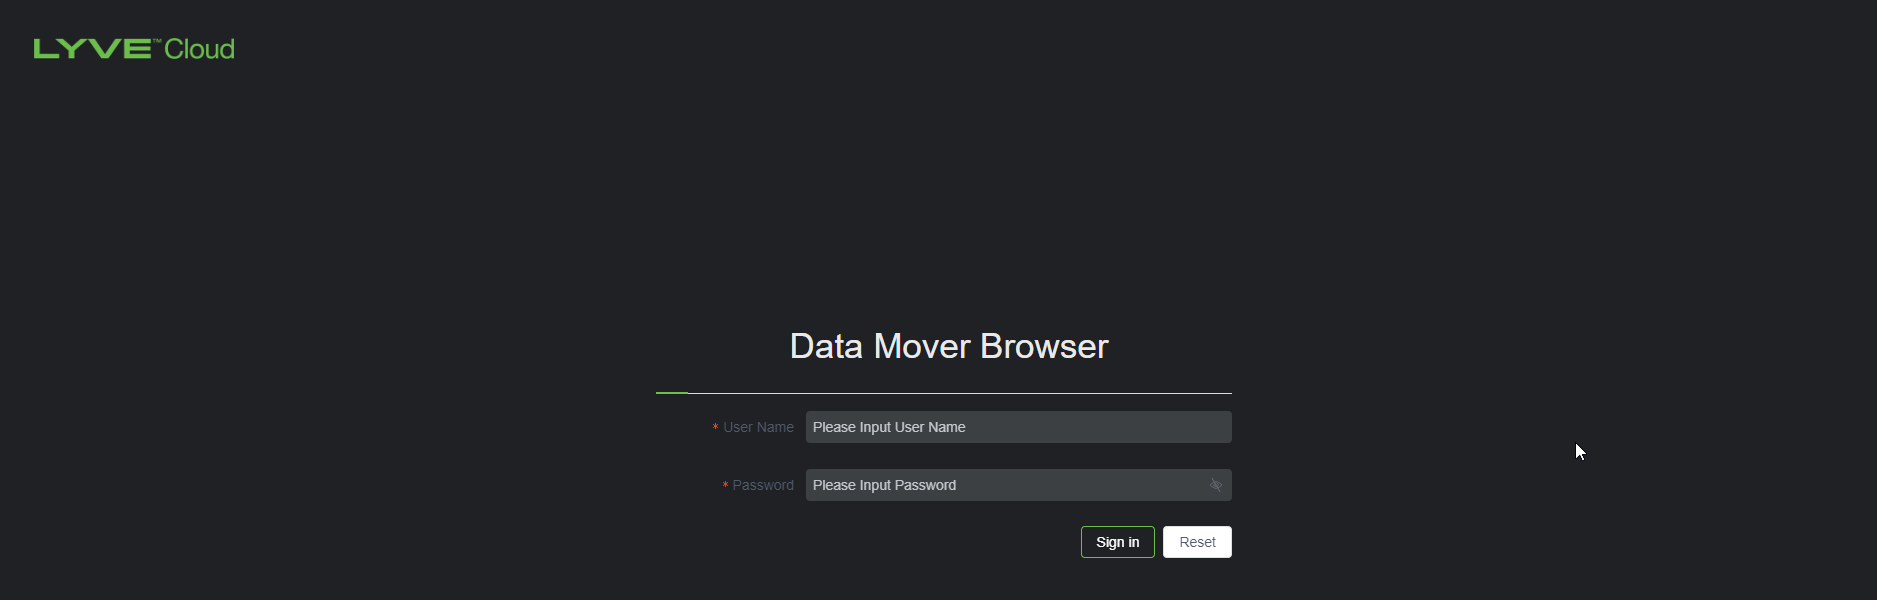
Use any of the following browsers to open the URL: Chrome, Edge, Firefox, Safari.
The following are credentials to access the Data Mover browser.
Username: admin and Password: 1q2w3E*
Access the Data Mover Browser on the web using the http://PORTALHOSTNAME or IP Address:PortNumber/login.
Enter the default user name and password to log in
Note
If the portal hostname is not available, replace it with IP Address where the default Port Number is 8088.
If SSL is enabled, use HTTPS instead of HTTP.
View your Data Mover and folder/files in Lyve Cloud.

Right-click the folder/files to download the folder/files using Data Mover Browser to your computer. Files will be downloaded as a zip file in the personal computer/downloads folder.

Note
Downloading many files simultaneously may reduce performance. The system may perform better if the file size is less than 5GB. Data Mover browser does not allow downloading files greater than 5GB.