Managing service accounts
Service accounts allow applications to authenticate and access Lyve Cloud buckets and objects. The appropriate access and secret keys are generated when you create a service account. This information must be saved during the account creation, as you cannot recover key details afterwards. You must create buckets and assign permission to buckets before creating a service account. For more information, see Creating buckets and Creating bucket access permissions.
Role-based access to manage service accounts
The following table describes access to service account features based on your role.
Actions | Admin | Storage Admin | Auditor (Read only) |
|---|---|---|---|
Create service account | ✓ | ✓ | × |
Edit | ✓ | ✓ | × |
Clone | ✓ | ✓ | × |
Delete | ✓ | ✓ | × |
Status | ✓ | ✓ | × |
List and view | ✓ | ✓ | ✓ |
Service Account Expiration | ✓ | × | × |
Creating service accounts
You must have at least one associated permission before creating a service account. To set the duration of keys generated after service account creation, you must first configure the expiration period. If the expiration duration is not set, the service account will not have an expiration set, and the secret credentials will never expire. For more information, see Setting expiration duration.
On the left-hand menu, select Service Accounts.
On the Service Accounts page, select Create Service Account.
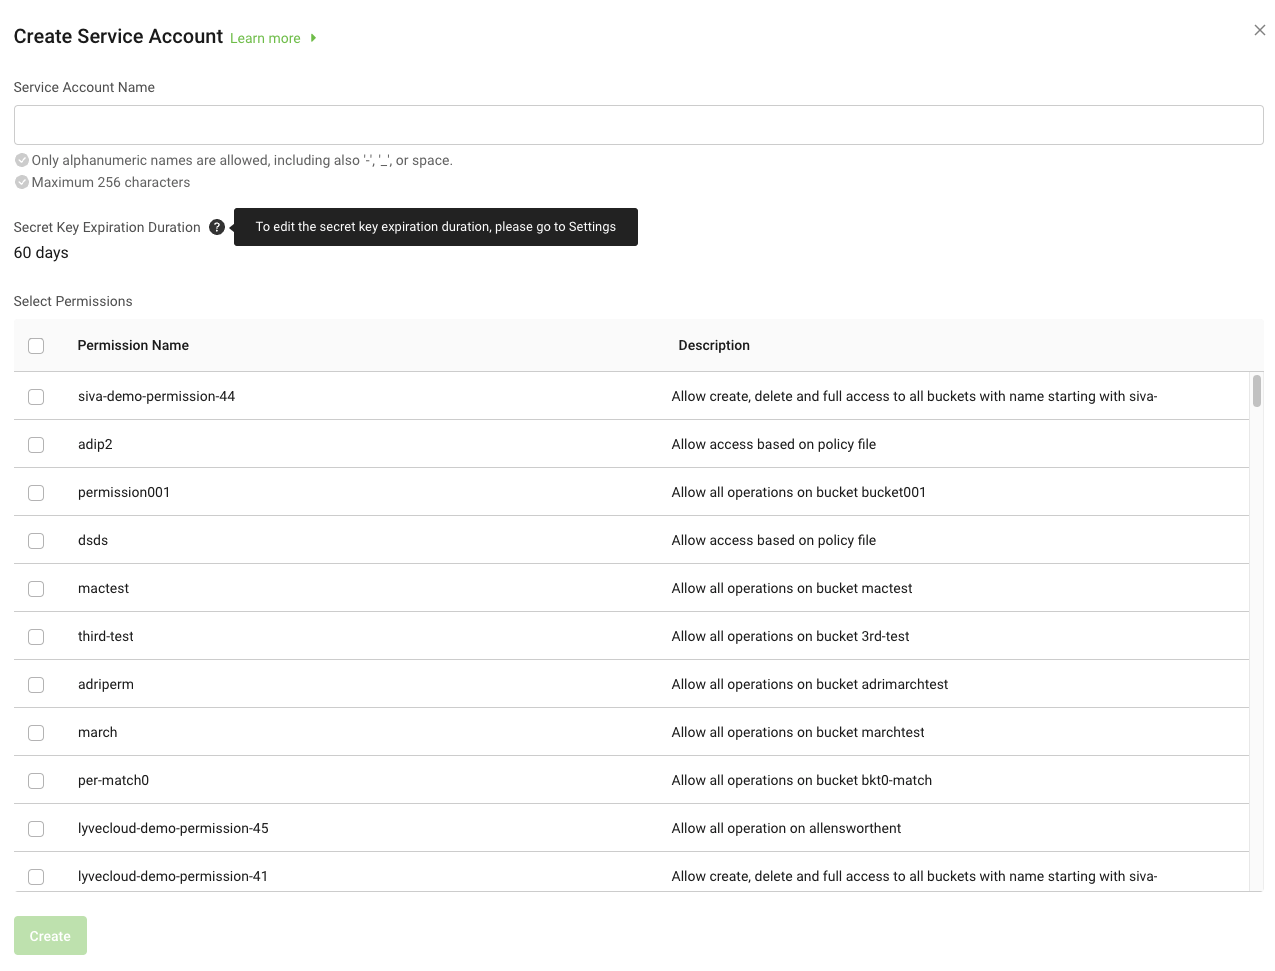
Enter the Service Account Name.
Select Permissions from the available list, and select Create.
Note
Selecting permissions with different Actions (All operations, read only), the action with the least priority is applied to the account.

Note
When you configure the expiration duration, the Secret Key Expiration Duration displays the days when the secret key expires. Otherwise, the expiration duration is displayed as Never.
To change the expiration duration, see Setting expiration duration.
If an administrator configures a new expiration duration during the same time frame as the storage administrator creates a service account, the storage administrator receives an information message about the new expiration duration.

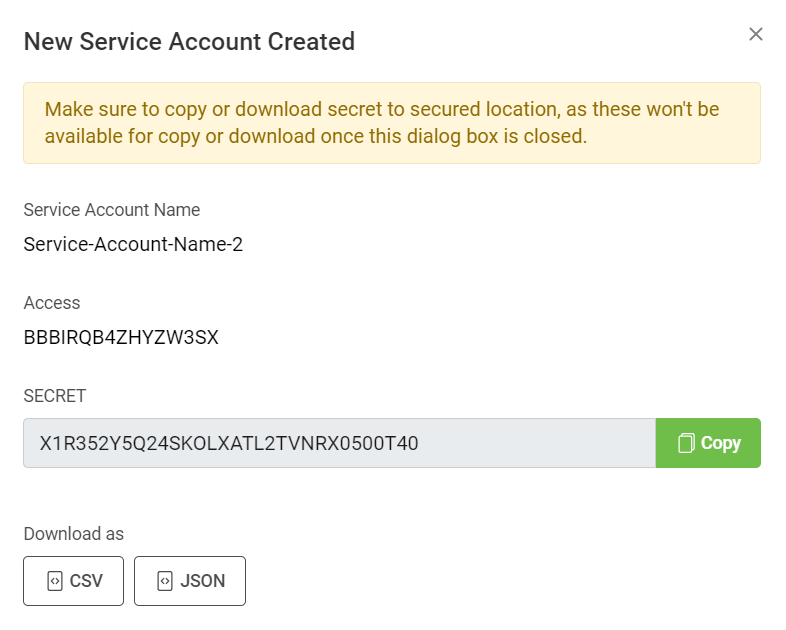
A confirmation displays the access key and secret keys required to access the bucket.
Important
Before closing the dialogue, you must copy or download the service account credentials containing the access and secret keys. Download the key in CSV or JSON format, as the secret key details cannot be retrieved later.
The following image displays a generated access key and secret key.

Notice
Once you create the service account, it may take a few minutes to replicate across other regions. If you cannot access your storage in a particular region, try after some time.
Note
Sometimes there may be a delay in creating a service account.
Viewing service accounts
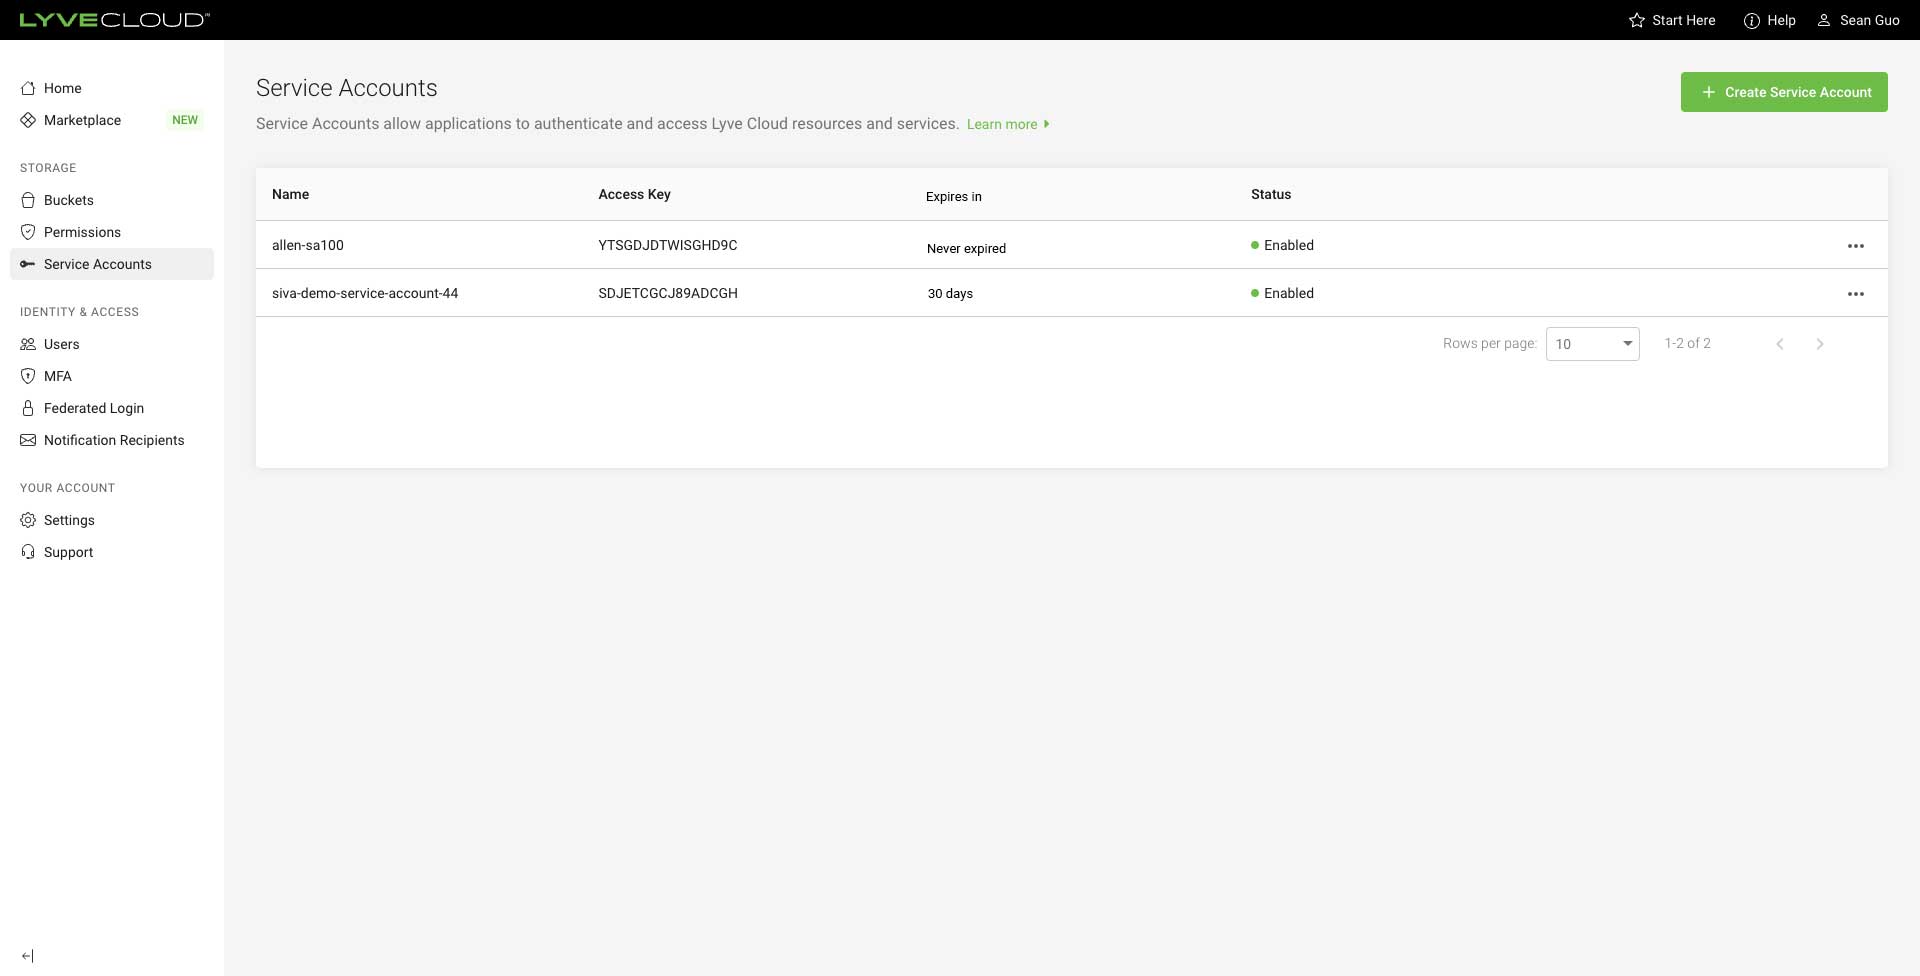
The service account list displays the Access Key, expiration period, and the status of the service account.
The Expires in column displays any of the following:
Expired: If the service account is already expired.
Never Expires: The expiration period for the service account is not configured.
Value: Displays the remaining days for the service account to expire.

On the left-hand menu, select Service Accounts.
You can view the list of service accounts. You can increase the number of service accounts per page.
You can change the name from Service_Account_1 to Service_Account_01
You can add permission3 (new permission) to permission0, permission1 and permission2 (existing). Else you can remove permission0 (existing) from the available list.
You can perform the following operations by selecting the ellipses for each service account:
Editing service accounts
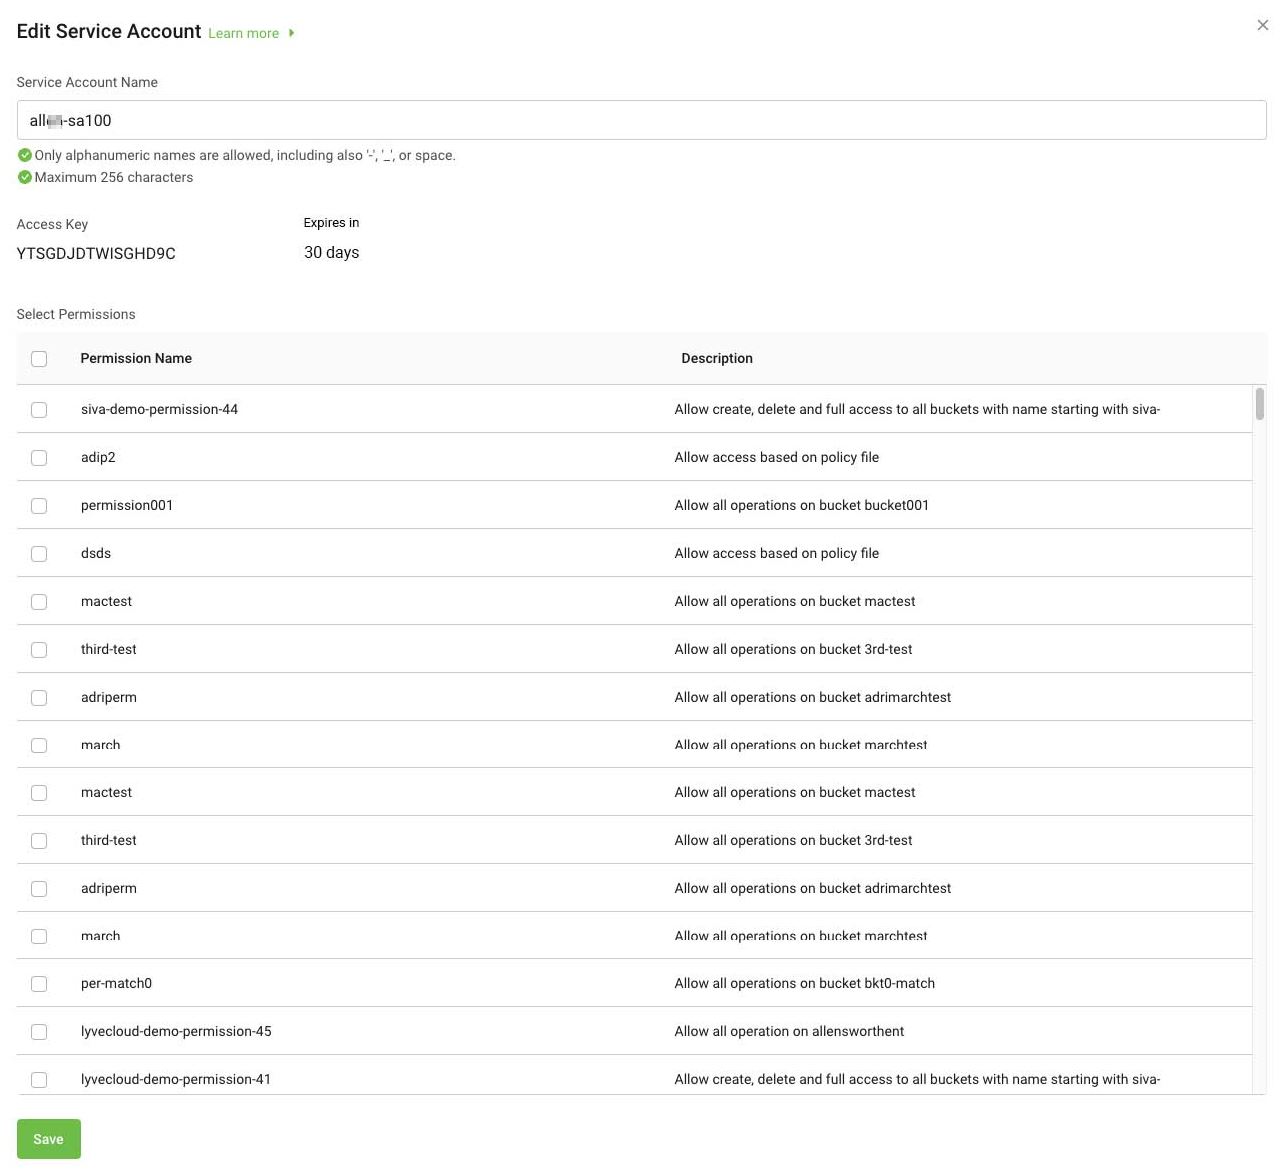
Editing allows you to edit the service account name and permissions. Editing does not generate a new secret key (credentials) for a service account. To generate new credentials, you must create a new or clone an existing service account. While editing the service account, the access key and expiration period for the service account is displayed. However, you cannot edit them. The expiration period is set when you create a service account. For more information on the expiration period, see Configuring expiration period.
Note
You cannot edit a service account if the expiration period is over.
If you edit Service_Account_1,
When you save this service account, the name and permission of the service account are changed. However, the secret credentials and expiration period remain the same as the original.
On the left menu, select Service Accounts.
On the Service Accounts page, select the service account to modify and select Edit.
In the Edit Service Account dialog, you can edit the service account name and modify permissions.
Select or deselect the permissions to associate with the service account, and scroll to view all available permissions for the account.

Select Save to save changes for the service account.
Changing the status of a service account
The service account is enabled by default. You can disable the service account anytime. Disabling a service account prevents you from using the secret key to authenticate.
Note
You cannot change the status of the service account if the expiration period is over.
On the left-hand menu, select Service Accounts to view the list of service accounts.
Set Status to Enabled or Disabled to change the account status.
Deleting service accounts
Before you delete a service account, you can disable the key, and once you are sure that the service account is no longer needed, you can then delete the key. Deleting a service account permanently prevents you from using the secret key to authenticate.
On the left-hand menu, select Service Accounts.
On the Service Accounts page, select Delete.
Select Yes to delete the service account.
You cannot restore a deleted account. However, you can reuse the service account name to recreate a new service account.
Cloning service accounts
Cloning a service account is a quick and easy way to create a duplicate service account. The values of the service account, like the service account name, associated permissions, etc., are the same as the original service account. However, it generates new access and secret keys. The name of the service account appears as a Copy of <service account name>, and you can change the name and associate different or same permission to this service account.
On the left-hand menu, select Service Accounts to view the list of service accounts.
Select the ellipses to clone the service account.
Select Clone, and edit the required fields of the service account.
New secret credentials are generated once you create a service account. For more information, see Creating service accounts.
