Setting up Lyve Cloud validated tools
This section will help you to migrate the data from your existing cloud provider to Lyve Cloud using any of the validated data migration tools.
Cloudsfer is validated for use with Lyve Cloud. Cloudsfer offers cloud data migration from on-premise to cloud or from cloud to cloud with over 20 cloud storage providers, including Dropbox, Google Drive, Box, and Egnyte.
Follow these instructions to use Cloudsfer with Lyve Cloud.
Sign in to your Cloudsfer account.
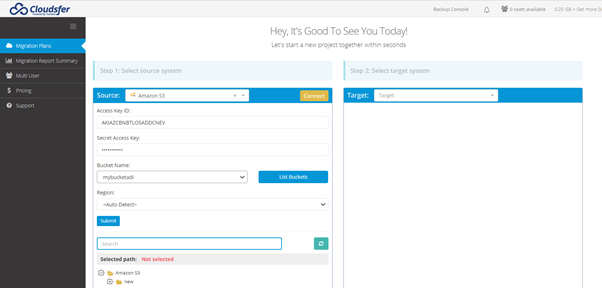
Select Migration Plans.

Select the cloud provider as a Source. For example, select Amazon S3. Enter the source credentials and select Connect.
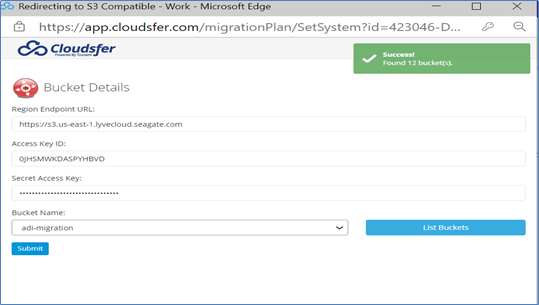
Select S3 compatible as Target in the dropdown and enter the credentials.
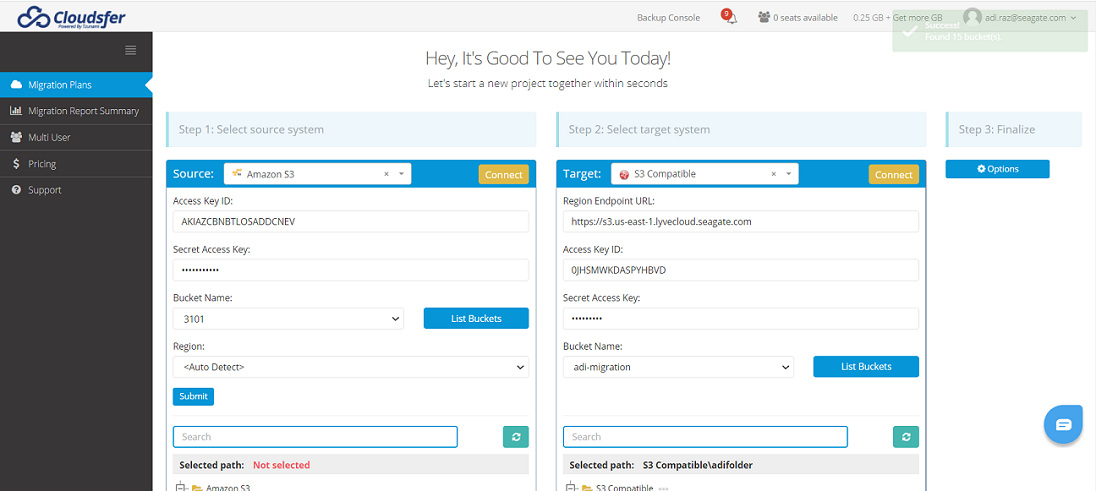
Enter the following details and select Submit.
Note
If the S3 buckets are hosted in different regions, the client talks to the us-east-1 region by default. Hence, the migration may not work other than us-east-1 region.
Region endpoint URL for your buckets
Access key
Secret access key
Select a Bucket Name from the Bucket Name list. Cloudsfer will list your buckets in the dropdown. Choose the bucket(s) to transfer the data.
Verify the source and target details on the main page.

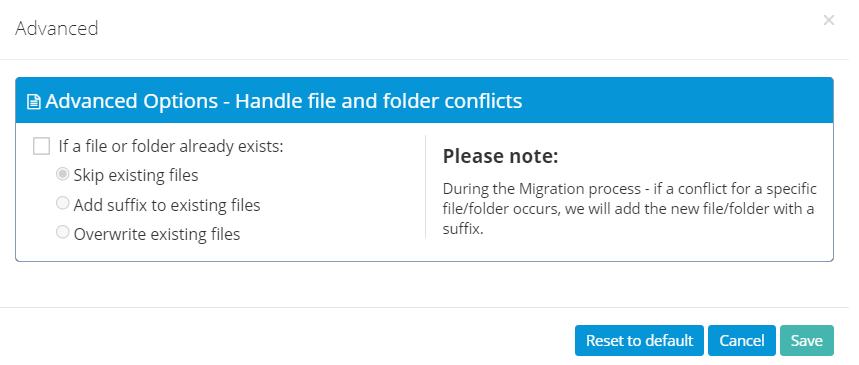
Select Options on the right side, and then select Advanced. Select these optional settings if required, and then select Save.
Cloudsfer displays the new migration plan. You can perform the following actions for the migration plan.
Change the plan name
Start the migration

Modify the migration plan settings by clicking the Actions icon and selecting the appropriate action:
Delete the migration plan
Get migration status details
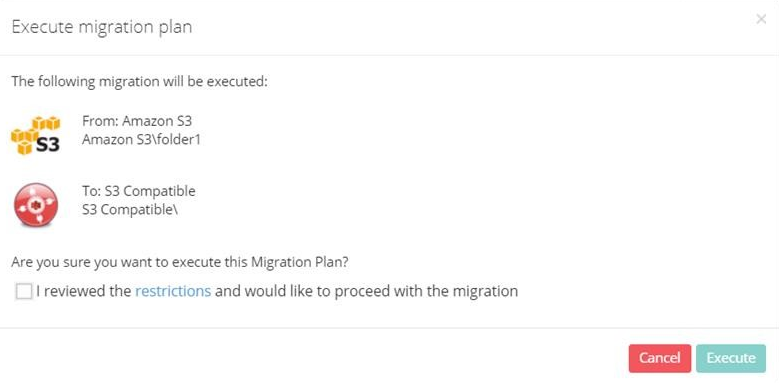
To initiate the migration, select Start now, then select Execute on the confirmation.
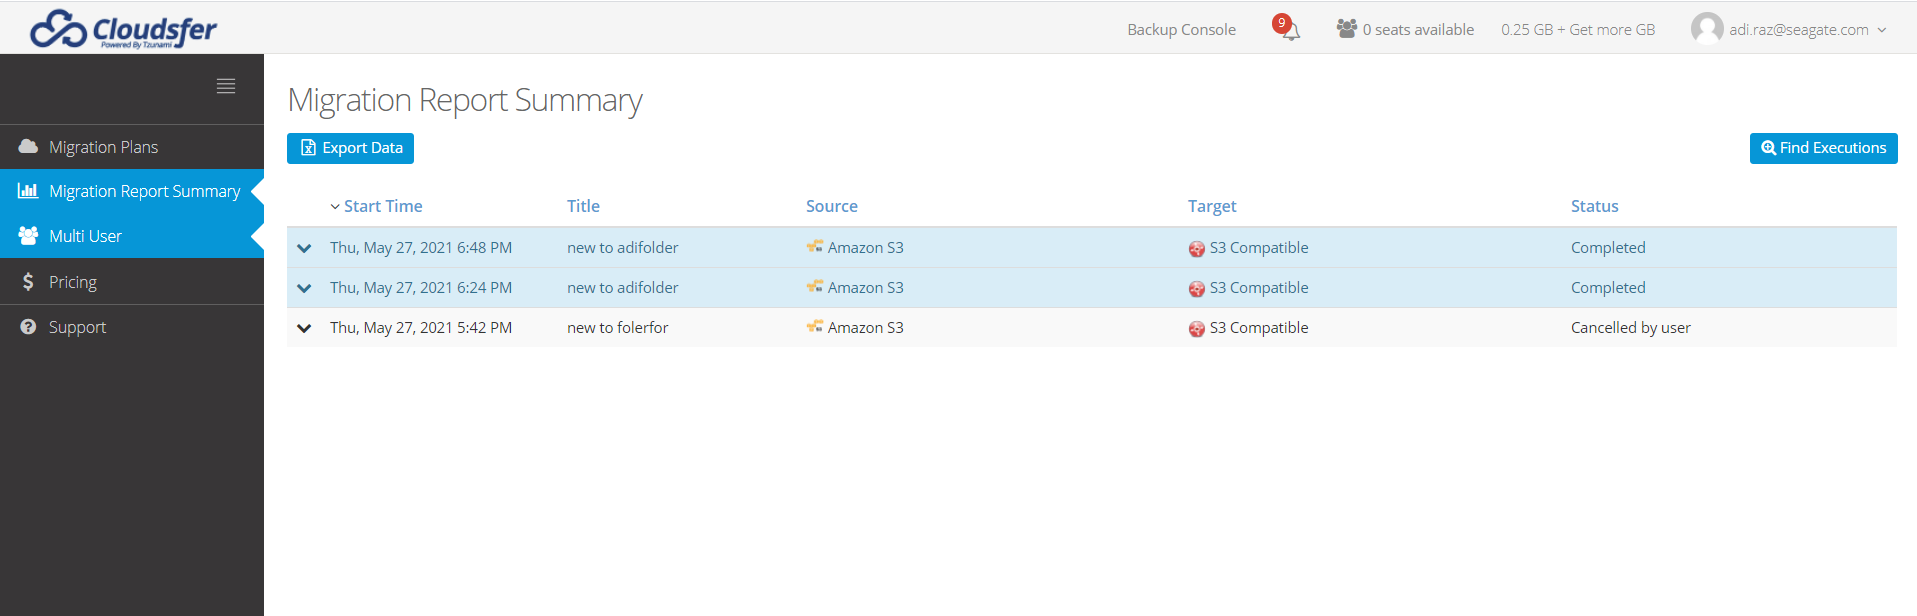
Switch to the Migration report summary and see all migration actions and their statuses.
Flexify.IO (Flexify) is a cloud storage virtualization and migration solution that allows migrating data from one cloud provider to Lyve Cloud.
To use Flexify.IO with Lyve Cloud:
Select from the list of providers, then select Add Storage.Create an account with Flexify.IO.
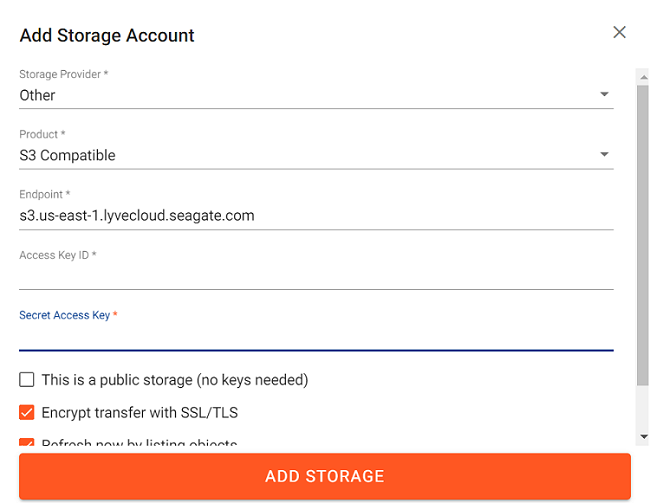
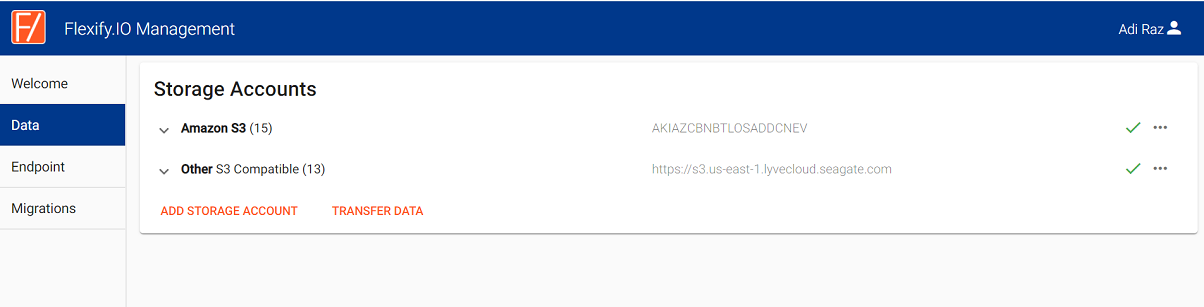
In the Flexify.IO Management Console select the Data tab, then select Add Storage Account.
Select from the list of providers, then select Add Storage.
Where,
Storage provider=Other
Product=S3 Compatible
Endpoint= Enter Lyve Cloud S3 API endpoint
Enter Lyve Cloud’s Access Key ID and Secret Access Key.
Select Encrypt transfer with SSL/TLS and Refresh now by listing objects check box.
Select Add Storage again and select your previous storage provider.
Flexify.IO supports Amazon S3, Microsoft Azure, Google Cloud Storage and many other cloud storages.
Enter the Secret Key and Access key for your previous storage provider and add the storage.
Select Transfer Data.
Chose mode (Copy or Move), buckets you want to migrate from, and Lyve Cloud as a destination.
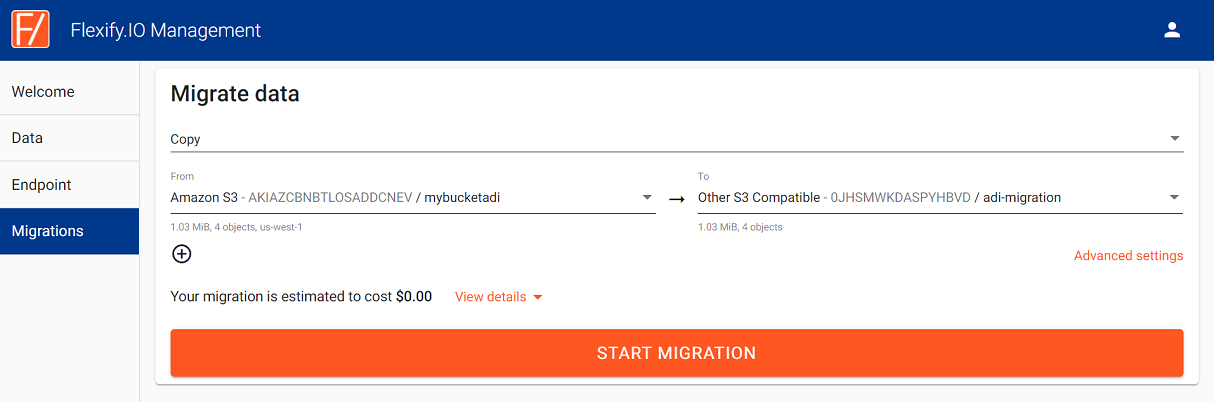
Optionally, select Advanced settings and fine-tune options such as conflict resolution, performance settings, or define a pattern to migrate only subset of the objects.
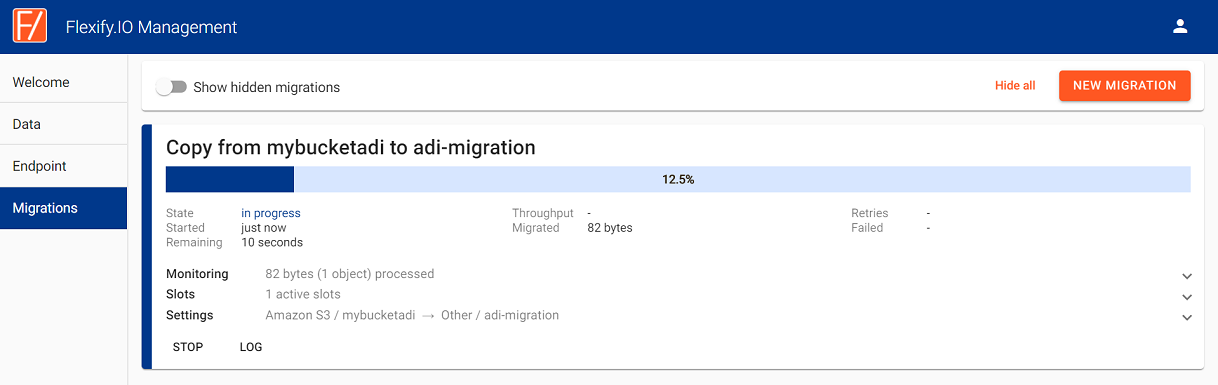
Click Start Migration and monitor the migration progress.
Couchdrops’s Movebot is a cloud-hosted service and is a next-generation cloud data migration tool that offers fast, simple and cost-effective cloud storage migrations.
To use Movebot with Lyve Cloud
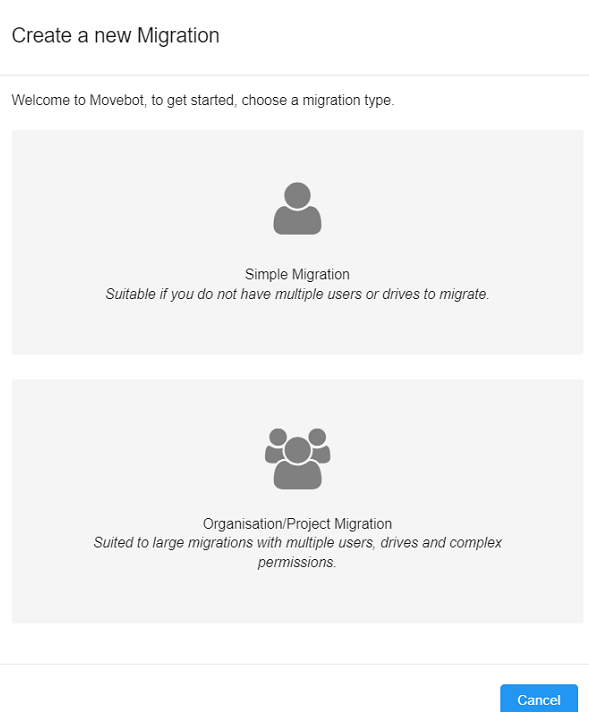
Sign in to MoveBot account and select Create new migration, then choose Simple Migration.Select MoveBot, then select Launch Migration Now.

Sign in to MoveBot account and select Create new migration, then choose Simple Migration.
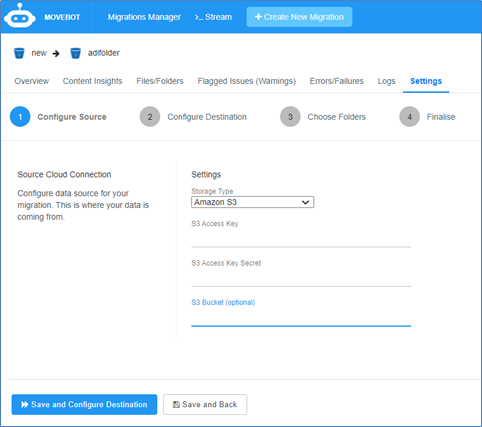
Configure the source.
Storage Type: Select the source from the list.
As an example, the image shows Amazon S3 as the Storage Type.
S3 Access Key: S3 access key.
S3 Access Key Secret: S3 secret key.
S3 Bucket (optional): S3 Bucket name to migrate.
Note
The following image displays an example of the credentials after selecting Amazon S3 as the source.
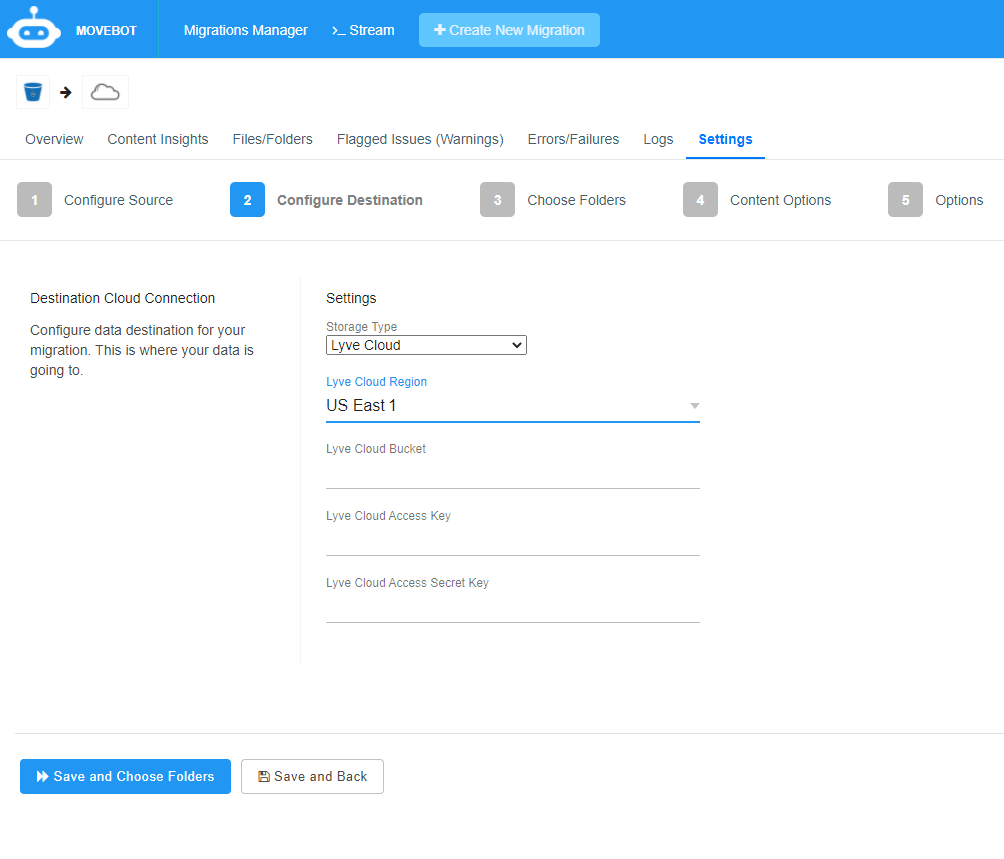
Enter the destination credentials:
Storage Type: Select Lyve Cloud as the destination address.
Lyve Cloud Region: Select the Lyve Cloud Region to be used. (US East 1 or US West 1).
Lyve Cloud Bucket: Bucket created in Lyve Cloud to store data. For more information see Listing buckets.
Lyve Cloud Access Key: Enter Lyve Cloud's access key and secret access key. For more information, see Creating service accounts.
Lyve Cloud Access and Secret Key: Enter Lyve Cloud's access key and secret access key. For more information, see Creating service accounts.
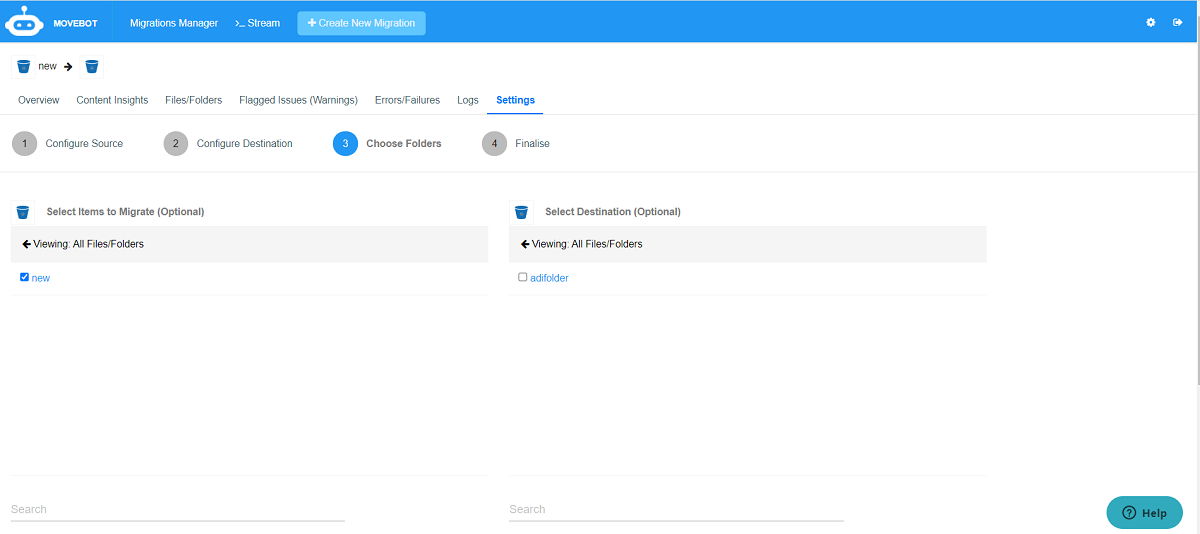
Choose and select the folders to migrate data.
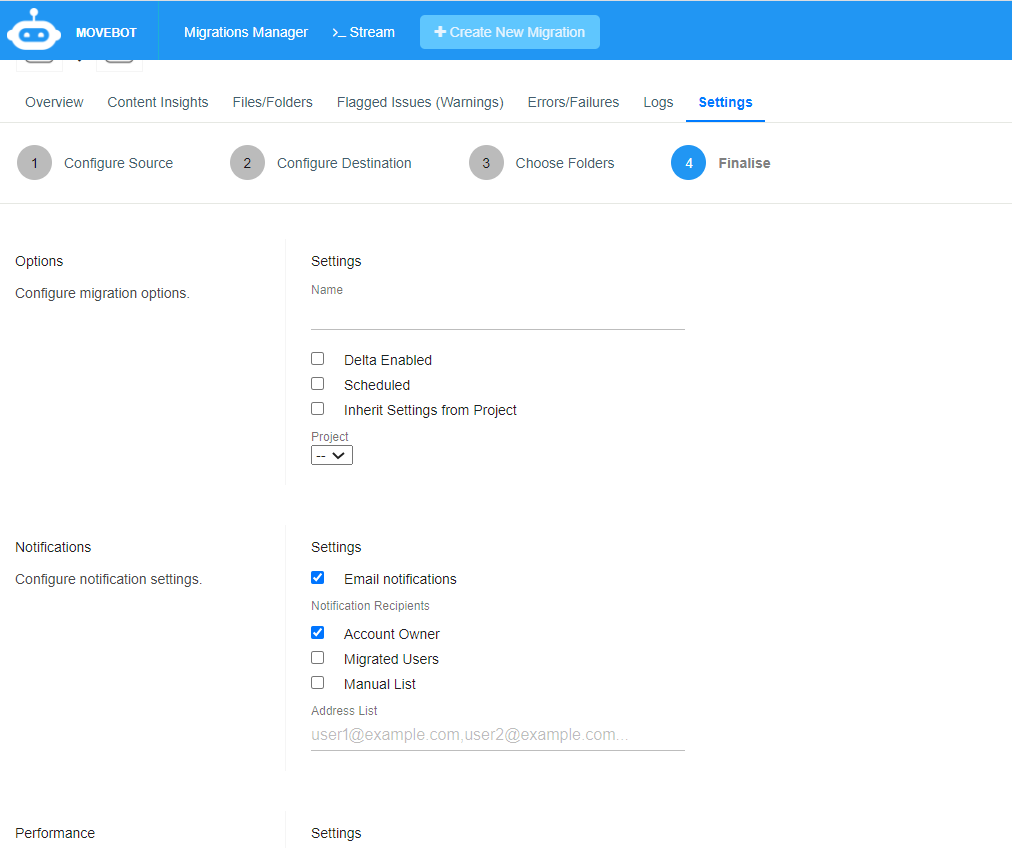
Finalize the migration process by configuring the migration options, notification settings, and performance.
Note
Due to egress fees, these may affect the total migration cost.
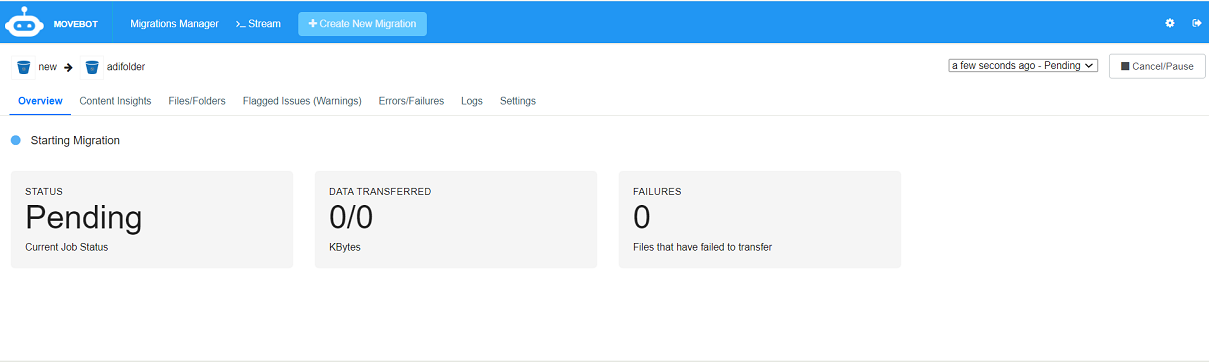
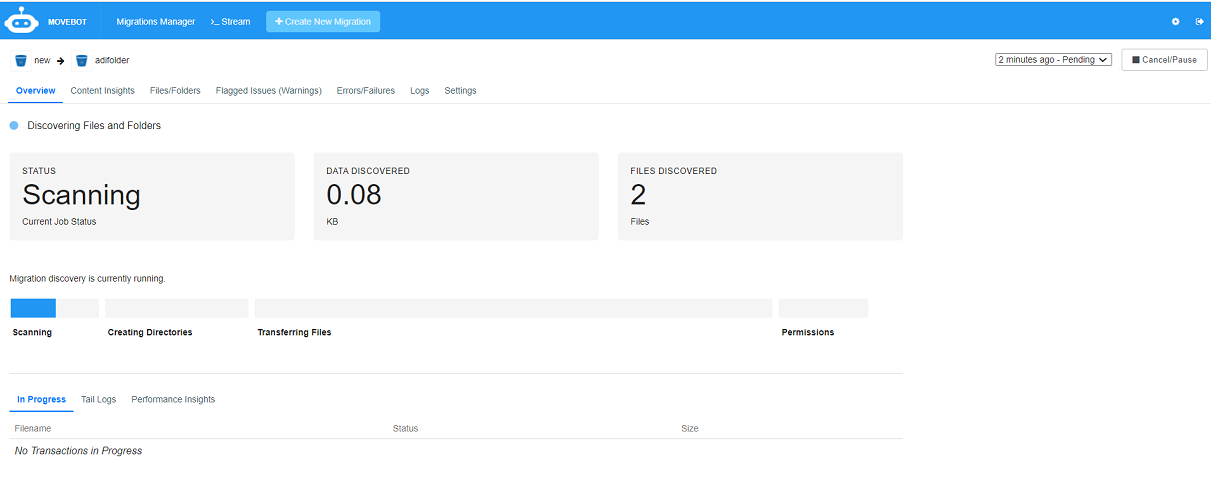
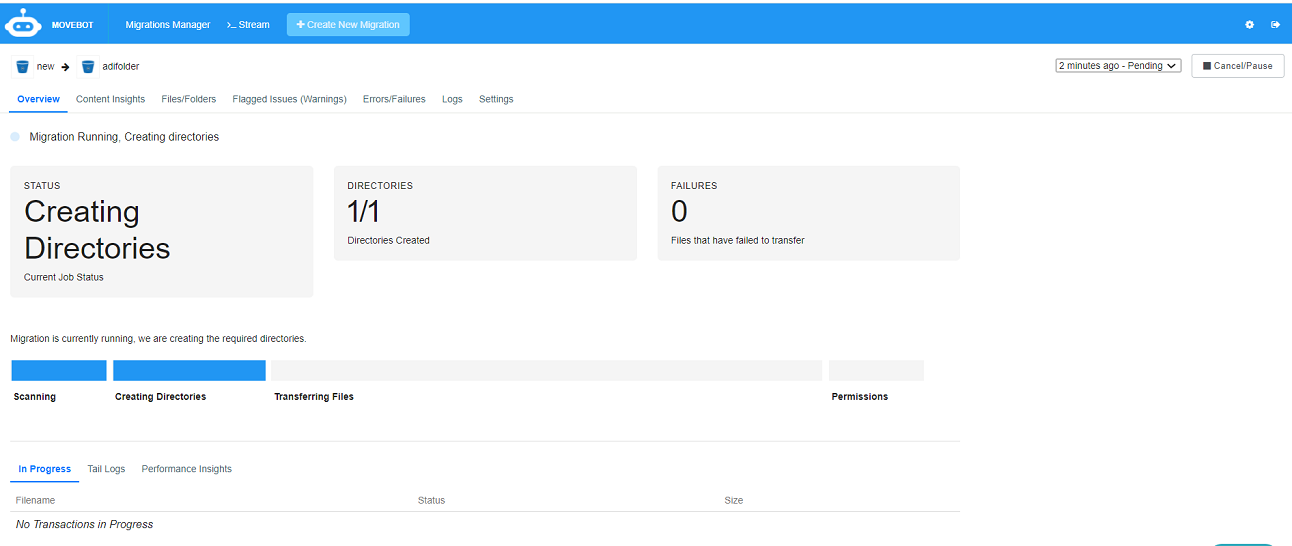
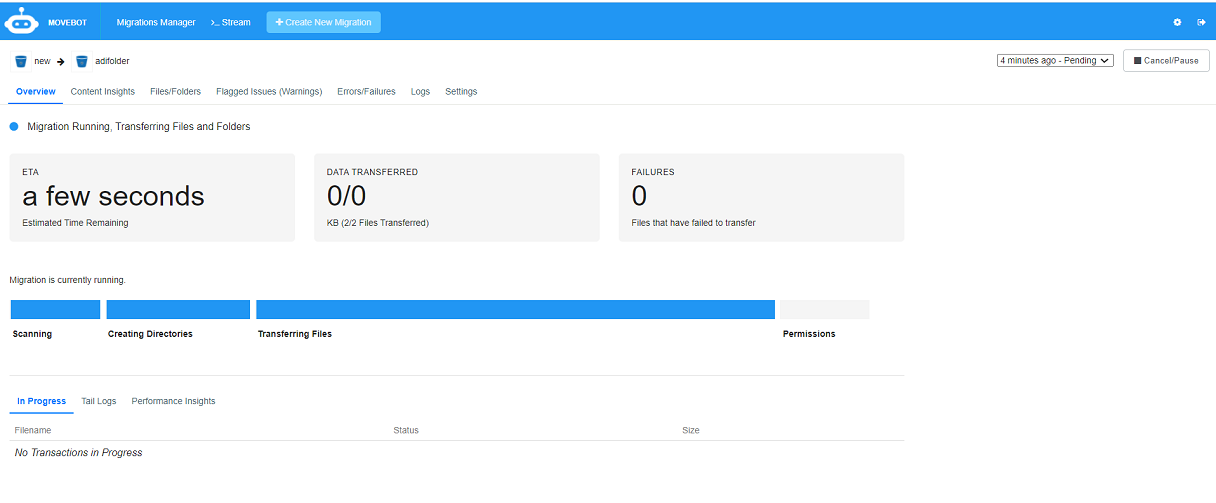
The dashboard displays the migration process. The following images display how the migration progress is tracked, where the status shows the current job status:
Pending
Scanning
Creating directories
Transitioning files and
Permissions
The Summary displays the migration status.
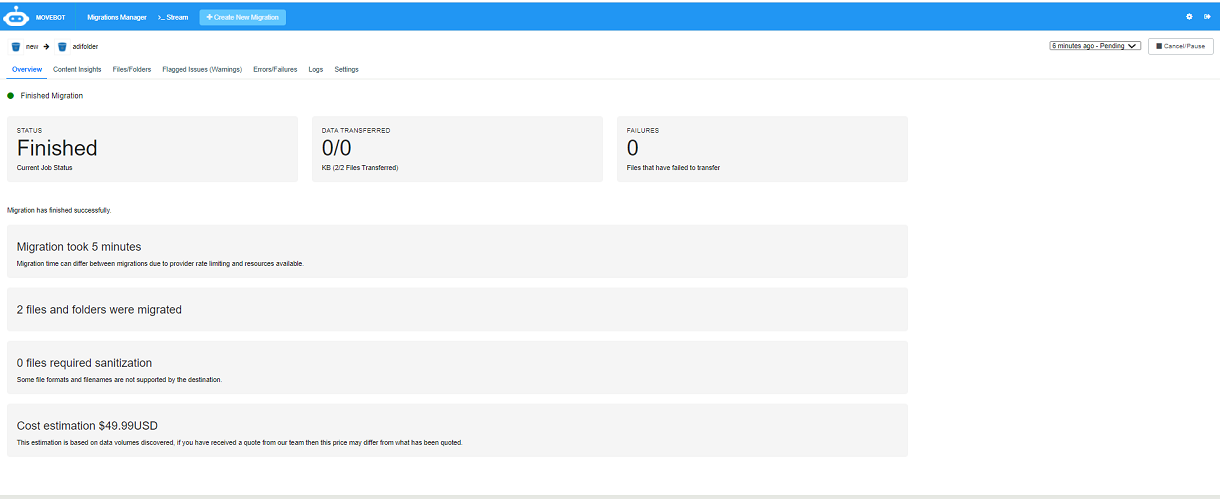
Make sure all the data is transferred to Lyve Cloud.
For example, use any third part tool like S3 browser, Cyberduck, etc. to check if the required data successfully transfers to Lyve Cloud.
The Movebot dashboard displays all the configured data migration, and the migration is available to execute again.
The AWS CLI (Command Line Interface) tool is certified for use with Lyve Cloud.
Prerequisites
To use the AWS CLI with Lyve Cloud you need to download and install AWS CLI on a host, you cannot use AWS CLI to move data directly from a cloud to another cloud. Before you start the migration, first download the data locally from the source cloud, then upload the data to the Lyve cloud.
These instructions guide you to download data locally from AWS S3 and upload it to Lyve Cloud:
Use the configure command to create an additional profile to access Lyve Cloud bucketsTo access your AWS S3 buckets with the CLI, use the configurecommand. The configure command will bring up a series of prompts that creates the default profile.
$ aws configure
Enter the AWS S3 access key and secret access key.
AWS Access Key ID [****************aa]:

AWS Secret Access Key [****************aa]:

Default region name [a]:

Default output format [a]:
Use the configure command to create an additional profile to access Lyve Cloud buckets
aws configure --profile lyvecloud
Enter Lyve Cloud's access key and secret access key.
AWS Access Key ID [****************aa]:

AWS Secret Access Key [****************aa]:

Default region name [a]:

Default output format [a]:
Run the aws configure list-profiles command to see all your configured profiles.
aws configure list-profiles

default

lyvecloud
Run the command to transfer all files from the AWS bucket to the local directory:
mv- for moving the object(s)
cp-for copying the object(s)
aws s3 cp s3://<source_bucket>/ <local_directory> --recursive
Following is an example of the copy command
aws s3 cp s3://3101/ C:\222 –recursive
Transfer all files from the local directory to the destination bucket at LyveCloud
aws s3 cp <local_directory>/
s3://<destination_bucket>/ --recursive --profile lyvecloud
--endpoint-url=https://s3.us-east-1.lyvecloud.seagate.com
aws s3 cp C:\222\ s3://adi-migration/ --recursive --endpoint-url=https://s3.us-east-1.lyvecloud.seagate.com
Executing the command uploads all the three local files.
Note
When listing objects using the AWS CLI S3 ls command or S3 API list-objects command in a bucket with object immutability enabled, the output will only display the current active object version. Previous object versions will not appear using these commands.
For instance, if you have deleted an object, these commands may show the bucket as empty. To display previous versions of objects, use the following command:
$ aws --profile <YOUR RPOFILE> --endpoint https://s3.us-west-1.lyvecloud.seagate.com s3api list-object-versions --bucket <YOUR BUCKET> --prefix <PATH TO OBJECTS>;
The output is in JSON format. Look at the Key and VersionID to identify objects and versions. If you are unable to view your bucket contents with AWS list-buckets command, you must verify that your bucket has the correct permission settings. Check to verify that your permission settings apply to all buckets or use a consistent prefix for your buckets that will determine consistent permissions.
This topic covers data migration from an existing cloud provider to Lyve Cloud. You must install rclone on Linux, Windows or other UNIX systems. rclone reads data from the source cloud and sends it to Lyve Cloud. For more information, see, Using rclone with Lyve Cloud.
Set the Source and the Target as remote. For more information, see Connecting to Lyve Cloud from Linux.
Sync the Source and Target remote using rclone sync command.
rclone sync <source remote name>:path <target remote name>:path
Once the source and the target are synced, all the data from the source is copied, removed or migrated to the target remotely.
You can use the following flags in the command to check the status of the sync/copy/migration.
--progress: Displays the real-time transfer progress
--interactive: Enables interactive mode and displays interactive for every action taken
StorageDNA Fabric (SDNA) is enterprise data management software that consists of a controller and data managers. Both components can be deployed locally or in the cloud on physical or virtual Linux computers. One of its features is Cloud-to-Cloud data migration.
This topic covers migrating data from Azure Blob Storage to Lyve Cloud via the SDNA Fabric Object Migration feature. In this section, Azure Blob Storage is considered as one of the examples from various storage providers. Some of the steps may differ slightly depending on the source cloud provider. However, the overall process will be the same.
To migrate the data you need to:
Creating a configuration
You must create source and target configurations for the cloud providers. In this case, we have Microsoft Azure as a source cloud provider and Lyve Cloud as a target cloud provider. You can attach more than one bucket to the configuration.
Before you start to configure the source for Microsoft Azure, ensure the following:
Login to your Azure portal and Lyve Cloud console.
Copy the secret and access key value. These keys are required for source and target remote configurations.
Microsoft Azure: Locate your storage account in Microsoft Azure and Copy the value from the Key1 field under Access Keys.
Lyve Cloud: Copy the following:
Access key and Secret key: For more information, see Creating service accounts
Bucket S3 endpoint URL: The endpoint is a URL specific to the bucket region.
In this case, the bucket is in the US west region so the endpoint is https://s3.us-west-1.lyvecloud.seagate.com. For more information, see S3 endpoint URL
Region: For more information, see S3 API endpoints
To manage your remote configurations:
Login to DNA Fabric using credentials and then select Settings.
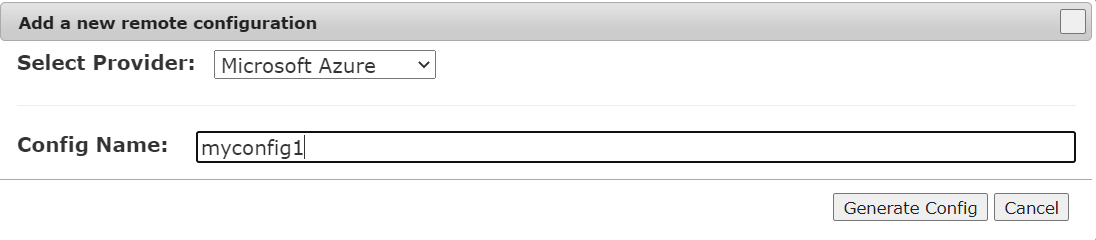
In Remote Configurations, select Add to add a new remote configuration:
Select Provider like Microsoft Azure from the drop down.
Enter the Config Name.
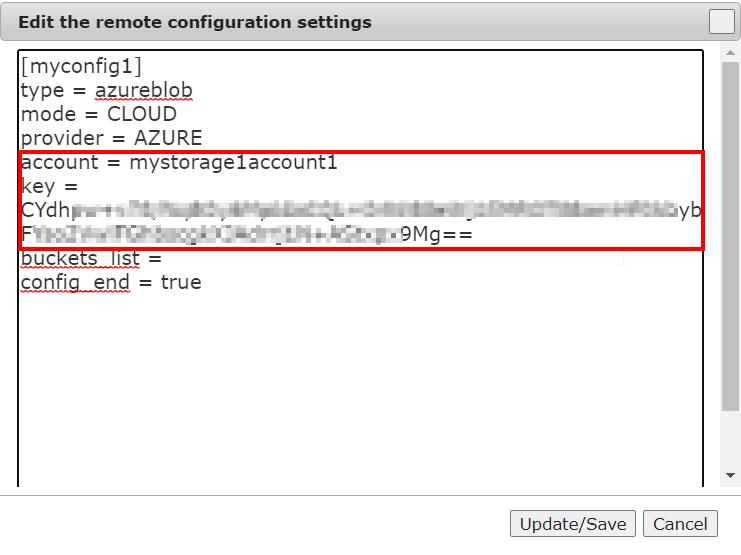
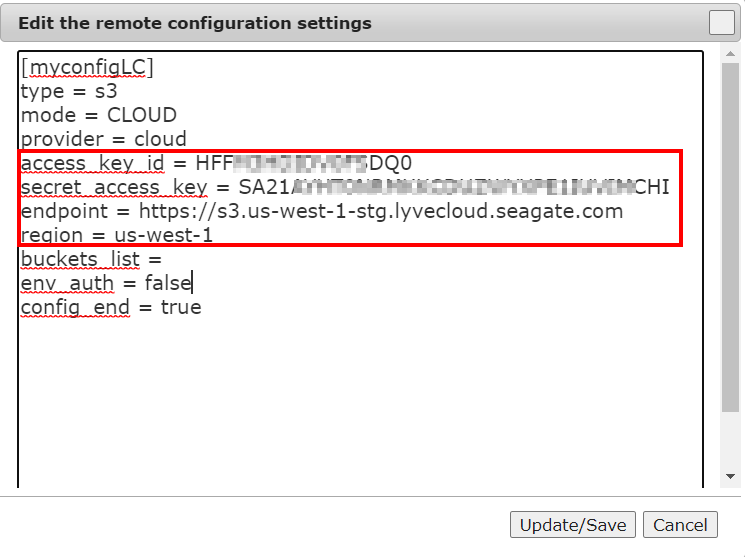
In the Edit the remote configuration settings, update the following:
account: Microsoft Azure account name
key: Microsoft Azure account access key. To locate the access key, see Pre-requisites for Microsoft Azure and Lyve Cloud.
Follow the first two steps as mentioned in Source remote configuration.
In the Edit the remote configuration settings update the following:
Access key
Secret Key
Endpoint
Region
Creating pools
Pools are created to migrate data from one cloud to another. You must create a remote pool for source and target providers before creating a project.
One pool for source and target allows you to migrate objects for that bucket (container), so if there are more buckets to migrate, you must create a source and target pool for each bucket.
For example: If there are four buckets (B1, B2, B3, B4) in Microsoft Azure and you want to migrate all four buckets to Lyve Cloud. In this case, you must create four pools for the source and four pools for the target. In each pool, you select the configuration and select the buckets available for the configuration.
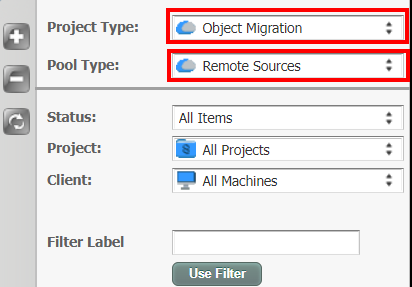
Select Pools tab.
In the Project Type, select Object Migration from the list.
In the Pool Type, select Remote Sources from the list.
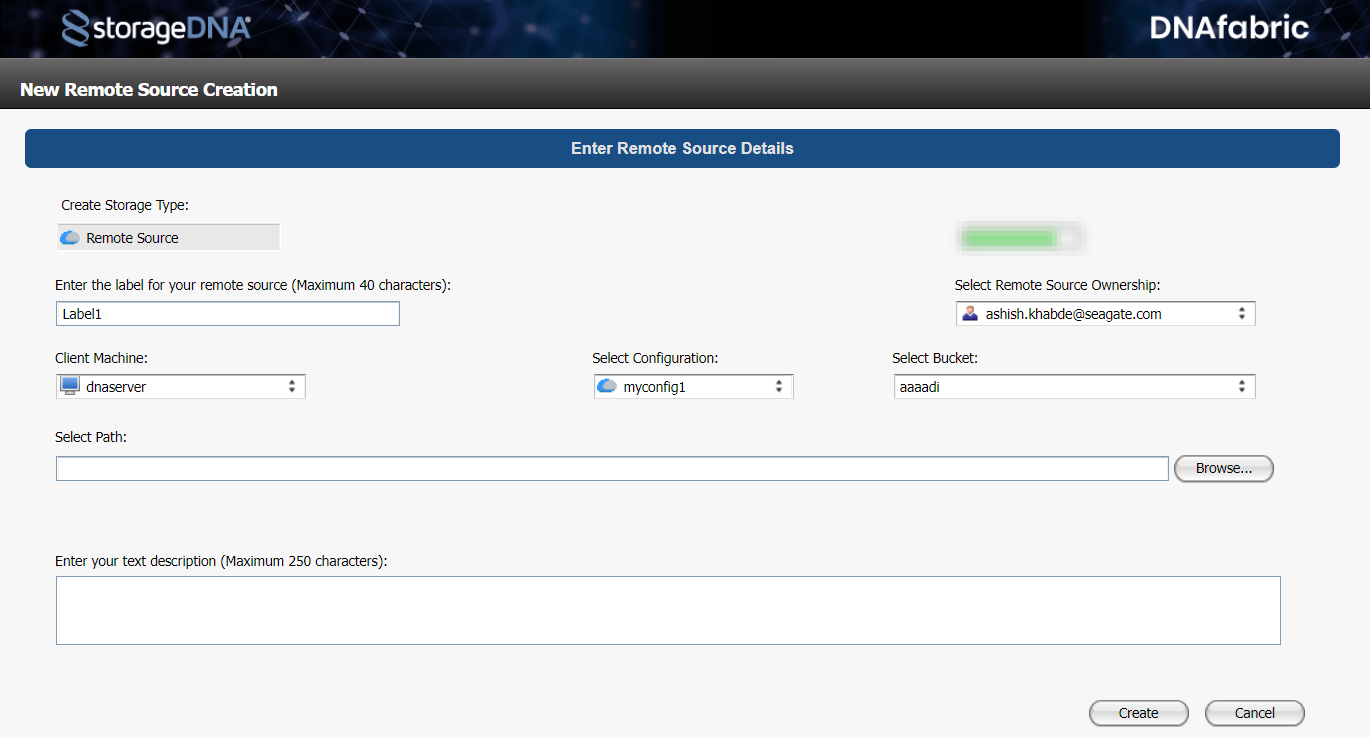
Click + to create a new storage object and enter the following:
Label of remote source: Enter name of the remote source. This label appears on the project selection screen.
Client Machine: Select the client machine.
Select Configuration: Select the configuration of the source cloud. For information on source configuration, see Creating configuration.
Select Bucket: Choose the bucket to migrate data. The bucket list displays all the buckets (containers) available in Microsoft Azure.
Creating projects
Migration is conducted by defining projects. When creating a project, you specify the source and target with buckets or sub-folders, also called a prefix in S3 terminology.
You must create different projects if more than one bucket is required to migrate.
For example, if you have two buckets (B1 and B2) in Microsoft Azure that you want to migrate separately in Lyve Cloud, you must create two projects. Each project has one source and one target bucket attached. Once the project is created, you must run this project to start the migration.
In the Projects tab, select + to create a new project.
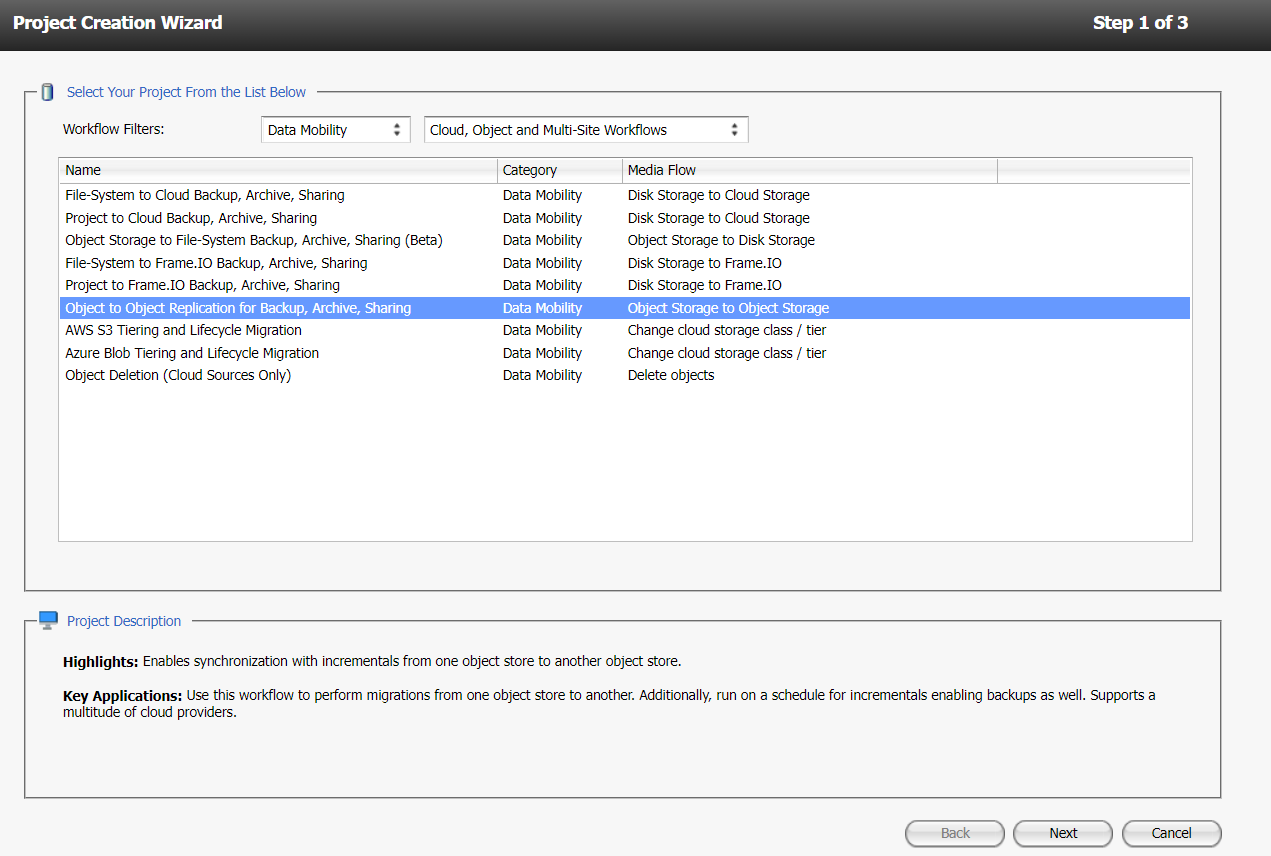
In the project creation wizard:
In the section, Select Your Projects from the List Below select the required option and click Next.
In the Workflow filter, select Data Mobility and Cloud Object and Multi-Site Workflows and then select Object to Object Replication for Backup, Archieve, Sharing from the list.
Select the following and select Next.
In The Basics section:
Enter the name of your project
Select the owner of the project from the list
Enter the project Description
In the Source Machine section:
Select the source and target machine.
Select your disk source and cloud target from the list.
Enter the credentials to complete the job creation on the selected system and select Finish.
After the project is created it appears in the list of projects in central projects.
Running projects
You must run a project manually. Specify the source data within the source bucket container.
In the Projects tab, select the project you want to run.
Select Store, and verify the Store Job Summary and Folder Selection before you start running the job.
If you want to migrate the entire source bucket in Add Folder, specify /’ as source data. If you want to migrate one or more subfolders within this bucket, specify the subfolder names.
In the Action Toolbar select Start Job to manually run the job.
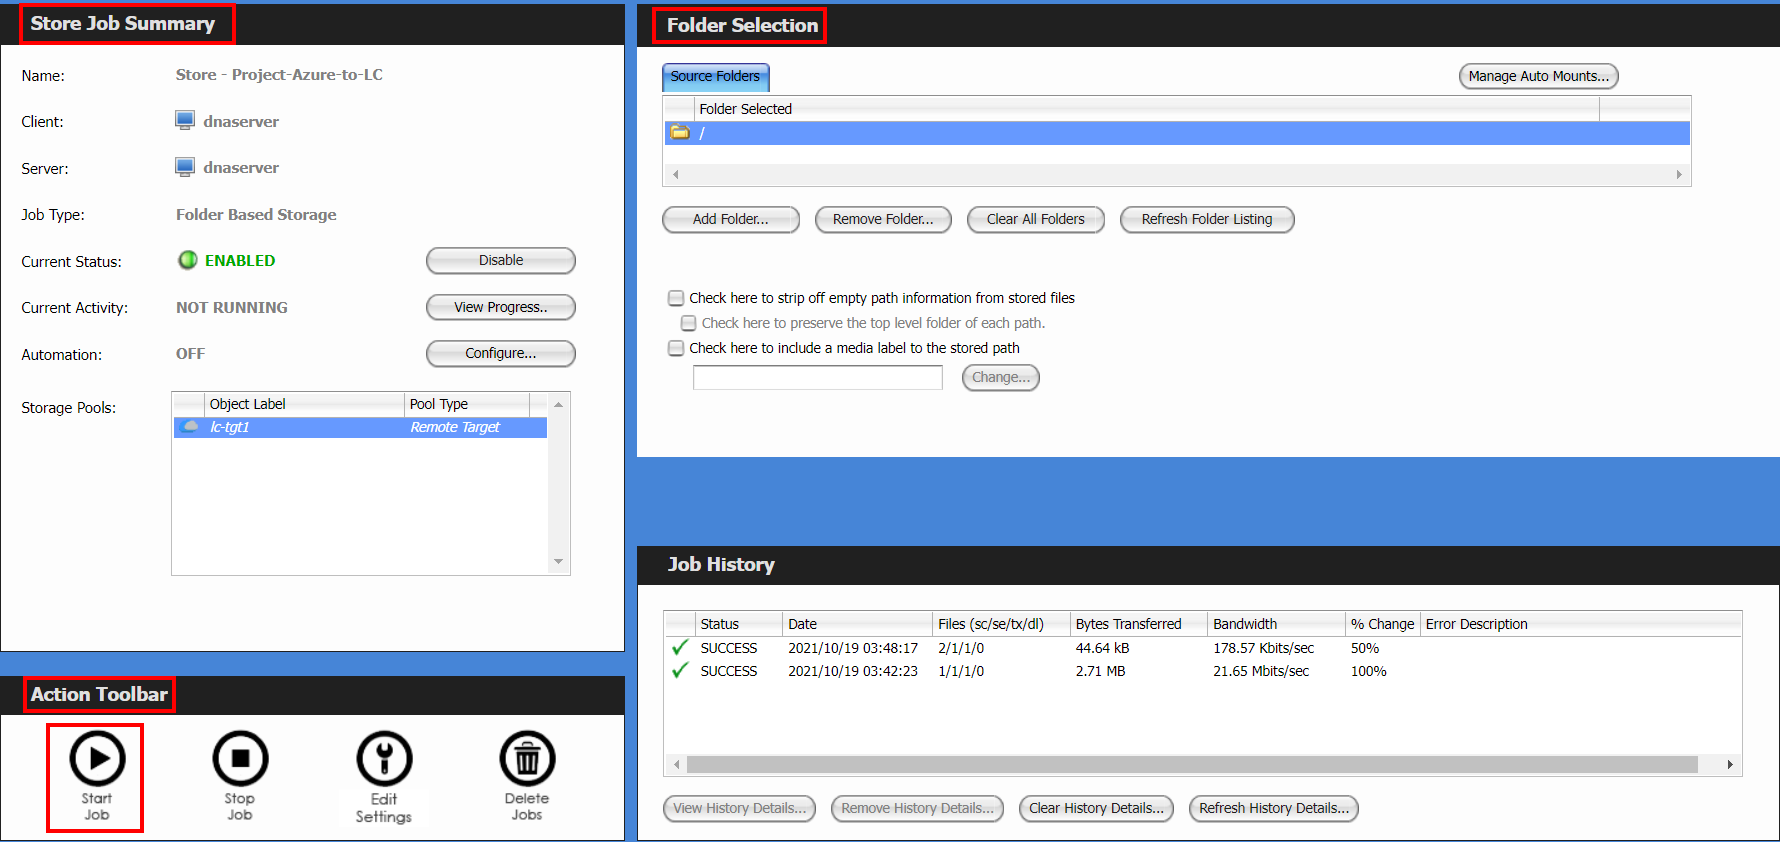
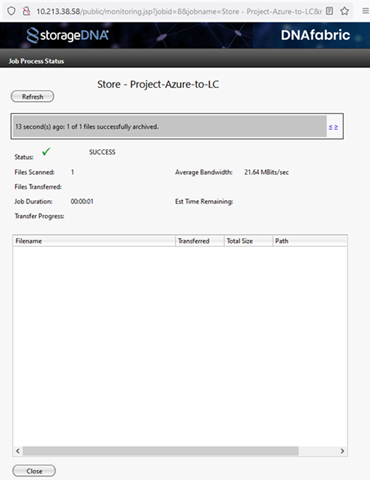
The Job Process Status diaglog displays the status of the project where the running job can be monitored.
After the job is complete, you can view the contents of any S3 client in the target bucket. The data remains in the same format as within the source bucket.