Lyve Cloud with Dell Networker Data Domain
This section helps you to integrate Dell NetWorker and Data Domain Cloud Tier with Lyve Cloud.
The following are prerequisites to add a cloud bucket to the Data Domain Cloud Tier. For more information on Data Domain prerequisites, please refer to the DDOS Administration Guide.
A configured Lyve Cloud storage account.
An enabled and configured Cloud Tier.
A Lyve Cloud endpoint SSL CA certificate (See Retrieve Lyve Cloud SSL certificate of Lyve Cloud Endpoint for more information)
You can achieve the configuration for Lyve Cloud and Dell Networker in two simple steps.
Add Lyve Cloud bucket to Data Domain Cloud Tier.
Create a Data Domain Cloud Tier device in NetWorker.
Import Lyve Cloud endpoint CA certificate.
Login to the Data Doman System Manager portal and proceed with the following:
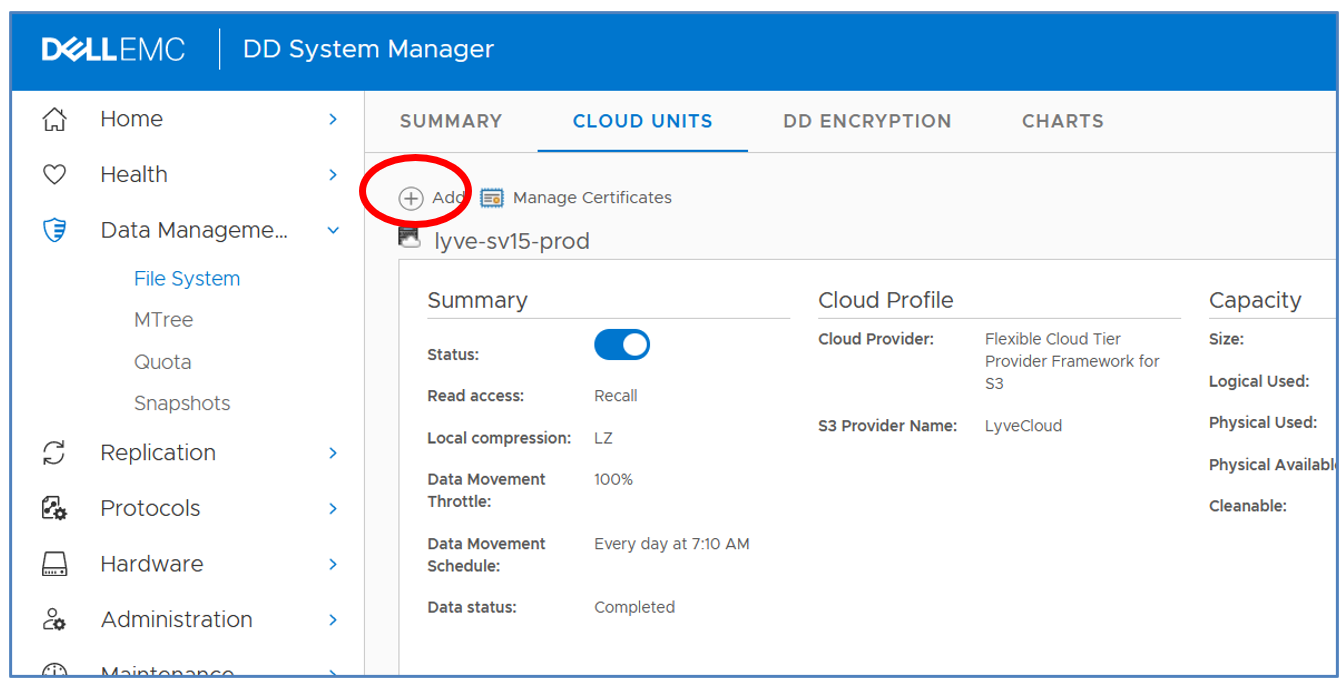
Select Data Management > File System > Cloud Units.
Select Manage Certificates from the toolbar.
Select Add from the Manage Certificates for Cloud dialogue box.
Choose I want to upload the certificate as a .pem file.
Browse to locate the certificate file, then select Add.
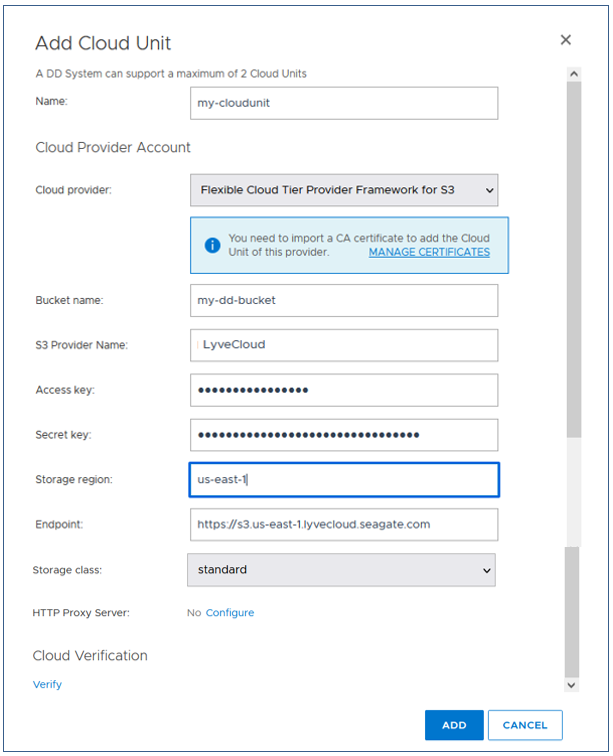
Add a Lyve Cloud bucket.
To add a Lyve Cloud bucket to Data Domain Cloud Tier, select Add to enter the Storage region and select Add to complete. The new Cloud Unit should appear.
NetWorker can protect data by generating a copy of data and sending it to a remote destination. The remote copy (archive copy) is kept off-premises using Cloud storage. For quick recovery, you can save the first backup copy on-premises. In this section, you will learn how to create a device located on Lyve Cloud for an archive clone repository.
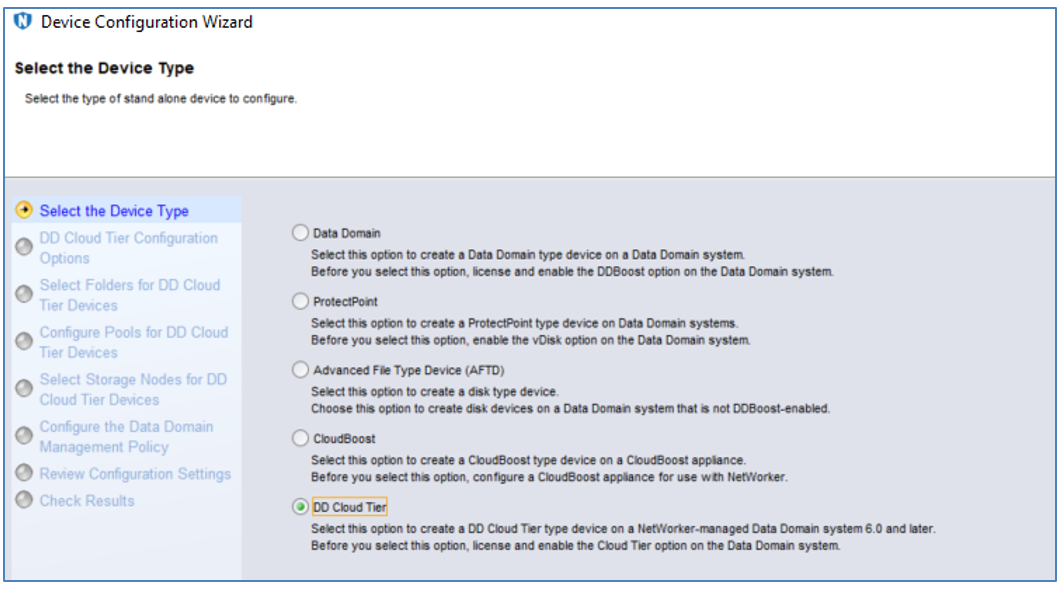
Open Network Administrator, right-click on Devices and select New Device Wizard.
Select DD Cloud Tier as the Device Type. Select Next.
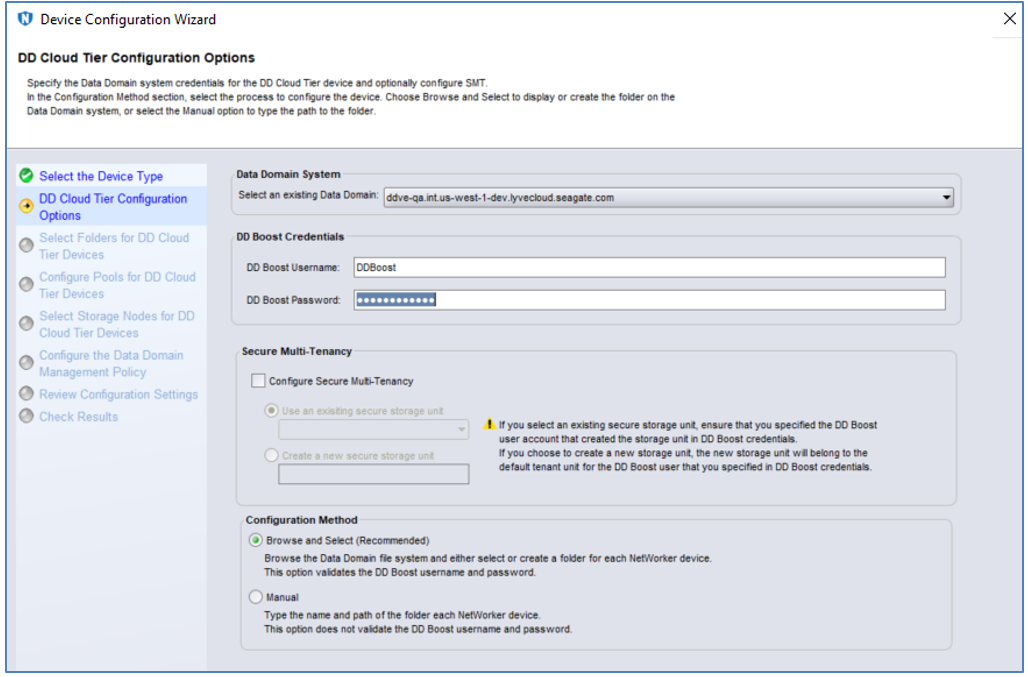
Enter Data Domain DDBOOST Username and Password. Select Next.
Choose an existing folder or create a new folder.

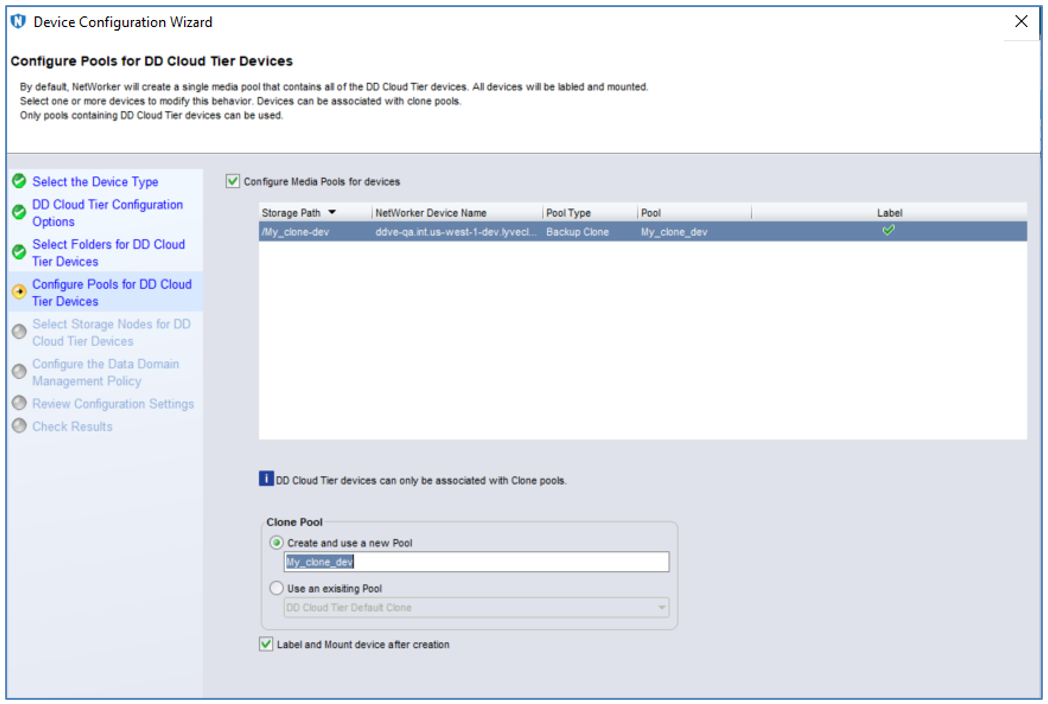
Choose an existing pool or create a new pool.
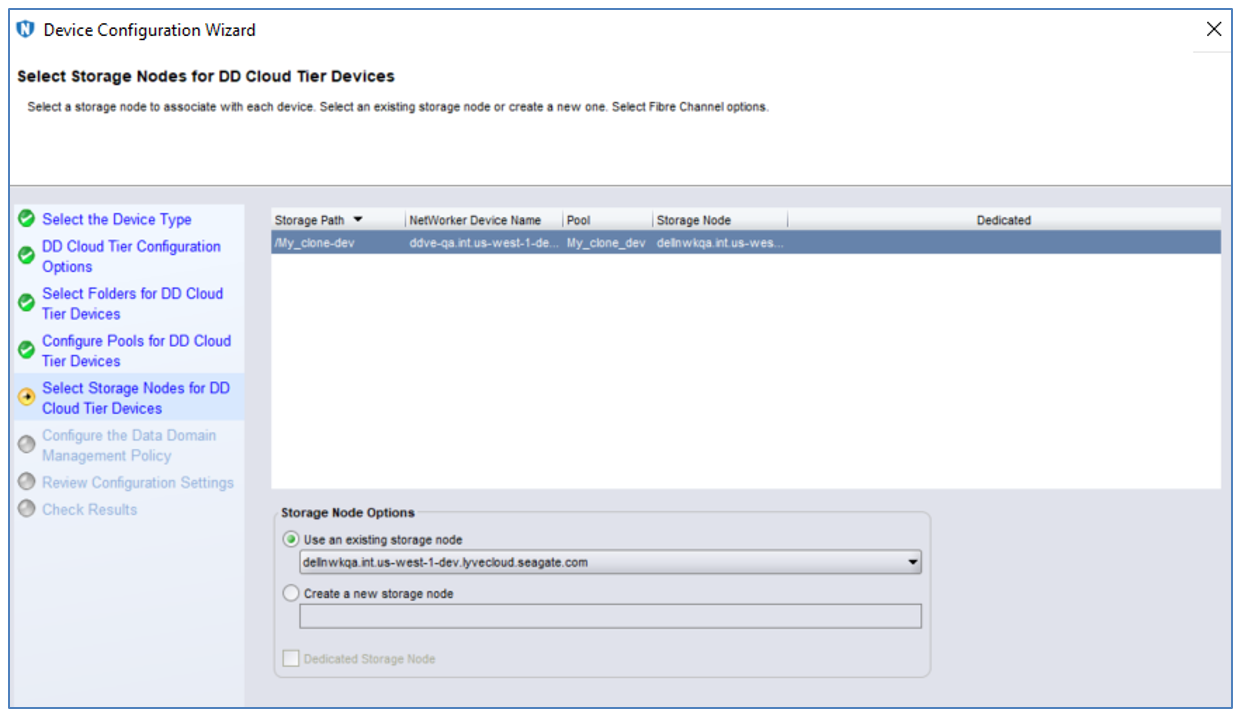
Choose a storage node.
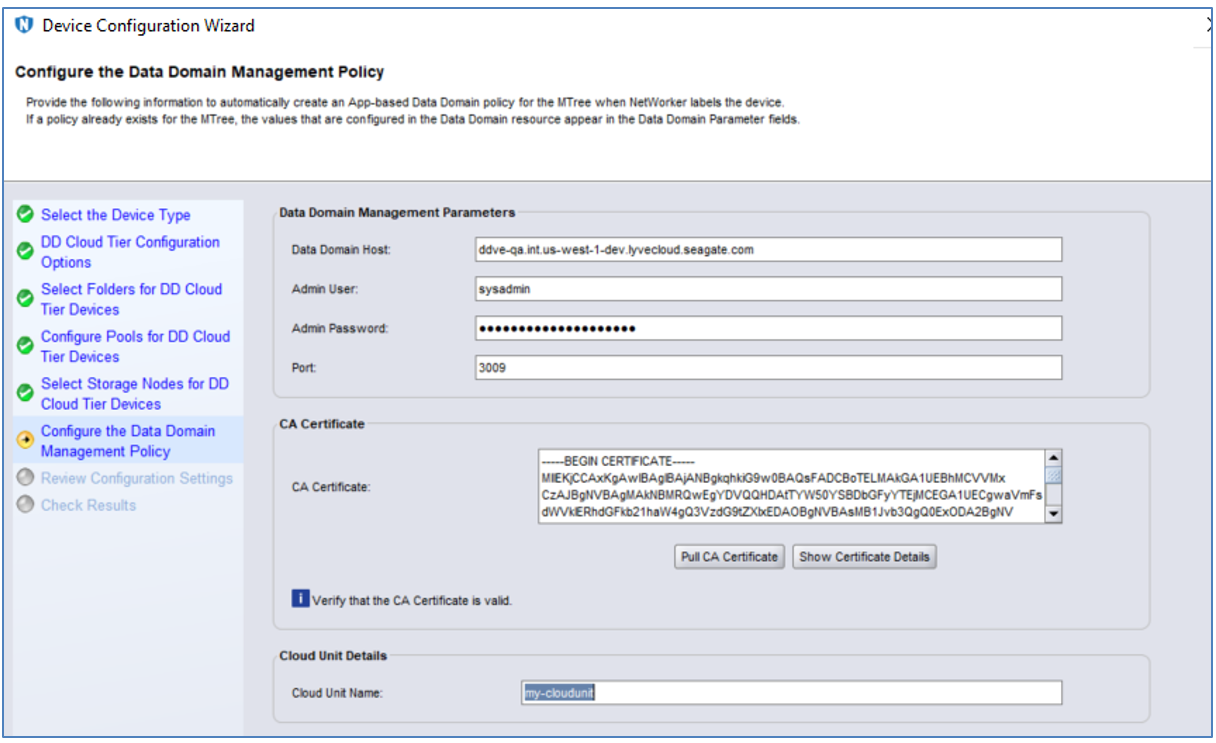
Configure the Data Domain management user and choose a cloud unit. In the CA Certificate section, select Pull CA Certificate to get a Data Domain certificate.
Select Configure and Finish to create a clone pool.
